Bridesmaids dresses – I pleat the fifth

While I’ve been showing you all sorts of books and magazine reviews and drafting up free bag patterns for you, what’s been going on in the sewing room, I hear you ask! Well, I set aside April and May to sew my two bridesmaids dresses, and after a long muslin period, I’ve been getting stuck in with the most time consuming portion of the dresses first – the pleated, silk satin (charmeuse) waistband/cummerbunds.

If you recall, I’m sewing the Gant exclusive design dress from the 09/08 Burda magazine:

The fabrics were bought over a year ago, so I fished out the bag and got to work on the reeeeeeeally long pleated sections using Burda’s magazine instructions (which are surprisingly helpful) and a bit of info from my The Art of Manipulating Fabric book (thanks, Cindy!). These are knife pleats, one centimeter apart, and Burda called for seven pleats down the band, but after my test piece, it looked a bit sparse at the top and bottom edges, so I decided to go for eight pleats in the final versions.

So in order to help any of you attempting this on your own (and sadly, a Perfect Pleater is way too narrow to help me here), or those of you wondering why professional designers outsource their pleating to professional firms, here’s what’s involved…

How to pleat

Step 1 – On the reverse of the fabric to be pleated, mark chalk lines exactly 3cm apart, one for every “mountain” pleat.

Our DIY wedding – the dresses, makeup, and final photos

Either groan or rejoice, but this is the last of the wedding posts!

The bridesmaids dresses

If you cast your mind back, you’ll remember the selection process, how I fitted and then hand-pleated, the lined, silk jersey dresses for my two bridesmaids, but even after I finished them, there wasn’t a chance to see either P or G wearing their dresses, let alone together!

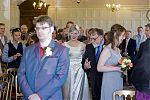
It was really nice on the wedding day to be able to see both of my great friends looking so happy and nice, and comfortable, too, in the bridesmaids dresses I made for them.

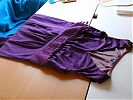
Their colour choices really suited them both, too, and even though I offered to shorten them after the wedding, I know P (in purple) is definitely keeping hers as a wonderfully posh maxidress. (S was my Man of Honour, but no, I didn’t make his suit!)

My dress

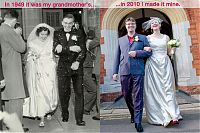
You’ve seen it in pieces and finally, in comparison with my grandmother’s original gown, but here’s some more photos where you can see the seamlines particularly well:

Bridesmaids dresses – finished!

Both bridesmaids dresses for my September wedding are now finished! Since I’m sewing both of these plus my own gown, I stipulated that these had to be knit so that I could sew them early and my girls could feel free to gain or lose a few pounds without too much last-minute alterations hassle.

To refresh your memory, the three of us chose the Gant exclusive design dress from the Sept 08 Burda magazine:

The previous posts about these dresses spanned over a year (from our pre-illness, original wedding date), so to help you find them, here’s a handy list:

  1. Choosing the pattern
  2. Going fabric shopping and choosing their colours
  3. Tackling those pleated cummerbunds
  4. Finishing the first dress

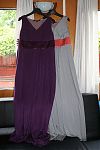
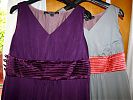
Here are both dresses together, so you can see how nicely their colours will go together on the day:

Bridesmaids dresses – one down…

I made a big push on Sunday to get as much done on the first bridesmaid as I could, and between then and some “non-commuting” time yesterday and today (I worked from home both days so I put the hour I’d normally be commuting to good use!) I managed to finish Pip’s dress, apart from the hem and the covered buttons, which I need to purchase in town tomorrow.

To refresh your memory, I’m sewing the Gant exclusive design dress from the Sept 08 Burda magazine:

I tackled those pleated cummerbunds first to get them out of the way, but even the easier silk jersey portions were not entirely straightforward. With a design this simple, the glory is in the perfect execution!

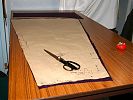
First thing I was grateful for is my newly-raised cutting and drafting table. Each gown takes four skirt sections this size (front & back, exterior & lining), and they take up nearly the whole table!

I didn’t take any intermediate photos of Pip’s dress, but I ended up doing the entire bodice on my sewing machine after all, so that I could understitch the neck and arm openings more easily. In the end, I only used the overlocker for the long skirt seams.