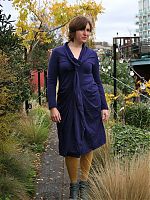
Bridesmaids dresses – one down…

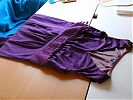
I made a big push on Sunday to get as much done on the first bridesmaid as I could, and between then and some “non-commuting” time yesterday and today (I worked from home both days so I put the hour I’d normally be commuting to good use!) I managed to finish Pip’s dress, apart from the hem and the covered buttons, which I need to purchase in town tomorrow.

To refresh your memory, I’m sewing the Gant exclusive design dress from the Sept 08 Burda magazine:

I tackled those pleated cummerbunds first to get them out of the way, but even the easier silk jersey portions were not entirely straightforward. With a design this simple, the glory is in the perfect execution!

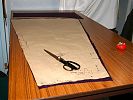
First thing I was grateful for is my newly-raised cutting and drafting table. Each gown takes four skirt sections this size (front & back, exterior & lining), and they take up nearly the whole table!

I didn’t take any intermediate photos of Pip’s dress, but I ended up doing the entire bodice on my sewing machine after all, so that I could understitch the neck and arm openings more easily. In the end, I only used the overlocker for the long skirt seams.

Bridesmaids dresses – finished!

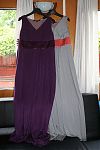
Both bridesmaids dresses for my September wedding are now finished! Since I’m sewing both of these plus my own gown, I stipulated that these had to be knit so that I could sew them early and my girls could feel free to gain or lose a few pounds without too much last-minute alterations hassle.

To refresh your memory, the three of us chose the Gant exclusive design dress from the Sept 08 Burda magazine:

The previous posts about these dresses spanned over a year (from our pre-illness, original wedding date), so to help you find them, here’s a handy list:

  1. Choosing the pattern
  2. Going fabric shopping and choosing their colours
  3. Tackling those pleated cummerbunds
  4. Finishing the first dress

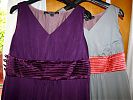
Here are both dresses together, so you can see how nicely their colours will go together on the day:

Patrones 292

Now, I know I said in the last Patrones post that it’d probably be my last for a few months since the Spanish summer styles really don’t suit English summers, but then I got a big ol’ offer I couldn’t refuse from tg33, who was holidaying in Spain and offered to pick one up for me!! Hooray! So thanks to her, you all get to see some gorgeous spring fashions!

This is Patrones issue #292, their “Spring Special”. It’s not quite as big as their “Extra” editions, but there’s still a surprising amount of very wearable clothes in here for a time of year I usually write off. I may have to reconsider my earlier Patrones-buying schedule…

Now I’m a bit safari-ed out of late, but Neighbour Helen was over (dropping off some pomegranate molasses, no less!) and she just squealed when she saw this safari dress:

The denim feature had its Ups… like this trenchcoat! And awesome pencil skirt (though on closer inspection, it disappointingly has side seams, rather than wrapping around into the pockets, boo)! And ruffled blouse! And stretch jeans!!

Bridesmaids dresses – I pleat the fifth

While I’ve been showing you all sorts of books and magazine reviews and drafting up free bag patterns for you, what’s been going on in the sewing room, I hear you ask! Well, I set aside April and May to sew my two bridesmaids dresses, and after a long muslin period, I’ve been getting stuck in with the most time consuming portion of the dresses first – the pleated, silk satin (charmeuse) waistband/cummerbunds.

If you recall, I’m sewing the Gant exclusive design dress from the 09/08 Burda magazine:

The fabrics were bought over a year ago, so I fished out the bag and got to work on the reeeeeeeally long pleated sections using Burda’s magazine instructions (which are surprisingly helpful) and a bit of info from my The Art of Manipulating Fabric book (thanks, Cindy!). These are knife pleats, one centimeter apart, and Burda called for seven pleats down the band, but after my test piece, it looked a bit sparse at the top and bottom edges, so I decided to go for eight pleats in the final versions.

So in order to help any of you attempting this on your own (and sadly, a Perfect Pleater is way too narrow to help me here), or those of you wondering why professional designers outsource their pleating to professional firms, here’s what’s involved…

How to pleat

Step 1 – On the reverse of the fabric to be pleated, mark chalk lines exactly 3cm apart, one for every “mountain” pleat.

My galaxy-print birthday sheath dress

Happy birthday to meeeeee! I hinted about it last week, but I decided to celebrate the occasion this year by sewing up something special to wear, using a fabric that I’ve lusted over for months even before I broke down and ordered it. My feeling is that if you adore the fabric or pattern (or both!) then the resulting garment is pretty much guaranteed to be a hit.

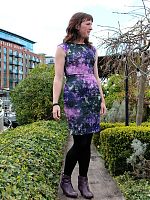
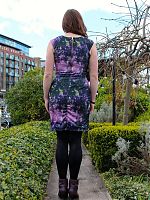
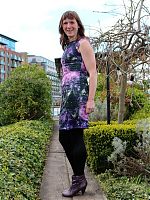
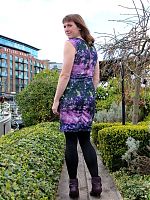
For this dress I used the Derek Lam-inspired knit sheath from the January 2014 Manequim magazine combined with the most amazing galaxy print ponte jersey which is even nicer in real life, I swear! It’s a digital print on a smooth, white ponte jersey base, and it’s both stable and stretchy, making it the bestest fabric ever (and I have just over a metre leftover! woo!).
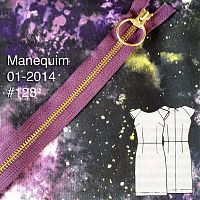
It’s been a while since I sewed a Manequim pattern and I’ve dropped in size over the past few months of marathon training to a 42 (Burda 40), so I decided to sew up a muslin of this first to test the fit. The resulting turquoise ponte muslin was very close fitting, and I wasn’t entirely certain at first whether it was too tight, or utterly perfect. So I lounged around in it for a day, decided it was comfortable enough, then cracked on with the final version without any pattern changes.

The final version is definitely tighter than the muslin, though, and I’m fairly certain it’s down to adding the lining layer, even though it’s stretchy! You can definitely see some horizontal pulls in the dress showing it’s a tad too tight, and it’s a struggle to get that waist seam on and off over my boobs, but one it’s on, it’s not uncomfortable, thankfully!
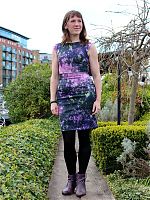
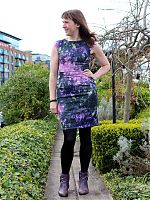
The pattern is really simple – a front bodice with both vertical and horizontal bust darts, back bodice with long vertical darts, raglan cap sleeves, and a skirt pattern with vertical waist darts (the same skirt pattern is used for both front and back). The pattern calls for a long invisible zipper, but as I could easily get the muslin dress on and off without it, I was going to leave it off the finished version, too…

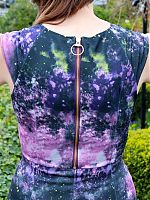
…until I discovered the most perfect purple, metal teeth zipper in my stash! So then I decided I had to use it and make it an exposed zipper feature instead. It was a bit shorter than I’d have liked, but it reached exactly to the waist seam, which worked out nicely visually (though for ease of getting in and out of it, a longer zipper would’ve been much better!).
A drapey colourblock top

I’m a big fan of the occasional “quick knit top”, but this time around, I wanted a knit top with a more challenging design to give my brain more of a 3-D spatial workout.

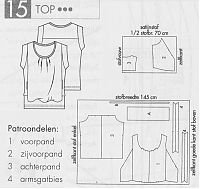
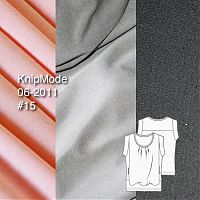
I was really intrigued by the pieces for KnipMode June 2011 #15 when I first saw the magazine, and even after tracing it out and laying the paper pieces together, I still wasn’t 100% sure how they were going to fit together.

I thought it best to make this up using scrap fabrics (just in case!), so I pulled out a couple of those awkward, less than 1m offcut fabrics from my stash:

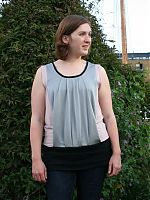
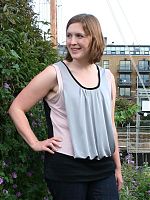
To be honest, while I enjoyed the challenge of constructing the design, I wasn’t so sure about how the design would look on me throughout the entire construction. But as soon as I tried it on for the first time, I was struck by how well my colourblocking worked, and how nicely Jonathan Saunders the look is!

I get to tick three separate SS11 trends here – colourblocking, muted hues, AND volume! All in one top!

Flashes of gold and silver

the gold

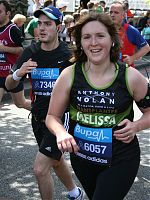
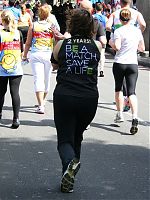
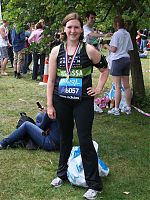
Yesterday I ran a 10km running race to celebrate my 2nd rebirthday of my bone marrow transplant (well, it’s a month early but this race is so much nicer than the July one I ran last year!).

The race went really well, and I truly gave it EVERYTHING I had, running the first 4 kilometers at an astonishingly fast 5min per km pace, and then I tailed back to a bit more realistic 5:30/km pace until the last 200 meters, when I gave an all out sprint for the finish!

Like last year, I ran with the memory of my three departed BMT friends firmly in my mind – this was for Vera, Rob, and David, who fought so so hard, and who even today inspire me to push and fight even harder on their behalf.

I wasn’t quite sure how well I did until I viewed the official chip times on the website last night… 51:21!! That’s only 7 seconds off my pre-illness Personal Best! I really was only trying to beat last year’s time of 53:38, and I honestly didn’t think I’d come anywhere close to that magical 51 minute point for me!

Our DIY wedding – the flowers

To carry on with the rest of our DIY wedding (oh no, it didn’t end with the wedding dress!), the flowers were something we’d both thought about, but hadn’t really wanted to go overboard with, preferring instead for subtle and personal accents. My bridal bouquet of white roses, plus two bridesmaids’ bouquets, and a ton of rose buttonholes for the gents, were all made by James’s Auntie Anne, who is a keen amateur florist. She even sent me a self-addressed envelope to get fabric swatches of the bridesmaids dresses so she could best match their bouquets to their dresses!

How gorgeous is this centrepiece, too? I told her since we wern’t having “wedding colours” (ugh ugh ugh!) that she should either go for all colours, or just white. So she incorporated the bridesmaids’ dress colours into it and I just love it. I think it’s just stunning, and I’m glad we got to enjoy it during the ceremony and then again during dinner at the top table.

Our DIY wedding – refashioning my grandmother's gown

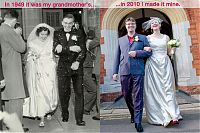
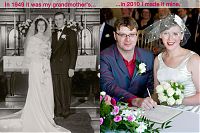
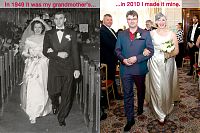
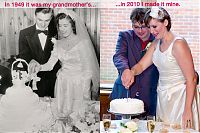
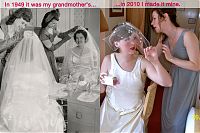
I’ve got many, many more wedding photos to come, but as I was slowly going through all the photos from friends and our professional photographer, I realised that there were a lot of parallel poses between my grandparents’ photos and ours.

Big thanks to my Dad for taking the time to scan in my grandparents’ wedding album in hi-res format, and also to our truly INCREDIBLE and AMAZING wedding photographer, Paul Tanner. I’m pretty sure he was the best money we’ve ever spent.

Confetti toss:

Post ceremony posing:

Walking back down the aisle:

Cutting the cake:

Pre-wedding girly preparations:

If you’re new to this site, let me back up a minute and explain what went on here. First of all, yes, I sewed my own wedding gown. But that would be too easy (ha!), so I decided to sew it from my grandmother’s gown.