Welts and Hives

I’ve sewn as far as I can now on the KnipMode Weekend Bag without the extra laminate – I’ve finished the lining, the three exterior pockets, and joined the two main pieces, but the next step is to attach the zipper to the long strips adjacent to it, and those are the bits I ran out of laminate for (oh, I decided to be lazy/cheap and forego the piping, btw).

So rather than twiddle my thumbs while I wait for the postal strike to run its course, I thumbed through my fabric stash instead to get some inspiration for some “me sewing”, after making so many christmas presents (which I can’t show you til December since the recipents visit here, sorry). Funny, but the two fabrics that jumped out at me the most were two I didn’t buy at all – a browny tweed tartan wool and a royal blue tartan sheer silk. Both are remnants, and both were gifted to me by my neighbour Helen.

My next step was to go through my pile of pattern magazines and find suitable patterns for them both, and I ended up with:

A wool maternity coat – basting and buttonholes

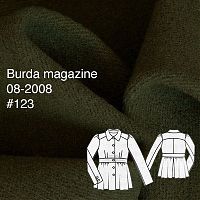
If you recall from last week, my next project is this maternity coat from the August 2008 issue of Burda, which I promised a very good friend:


(The issue date is still wrong above – it is indeed in the 2008 issue…)

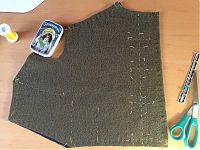
After we sorted out the fitting and design alterations (including a second, quick muslin fitting of just the upper bodice in the pub toilets on Saturday night!), my first step was to cut out all the pieces in the green wool and then again in the black cotton flannel I’d bought to underline the spongey wool coating and give it a bit more structure. The coating is wonderful, but I’m a bit concerned about it bagging out in places, and I wanted to give it some added stability as well as a bit of extra warmth (though if warmth were my primary concern, I’d call it “interlining” and attach it a bit differently!).

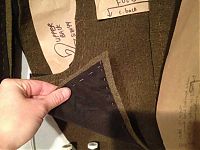
Here’s all the pieces hanging on the line in my tiny sewing room:

I then hand basted all the layers together around the edges of the pieces, plus through the darts, and then also marked out the placement lines for the five bound buttonholes:

How to sew welt pockets

It may be FREEZING in London, but the heat is on for me to sew James’s fantasy jacket in time for his birthday on Saturday!

I’m calling it his “fantasy jacket” because he’s asked me to recreated a beloved unlined, simple, waterproof jacket that was stolen from a pub on the night he met me. So he recalled it from memory while I attempted to create an accurate tech drawing. Then I compared this against my vast pattern magazine archive and decided that BWOF 10/08 #134 minus all the bells and whistles plus a few different whistles and bells was the best starting point. The muslin went well, so this weekend I started on the final jacket, made from a very cool laminated linen from Mood in NYC, with bias binding made from some dark red and black tie silk bought in Dublin three years ago.

The rubberised coating on the fabric means any and all pin holes show, so I needed to treat it like leather – pattern weights and rotary cutter for the pieces, and since it’s unlined, I also needed to create metres upon metres of bias binding for the exposed edges. I used a continuous bias binding method for the first time ever and it was very quick, though not very intuitive.
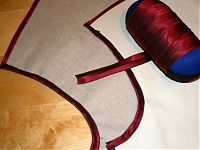
(I wrapped the binding around a sunglasses case to avoid creases. And because it was handy. Let’s face it – I’m not going to be needing the sunglasses any time soon!)

After binding most of the edges, I then set to work on the front welt pockets, which were rather tricky on a fabric that requires a press cloth (I’m paranoid that the laminating will melt!) and can only be basted where it will never be seen. So I thought I’d document the process and give you all a little welt pocket tutorial.

This is also exactly how I do bound buttonholes, but because the scale is much larger here, it’s easier to try welt pockets first to get the technique down and then just do the same thing on a smaller scale for buttons once you get the hang of it.

How to sew a double welt pocket

My pockets here are 7 inches long (6” is standard but I wanted to make sure his big man paws would fit in), and the opening is a total of 2cm wide (1cm on either side of the centre opening line). So the welts I cut out were 4cm wide (folded in half, they’re 2cm wide so straddle the stitching line nicely), and 8 inches long (so I get some overlap at the ends). You’ll need two welts per pocket. I folded each of these lengthwise and machine basted close to the cut edges to keep them together. If your fabric frays or shifts in anyway, you may want to interface the welt pieces in addition to the area around the pocket opening.

Step 1
Hand baste the pocket edges and central line. When you’re basting (in general), never turn a corner with your hand stitches, but leave the tails free at the corners. Also, you should extend the short edges here two centimeters or so beyond the long lines. I haven’t here because the needle holes would show!

Thank god it's finally 2010!!

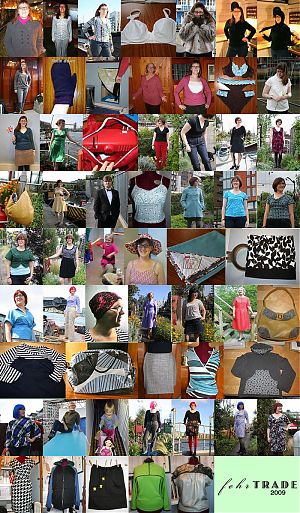
The worst year of my life is finally over, hurrah! Celebrate!! Woo! I always try to live each year so that it’s better than the one before, and I don’t think I’ll have to spend much energy to make 2010 a success by that yardstick! Still, my cathartic sewing output hasn’t been too bad, especially considering I spent a full 8 weeks/2 months in a hospital bed!

(Click the composite photo to zoom in, and have a look in the Gallery to read more about any of them. Except the last few, which you’ll see in greater detail next week.)

Here’s 2007’s and 2008’s roundups, for comparison.

Let’s find some highlights in what was an otherwise incredibly sh*tty, sh*tty year….

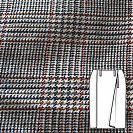
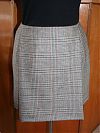
Tweed tartan pleat skirt

(I fear I’m a few days too late for a “Trick or Tweed” post title!)

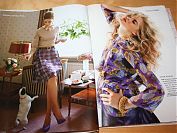
I’m starting to get into the Fall/Winter sewing mindset now (having almost entirely missed this summer, it’s a bit of a stretch), so what better says cold weather than a nice tweed skirt? After browsing through my pattern magazine archive, I finally decided on the rather recent Skirt 110 from the September 09 Burda magazine.

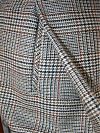
I chose this skirt because I really liked the big front pleat that conceals the two single welt pockets, and having that large pleat means there’s plenty of walking ease. I tend to walk really fast and with a large stride, so I always need a walking slit or pleat in my skirts. The fabric is a great wool (with a bit of synthetic thrown in, according to my burn test) tartan with lots of earth colours and even a thread of blue running through it, which is great for classic Fall and Winter looks. I mentioned before that this fabric was also a gift from my neighbour Helen, who had kept it from her fashion school days and thought I’d make better use of it than her spare room storage!

I already wrote about creating the single welt pockets, which took as much time to sew as the rest of the skirt combined, but here’s the end result!