Dublin fabric stores

I had a fantastic time in Dublin last week and managed to spend a lot of money at all of the fabric stores in town. So if you’re looking for fabric stores in Dublin to visit sometime, here’s a quick guide to take along…

Hickey Fabrics at 5 Henry Street

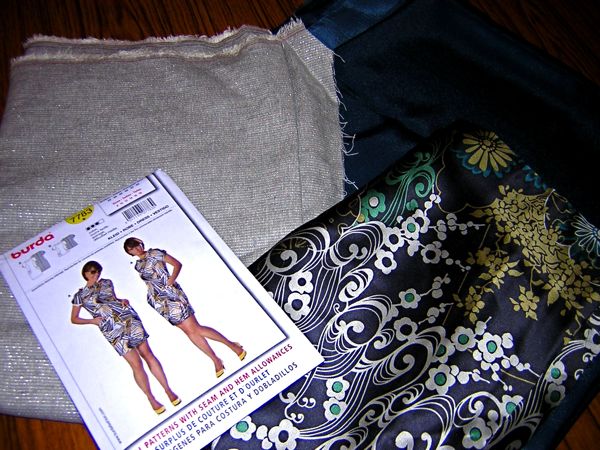
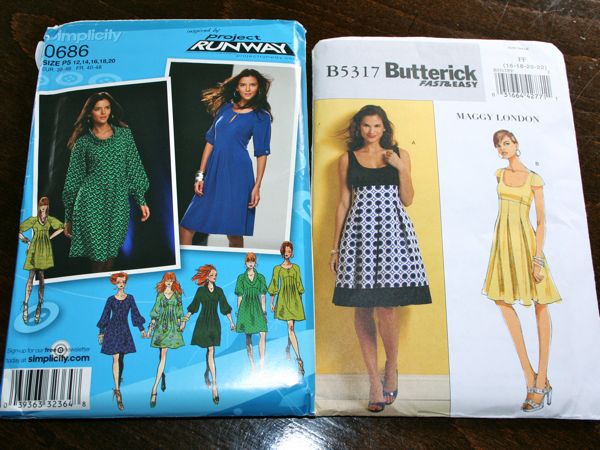
This one looked a bit corporate from the website, but I was pleasantly surprised by the shop itself! It’s set on three levels, with the ground floor mostly being curtain and upholstery fabrics, the first floor being bridal fabrics, and the basement being fashion fabrics and haberdashery. I mostly stayed downstairs, and I was really impressed by the mix of really nice quality fabrics – lots of standard corduroys, denim, knits, satins, fleeces, and anything else you could think of. I got an absolute steal on a length of 100% silk charmeuse – it was originally €42, marked down to €10!! There were a handful of other silk prints marked down, too, but I fell in love with this navy, silver, gold, and teal print. There was only one Spring/Summer pattern I had any interest in, Burda 7783, so I bought that and found the most wonderful grey linen/lurex blend to make it in! I also snagged a one metre remnant of teal satin, and had a sweep through the haberdashery before finally stocking up on Gutermann thread. All the London stores decided to inexplicably switch to Coat’s Duo overnight, which is more expensive for less length and makes me shudder at the memory of the quality of the American Coat’s and Clark thread. So I bought huge spools of all the neutrals in the hope they’ll last me a while.

Fabric Shopping in Dublin and Battersea

As I mentioned earlier this week, we visited Dublin on a flying visit last week as James was speaking at a conference, and I decided to tag along to visit some of his family over there. I first visited Dublin back in 2000 when I was a student and did the very American thing of visiting for St Patrick’s Day (hint: it’s absolutely rammed with Americans and Aussies!). We went back again in 2008 to see some family and also buy an engagement ring, and then I had to fly over a bunch for work around 2011-2013 but those trips were mostly in-and-out on the same day, dealing with a difficult client. But it’s been long enough now that I’m mostly over the pain of those awful work trips, and since I had a spare day to wander around the city centre, I thought I’d revisit a few of the fabric shops I reviewed back in 2008.

While I’ve got mixed feelings that the Woolen Mills is no longer a source for haberdashery (mixed because I’m sad it’s closed down, but happy because it’s now a sister restaurant to our favourite restaurant in Dublin, The Winding Stair), I’m pleased to report that Hickeys on Henry Street is still going strong!

A cape in progress

I don’t tend to post about in-progress garment much anymore. I think part of the reason is that I tend to make projects quickly, so there’s not much to document and I roll any construction notes into the finished garment post, but also because I’m not not exactly light on garments to post about and it takes enough time putting together the ones I do share without adding any more to the To Blog pile!

But I’d been making a lot of quick garments in the past few months and decided I wanted something a bit more involved to sink my teeth into, so I started making a cape, using this Burda magazine pattern from 2011 (still available to buy as a pdf). I had some gorgeous teal wool coating a friend had bought for me in Tokyo in January, and I thought it paired really beautifully with some black and pink abstract tartan fabric I chose from Sew Essential as my #sewphotohop prize draw. It’s a lightweight John Kaldor satin with a lovely hand that you really could believe was silk, but alas, it doesn’t appear to be on the site any longer!

James's fantasy jacket

I’ve been calling this James’s “fantasy jacket” because he’s asked me to recreate a beloved unlined, simple, waterproof jacket that was stolen from a pub on the night he met me all those years ago.

He recalled it from memory while I attempted to create an accurate tech drawing, and then once that was agreed, I compared this against my vast pattern magazine archive (made much easier since I started tagging my At a Glance scans online, so I just had to shuffle through those issues tagged “menswear”!).

I decided that BWOF 10/08 #134 was a pretty good starting point for what James wanted, and I went from there. The muslin went well, so around Thanksgiving I started on the final jacket, made from a very cool laminated linen from Mood in NYC, with bias binding made from some dark red and black tie silk bought in Dublin three years ago.

How to sew welt pockets

It may be FREEZING in London, but the heat is on for me to sew James’s fantasy jacket in time for his birthday on Saturday!

I’m calling it his “fantasy jacket” because he’s asked me to recreated a beloved unlined, simple, waterproof jacket that was stolen from a pub on the night he met me. So he recalled it from memory while I attempted to create an accurate tech drawing. Then I compared this against my vast pattern magazine archive and decided that BWOF 10/08 #134 minus all the bells and whistles plus a few different whistles and bells was the best starting point. The muslin went well, so this weekend I started on the final jacket, made from a very cool laminated linen from Mood in NYC, with bias binding made from some dark red and black tie silk bought in Dublin three years ago.

The rubberised coating on the fabric means any and all pin holes show, so I needed to treat it like leather – pattern weights and rotary cutter for the pieces, and since it’s unlined, I also needed to create metres upon metres of bias binding for the exposed edges. I used a continuous bias binding method for the first time ever and it was very quick, though not very intuitive.

(I wrapped the binding around a sunglasses case to avoid creases. And because it was handy. Let’s face it – I’m not going to be needing the sunglasses any time soon!)

After binding most of the edges, I then set to work on the front welt pockets, which were rather tricky on a fabric that requires a press cloth (I’m paranoid that the laminating will melt!) and can only be basted where it will never be seen. So I thought I’d document the process and give you all a little welt pocket tutorial.

This is also exactly how I do bound buttonholes, but because the scale is much larger here, it’s easier to try welt pockets first to get the technique down and then just do the same thing on a smaller scale for buttons once you get the hang of it.

How to sew a double welt pocket

My pockets here are 7 inches long (6” is standard but I wanted to make sure his big man paws would fit in), and the opening is a total of 2cm wide (1cm on either side of the centre opening line). So the welts I cut out were 4cm wide (folded in half, they’re 2cm wide so straddle the stitching line nicely), and 8 inches long (so I get some overlap at the ends). You’ll need two welts per pocket. I folded each of these lengthwise and machine basted close to the cut edges to keep them together. If your fabric frays or shifts in anyway, you may want to interface the welt pieces in addition to the area around the pocket opening.

Step 1
Hand baste the pocket edges and central line. When you’re basting (in general), never turn a corner with your hand stitches, but leave the tails free at the corners. Also, you should extend the short edges here two centimeters or so beyond the long lines. I haven’t here because the needle holes would show!

KnipMode November 2010

Like the October La Mia Boutique, this issue arrived while I was away on our honeymoon so I’m only just now digesting it (nearly in time for the next issue to arrive any day now).

From the rugged outdoor feature, I really loved this pair of jeans. Mid-leg seams are always so slimming, the ankle zips look great on a tapered leg, and I just love Knip’s trouser details. The only thing I’m not so sure about are those vertical front pockets…

The tech drawing makes this jacket look quite ordinary, but I love it in the pique they’ve used here – it looks simultaneously 60s and current! And the skirt pattern it’s paired with would be a great basic in any fabric.

In America…

Having an international relationship (even when the expat half is as firmly ensconced as I am) makes weddings a bit tricky. We’re lucky that we didn’t have to take immigration laws into account, but even so, we needed to have wedding celebrations on both sides of the Atlantic to include as many people as possible. So a few days after the wedding, we flew over to Pennsylvania, spent a few days at my parents’ house in Perry County, then had our celebration dinner in Lancaster, taking the train down to Philly to catch up with my Man of Honour, then the Acela train up to NYC for a week of a proper honeymoon before flying back home to London.

So to start, I decided that I wanted to give my Granny a nice memento of her gown, since she had given it all to me, and I ended up with some medium-sized scraps of the really nice silk satin after finishing my gown. So before I left I made up four sachets filled with lavender buds I’d grown on deck, and during the flight I embroidered a silk square for each of these with the initials of her four grandchildren and their spouses, plus the year they were married. It just worked out nicely that my cousin Charlie was the last of us to wed, having their wedding two weeks after ours!

I then finished up the sachet construction at my parents’ house and presented these to Granny before the Lancaster reception dinner.

There was also a nice surprise of a massive box of vintage haberdashery she’d found in a charity shop. I only picked a few things out of it, but I just couldn’t resist some of this glorious packaging!

Then my mom insisted on driving me out to this Amish fabric shop she knows in Perry County – it was only a little ways past my old high school, but I was just blown away by the prices!! I went NUTS in the zippers – tons of really long invisible zips for 75 cents or a dollar (when I’d pay at least £3-4 each for these in London), buttons for as low as 2 cents each (when’s the last time you saw anything for 2 cents??), tons of ricrac and trims, embroidery floss for 30 cents, and (of course!!) they had the bobbins for my hand crank vintage Singer. For 15 cents each!

Summer sewing shortlist

Last week you got to see the newest Patrones that Aisling sent over, but you all have been far too good to me, because last week I also got a surprise parcel from Daisy!

She did some awesome detective work and worked out my size and style and picked out Simplicity 2754 and Butterick 5317 for me! And she did a great job, because I really like them both! I always have a hard time seeing the potential with the Project Runway patterns because the pattern covers are so horribly done that you can’t see any details at all, and Simplicity’s site makes it really awkward to browse by technical drawing (what I do as a general rule with Burda magazine previews). Anyway, as it turns out, I really like the details of this one, and doing some research myself, I remembered that Trena made it a few months back and I absolutely loved it! And she’s so got the right idea with those back view enhancements! And the Butterick Maggy London dress is just screaming out for a border print, as far as I’m concerned – the skirt is just a rectangle with pleating, so anything with a border or lace at the edge would go perfectly as you don’t have any cut, curved hem or side seams. So it actually is as easy as it’s labelled, seeing as how you’re really just making the bodice…

These patterns all came at the perfect time, because not only did I finish the second bridesmaid dress this weekend (photos coming later this week), but London has stumbled into a mini-heatwave which always gets me raring to sew! After spending the last two months solid on these dresses for my girls, I’m more than ready to sew for myself now, and I’m not scheduled to start on my wedding dress muslin until July.

Sooooo, how much can I cram into the next month, eh? Granted, I’ll still want to make a few things here or there while I’m working on my gown, but I thought it’d be a good idea to get all the things I want to sew together in one place. I’m not calling it a wardrobe or SWAP since they don’t all go together, and I don’t want to commit myself to ALL of these since I tend to get bored easily, so let’s just call this a shortlist so I can choose from these at will…

The FehrTrade Summer 2010 Sewing Shortlist!

From the top:

Satin cowl blouse

You’ve seen it in the tweed and satin three piece suit, now it’s time to reveal the blouse on its own!

Marfy 1210 is the first Marfy pattern I’ve ever sewn, and if you’re not familiar with them, Marfy patterns come with no instructions, no technical drawing, no layout diagrams, nothing. You don’t even get any other sizes – just the one you’ve ordered, in pre-cut tissue, just like vintage patterns.

So the above is all I had to go on, plus a few cryptic phrases rubber stamped onto the tissue itself (if you thought “Burda-isms” were bad, hoo boy, you should see Marfy!). Still, I knew I was up for a challenge, and to be honest, the construction wasn’t any more different than dealing with KnipMode or Patrones when I can’t understand the instructions.

There are a lot of things I like about this blouse, but there are also a fair amount of things I’d change if I made it again.