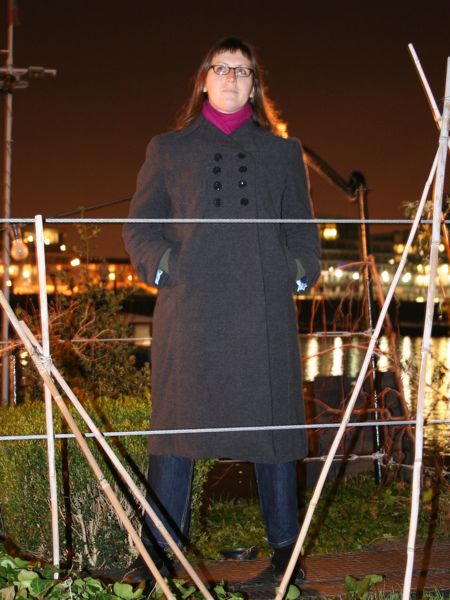
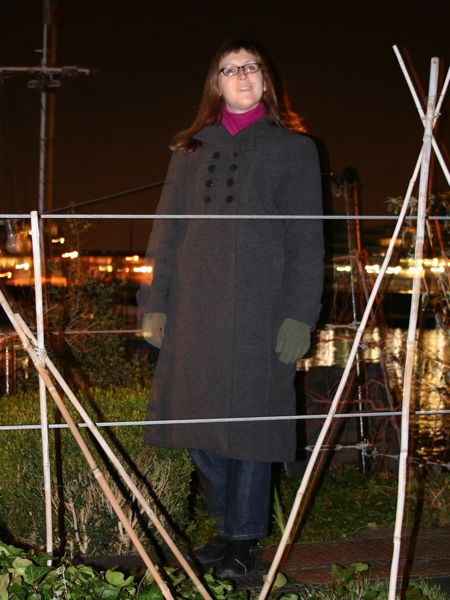
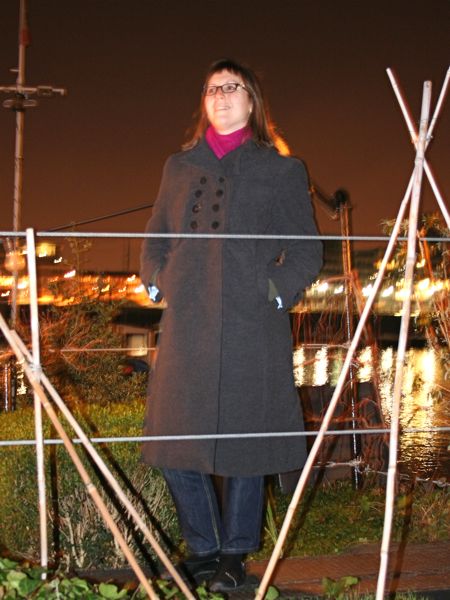
Conquering bound buttonholes and interlining my winter coat

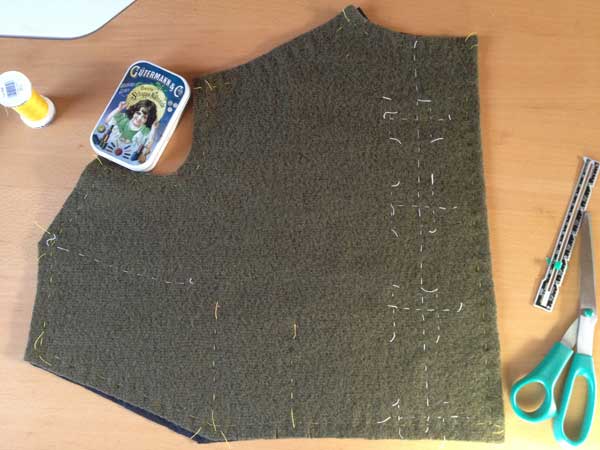
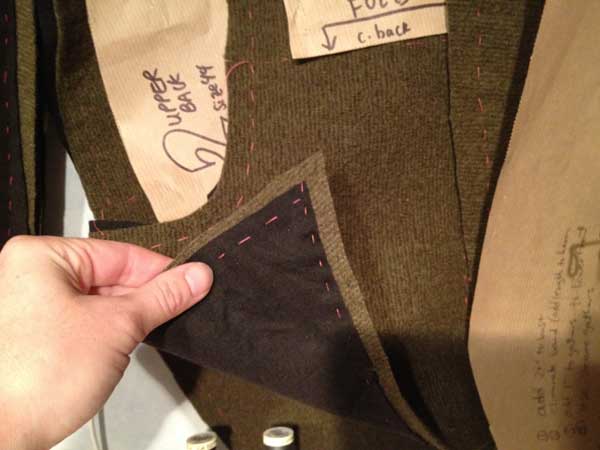
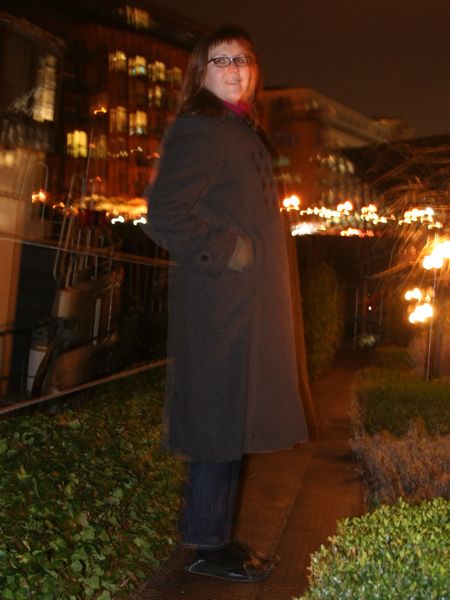
Cast your mind back to the heady days of May, when I decided to join hands with the internet and start in on The Great Coat Sew Along, with this beautiful long coat pattern from BWOF 09/2005 #102:

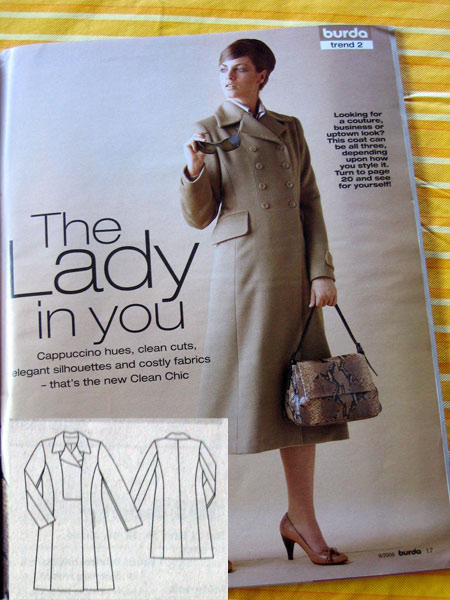
(There are two similar views – mine’s using the exposed buttons and sleeve tabs of 102, but the in-seam pockets of 101.) Anyway, I got as far as the material gathering, muslin fit and alterations, and even sewed together the body pieces of the coat before I lost momentum in August. The half-finished coat has hung in my sewing room ever since, taking up valuable space and making me feel bad every time I glanced at it, but the abnormally freezing cold temperatures we’ve had in London have made me jump back in with both feet to get this finished, because I could really use this on my daily walking commute to work. I’ve got a RTW long wool coat, but with the wind and extreme cold we’ve had, I can feel the cold through what I’ve got now (the papers are gleefully reporting that, at -10C, London is colder than Antarctica right now, and I’ve lost count of the number of Russian-style fur hats I’ve seen out and about).

A wool maternity coat – basting and buttonholes

If you recall from last week, my next project is this maternity coat from the August 2008 issue of Burda, which I promised a very good friend:


(The issue date is still wrong above – it is indeed in the 2008 issue…)

After we sorted out the fitting and design alterations (including a second, quick muslin fitting of just the upper bodice in the pub toilets on Saturday night!), my first step was to cut out all the pieces in the green wool and then again in the black cotton flannel I’d bought to underline the spongey wool coating and give it a bit more structure. The coating is wonderful, but I’m a bit concerned about it bagging out in places, and I wanted to give it some added stability as well as a bit of extra warmth (though if warmth were my primary concern, I’d call it “interlining” and attach it a bit differently!).

Here’s all the pieces hanging on the line in my tiny sewing room:

I then hand basted all the layers together around the edges of the pieces, plus through the darts, and then also marked out the placement lines for the five bound buttonholes:

Silver Tweed beginnings…

With the first Planned Partnership done & dusted in the form of my techno skirt and sequin top, it’s been time to start concentrating on another pairing – the pale silver tweed to go with the nude stretch suiting…

I decided to go with the bottom jacket seen above, so I traced all the pieces of it and the skirt pattern, playing it very carefully and was able to fit BOTH the cropped jacket and the skirt out of the 1.5m of tweed I’d bought! Woohoo! It was by no means certain, but my powers of fabric Tetris prevailed and I’m rather proud.

Thank god it's finally 2010!!

The worst year of my life is finally over, hurrah! Celebrate!! Woo! I always try to live each year so that it’s better than the one before, and I don’t think I’ll have to spend much energy to make 2010 a success by that yardstick! Still, my cathartic sewing output hasn’t been too bad, especially considering I spent a full 8 weeks/2 months in a hospital bed!

(Click the composite photo to zoom in, and have a look in the Gallery to read more about any of them. Except the last few, which you’ll see in greater detail next week.)

Here’s 2007’s and 2008’s roundups, for comparison.

Let’s find some highlights in what was an otherwise incredibly sh*tty, sh*tty year….

Patrones spring coat – finished shell

Are you thoroughly sick of the sight of the Patrones spring coat yet? Well, too bad, because it’s taking me forever!

The good news is, I sailed smoothly over the speed bump that caused me so many headaches and delays in making my winter coat – the bound buttonholes. I’d already decided that with such a thick, loosely woven fabric that’s so prone to unravelling, that I’d use the satin bias tape I’d bought for binding the hood seam allowances to also make the bound buttonholes.

So I pressed the satin bias tape flat, cut it down to 1/2 inch wide strips, then folded these in half (right sides out) to make the buttonhole “lips”. After basting my ladder stitches on all the coat tabs, I did the usual technique of sewing these lips to the right side and cutting open the buttonholes.

But here’s where I deviated a bit – since my wool unravels so much, I knew that trying to stitch those tiny triangles at the ends would just be an exercise in futility, so I pulled out some lightweight knit interfacing and cut out a tiny strip. I then pulled the triangles to the back and fused the interfacing over top to keep them out of the way:


(It’s a bit hard to see but the mesh white interfacing over the left and right ends is there!)

Black microfleece three ways

I had a few metres of black microfleece leftover from interlining my winter coat and I thought I’d put it to good use since it takes up so much room in my limited stash (and as you read yesterday, I have lots of new fabrics coming in!)

So to start off, I made yet another of my favourite BWOF sweatshirt, which I’ve already made before in red velour and also in blue fleece (twice, actualy, as I made one for a neighbour, too).

(My neighbour Lucie was hosting our mooring’s craft night so I thought we’d do a photoshoot in a finished boat for a change!)

Patterns To Trace

Recently I’ve been doing more batch tracing rather than tracing one pattern, sewing it up, then tracing the next. I find my sewing bottleneck is often in the tracing step (even though it doesn’t take much time), so by doing a bunch at once I can always have something on the go to work on in the mornings and evenings.

I’ve been mentally matching up my patterns to fabrics in my stash and tracing an awful lot the last few nights. Here’s what I’ve got coming up in the next few weeks, though you can see my plans have had to change somewhat to focus more on comfortable knits…

The warmest winter coat ever

I joined The Great Coat Sew Along all the way back in May because I’d never made a coat before and it seemed like a great opportunity to gather together with like-minded people and learn an awful lot, too! Even though I (and others) really fell behind on the timeline, I’m really proud to have finally finished my coat while it’s still cold out and to have learned a huge amount of techniques that I never would’ve on my own! So I owe this coat to Marji, really, for setting up and organising the Sew Along, and I’m already planning my next coat…

But for this coat, the pattern was BWOF 09/2005 #102:

I made a huge amount of alterations on the pattern: raised the waist by 1”, lengthened the arms by 1.5”, added a wedge to the lower centre front for walking ease, widened the top sleeve (and shoulder seam) by 1”, and increased all the vertical seams below the chest by about 1/2”. And then on top of all that I changed the pockets and added the interlining, too! It’s probably more alterations than I’ve done on all my other 2008 patterns combined! But as much as BWOF usually fits me straight off the sheet, this pattern didn’t really have enough wearing ease to fit big sweaters underneath…

Previous posts about this coat

Ok, ok, enough with the backstory, here’s the photos!