Vintage wedding gown photos

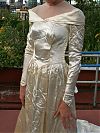
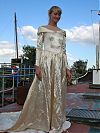
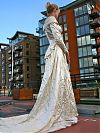
So you’ve already seen a bunch of detailed photos of my Granny’s gown (from 1949) laid out flat, but I wanted some on a real person so you could really see the style lines and how it falls. And this way I can get some nice Before and After shots when I refashion it into my gown for September.

Big big big HUGE thanks to my neighbour Kate who not only fit into this tiny dress (respect!) but actually humoured me and let me take photos of her in it to post to the internet (Secretly, I think she had fun!). Kate’s also engaged and I was thrilled to learn that she’s not having wedding colours, either!

So let the vintage dress photos commence!

Vintage wedding gown detail photos

My grandmother’s wedding dress arrived safely on Friday! I person, it’s absolutely jaw, droppingly gorgeous, even 59 years later. The preview photos I drew the technical drawing from didn’t do it justice, so I’m hoping these photos on James’s DSLR will help to show some of the amazing vintage details.

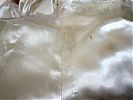
The dress is entirely silk satin with no lace, embroidery, or beading (just from a mesh panel around the neckline), and the weave of the silk is still perfectly and soft and so very strong still. Granny told me she bought this in a shop on South Street in Philadelphia in 1949, but I’m afraid I can’t tell you the designer as there’s no label and she’s long since forgotten the details. But the workmanship speaks for itself, and it’s very interesting for me to see that they’ve not wasted any silk where it couldn’t be seen – the mesh fabric is used for all facings, the seam allowances are only 1/2 inch, and there’s no lining.

Laid out on our table:

My bias silk 40th birthday gown

Happy 40th birthday to me! Since it’s a big birthday year I kinda felt like I just had to celebrate big, too! So we rented the whole of a private members cocktail bar near Kings Cross, invited a bunch of people, laid on pizzas, and let the rest just happen! Every year I like to make myself something special to celebrate my birthday, and I felt like I should sew a big, glamorous dress for myself to feel like a total star at the party, too.

I happened to have four meters of gorgeous copper-coloured silk satin (charmeuse) in my stash which I’d bought from Truro Fabrics back in 2015 with the intention of sewing a gown for the World Transplant Games gala dinner in Argentina. But I didn’t quite have enough time to sew it before we left, and the silk has been in my stash ever since. I still had the receipt in with the fabric, too, and the price reflects the incredible quality of this silk – I’d paid about £75 for it.

Our DIY wedding – the flowers

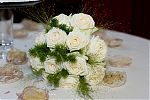
To carry on with the rest of our DIY wedding (oh no, it didn’t end with the wedding dress!), the flowers were something we’d both thought about, but hadn’t really wanted to go overboard with, preferring instead for subtle and personal accents. My bridal bouquet of white roses, plus two bridesmaids’ bouquets, and a ton of rose buttonholes for the gents, were all made by James’s Auntie Anne, who is a keen amateur florist. She even sent me a self-addressed envelope to get fabric swatches of the bridesmaids dresses so she could best match their bouquets to their dresses!

How gorgeous is this centrepiece, too? I told her since we wern’t having “wedding colours” (ugh ugh ugh!) that she should either go for all colours, or just white. So she incorporated the bridesmaids’ dress colours into it and I just love it. I think it’s just stunning, and I’m glad we got to enjoy it during the ceremony and then again during dinner at the top table.

DIY Wedding Fascinator – in progress

The Gown is progressing nicely, the shoes are bought and are being broken in little by little (while doing such glamorous tasks as watering the garden and taking out the rubbish!), so it’s now time to focus on my hair. In the past I’ve made fascinators (First in gold and then in silver) with a comb base that worked well for my long, thick, and straight hair, but post-chemo my hair is only two of those things so I’m using a headband for the base of this fascinator. In some strange twist of Life Imitating Art, my hair looks almost exactly like it does in the wonderful cartoon of us drawn by John Allison way back in March when I had barely any hair at all!

It appears that my “How to Make a Fascinator” tutorial vanished off BurdaStyle during one of their site moves, so I’m really glad I saved it as a Pdf a while ago so you can download it here now!

In the past my construction technique mostly centred around the glue gun, but for this one it just felt a bit wrong to do so when the rest of the ensemble is full of couture techniques. So for this base I used two teardrop shaped pieces of blue wool felt (the only colour I had on hand), with one of them stiffened with the ultra-rigid interfacing I used on my sun hat. I then covered this felt with a scrap of the vintage dress satin, stitched on the underside to prevent any puckers at the edges. You could omit this step if your felt matches the colour of whatever you’re covering it with, but the blue kept showing through the first few layers of feathers so I needed the satin layer.

I specifically chose a thin headband that had a fabric covering around it so I’d have something to anchor my stitches to, so keep this in mind while you’re shopping, as it’d be difficult to sew onto an all-plastic band (in which case you’re probably better off using glue). I then sewed the satin-covered base onto the headband, making sure my stitches went around the band each time for strength. Since the top was being covered in feathers, I didn’t bother to hide my stitches on the top side.

Once the decoration attachment is all complete, I’ll stitch the other blue felt piece to the underside of it all to hide the stitches (and band) and create a bit of grip on my hair.

Here’s the fascinator with just the white goose feathers attached:
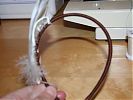
Sewing these onto the base was way easier than I was expecting. I just took 2 or 3 stitches over the central portion of the feather near the base, and that was enough to keep them secure. I’m leaving them unattached at the tips because as the headband stretches whilst worn, the feathers stay close to my head anyway.

Here’s the underside so you can see my stitches and that super-stiff interfacing:
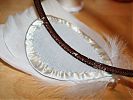
DIY Wedding Gown – attaching the bodice and skirt

Finally I can give you another progress report on the wedding gown! Don’t worry, as you can see below, I’ve been continuing to work on it on my weekends and Wedsnesdays, so I’ve got a lot of progress to cover!

For the first time I got to turn my attentions to the skirt, which is exactly as it was when it was attached to Granny’s dress, albeit separated from the bodice at the (very gathered) waist seam. But there was a prominent blue stain in the centre front (CF) panel at about thigh-height from the blue tissue paper it was wrapped in for 60+ years, so the first step was to unpick and remove that entire panel. I then moved the two triangular sections that had been on either side of it together to form a new CF:

I actually prefer the way these two look together, forming a beautiful triangular, almost art-Deco detail at the CF!

But back to the bodice, where I had completed prickstitching along the entire neck and arm edges. I just free-handed this without my post-it guide and I actually think this looks better than my zipper insertion!

Wedding dress ideas

We visited our venue (and totally geeked-out at the museum!) on Saturday and met with the wedding coordinator there so we now have a date – the rather auspicious 19 September 2009. Or to put it another way, 19.09.09 (09/19/09 for the Americans)!

Good thing we have over a year though, because we’re going to need every single day of that to save up and prepare for it. Oh my, the grand total was an eye opener, and we’re not being frivolous in the slightest with our plans!

Luckily, then, my grandmother has given me her gown from her wedding in 1949. She’s insisted I use it and NOT be afraid to cut it up, saying she’ll cut it herself if I don’t, or donate it to goodwill or sell it on eBay. I think it’s her way of not letting me get too scared about changing it or treating it like a relic or something. In any case, I’ve seen photos of it, but I’m going to make you all wait until it’s shipped over to me, cleaned, and pressed before I document its “before” state properly.

Until then, here’s my rough sketch based on the photos and my mom’s eyewitness account:

Burda magazine July 2016

Burda definitely keep up with the seasons, but I still kinda miss the reliable rhythm that the issues used to have back in the day – January had loungewear, March was always the wedding special (the only one they’ve reliably kept!), some menswear in April, May had tons of dresses, August was the Fall fashion previews (and usually maternity, too), cocktail dresses every November, and evening gowns in December. But my least favourite was always the summery beachwear in the June and July issues, because there was pretty much nothing I could wear in an English summer, where it rarely gets about 70-75F (25C)!

But in recent years Burda have been mixing things up, and the old scheduling has given way to more unpredictable features, which I think gives more variety and appeal to a wider rare of sewists. This issue certainly has a lot more than I’d usually like from a July!

A whirlwind of activity

You can pretty much assume by this point that if I’ve gone a bit quiet on this site, then it probably means I’ve been sewing up a storm behind the scenes and am just struggling to find the time to tell you all about it! And yes, it’s happened again… So I’ll try and catch you up on a bunch of things at once!

Sewing Indie Month – Pattern Bundle 1

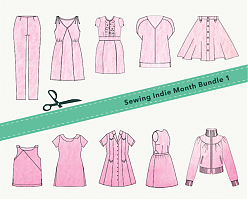
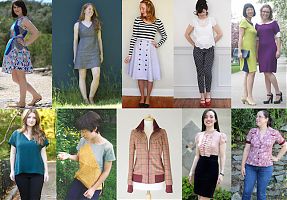
Remember how much fun Sewing Indie Month was last year?? It was a full month full of interviews, great tutorials (like Heather Lou showing you how to turn my XYT Workout Top into a summer maxi dress!), and fabulous Sew Along prizes and it’s back again this September!

But because us pattern designers know how much you all love a bargain, we’ve joined forces to create two pattern bundles in advance of Sewing Indie Month, and the first pattern bundle is on sale now through Wednesday 12 August only.

Click through to see all the included patterns and the different tiers, including some brand new patterns exclusive to this bundle! The cool thing here is that you’re not only buying these patterns for well under the usual price, but 20% of bundle proceeds will be donated to the International Folk Art Alliance, which provides education and exhibition opportunities to folk artists from around the world. So you’re helping out other crafters, too!

I made the Lolita Patterns Sugar Plum dress a few years ago and honestly, it’s one I still wear in regular rotation (and looks so much better than the photos in my post, annoyingly!). The Sugar Plum dress is a knit/woven hybrid, but the patterns in this first bundle are mostly wovens, so the sale timing gives you time to make muslins before the sewalong contest begins in September while supporting small women-owned businesses and raising money for charity. You can see the size range for each of the included patterns here, too.

Aztec Duathlon Shorts

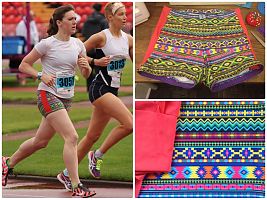
Psychologically, short shorts make me run faster. Well, not really, but I think they do, and that’s all I need! So, a few weeks ago, with the British Transplant Games coming up, I managed to squeeze out a new pair of Duathlon Shorts for the occasion!

Goodbye Granny

Sorry for the silence this past week, but I had to take an extremely-last minute, emergency flight back to the States last week to attend my grandmother’s funeral (as in “book me a flight for tomorrow“). Her last gift to us all was to prompt a family reunion, and I really felt strongly that I had to be there, so it was good to have some family time despite the circumstances.


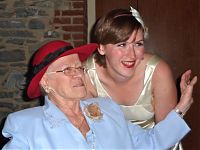
Granny and I at our wedding reception in 2010

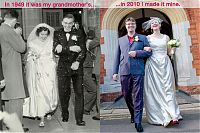
Granny has been in the background of my sewing for pretty much my entire life, but there were a few times when she featured heavily on this site, in particular when I refashioned her wedding gown into mine in 2010, but also earlier the same year when I made her a blouse from some vintage fabric in her stash (and which my mom said she was still wearing regularly right up until the end).

If you’re a new reader to this site and haven’t yet seen my wedding dress project, then really, I urge you to just stop for a minute, click through and take a look. Granny was so immensely proud that I looked so beautiful in “her dress” and she continued to show our wedding album to everyone she could. I had so many relatives come up to me at the funeral saying how much they loved that I turned her gown into mine.

Overall, this weekend really reinforced to me how much “making” is in my DNA – I knew Granny had been quite crafty, but I hadn’t realised that she was actually a seamstress in her early life before going back to school as a young mother and becoming an insurance underwriter. She continued to quilt and sew clothing throughout her life, but also knit and crochet, too. Happily, I was gifted a very modern-looking yoked cardigan that she’d knitted years ago (I actually wore it to work yesterday!) since I was the only one in the family it really fitted (ditto to a gorgeous pair of sage green leather gloves and an astonishingly beautiful vintage coat).


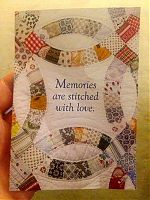
The funeral stationary was quilt-themed!

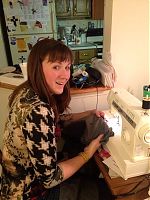
Over the course of the weekend, the family went through some of Granny’s most cherished items, and my granddad asked if I’d like to see her sewing machine. Of course I did, and before I knew it, I had it humming away fixing a tear on my sister-in-law’s trousers!