Blog

Steeplechase Leggings – citron and sage pairs

Wow, thank you all so much for your orders and comments on my new Steeplechase Leggings pattern! The response has been phenomenal, so thank you!

In case you missed the initial announcement, here’s the description:
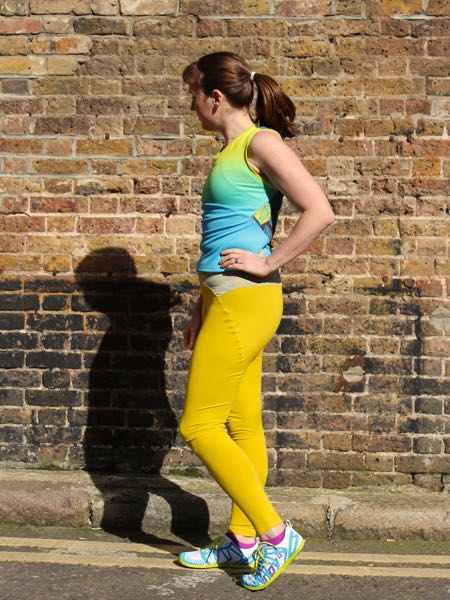
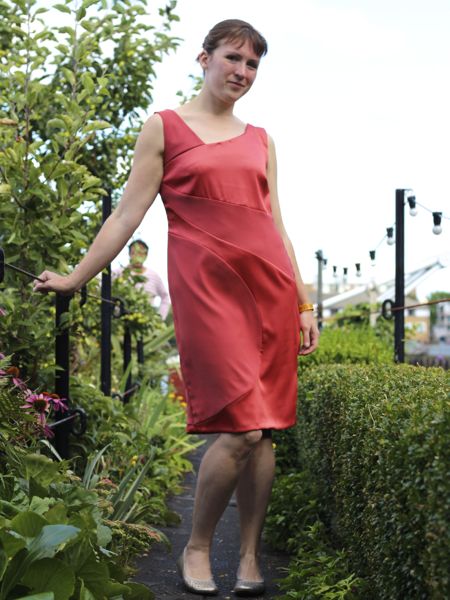
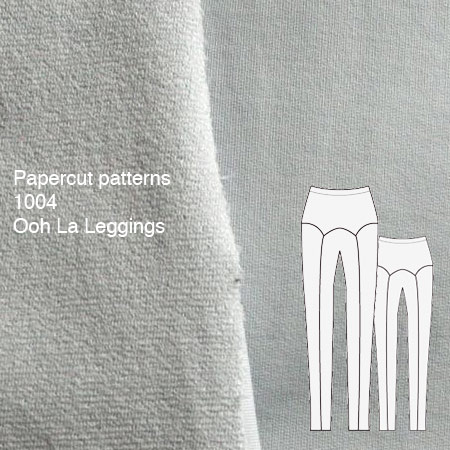
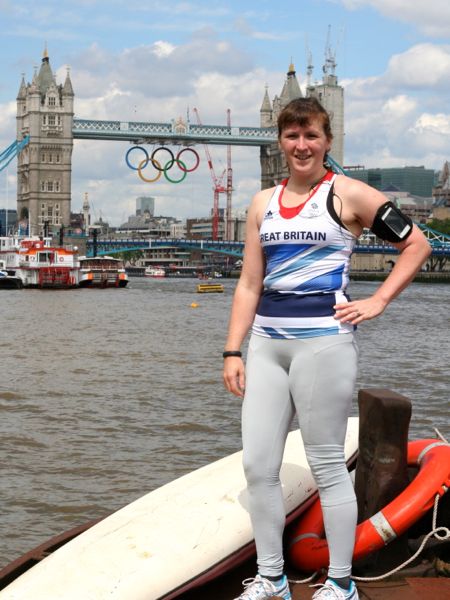
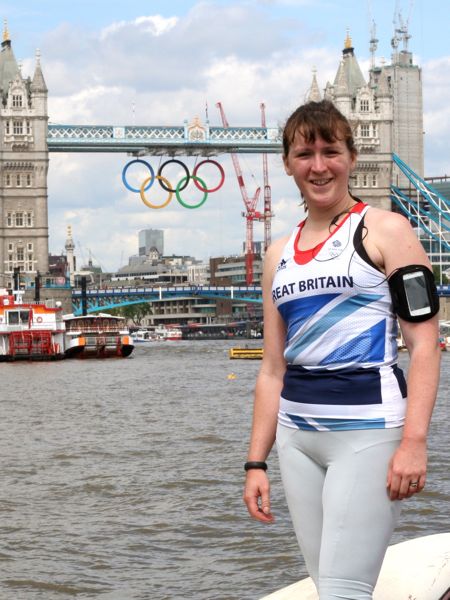
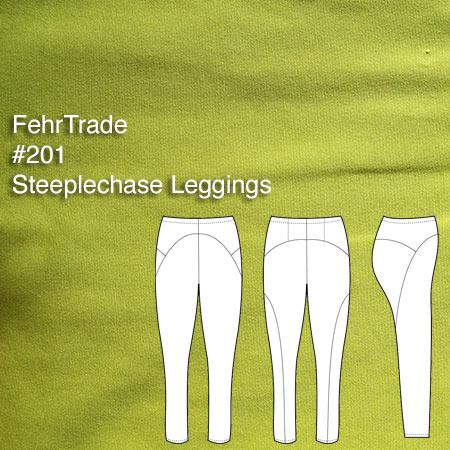
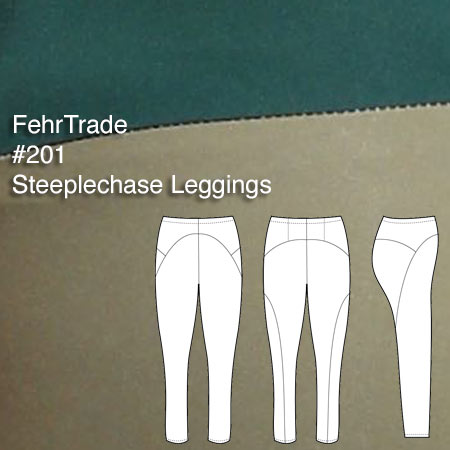
These leggings have no inseams! Instead, a curved, outer seam runs from the back of the ankle up to the centre front, where it joins a separate yoke piece. There’s an optional, hidden back pocket, elasticated waistband, and your choice of three lengths: biker short, capri, or full length leggings.

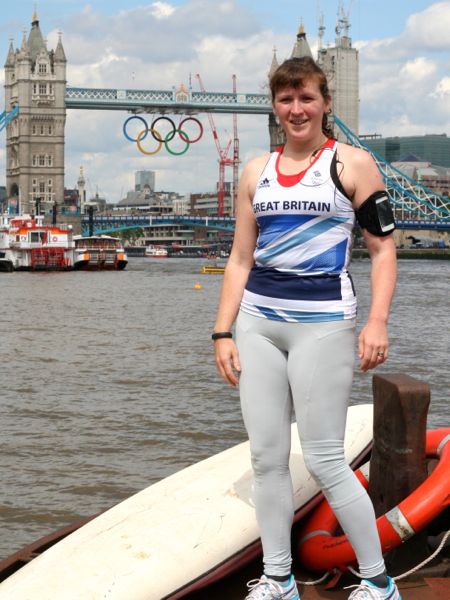
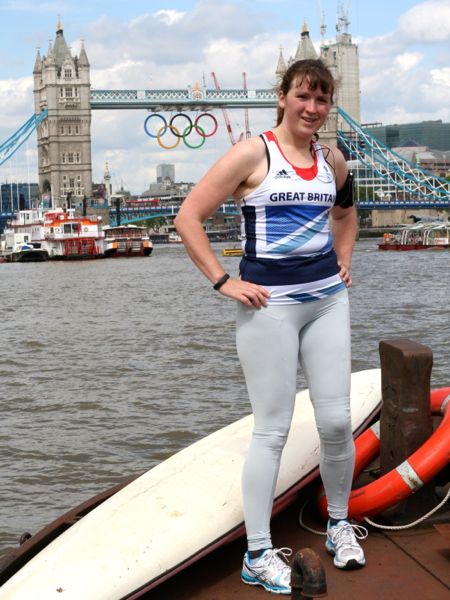
During the development process, I made so many samples pairs of these – beyond the initial early ones (not fit to be shown!), I made a whopping SIX pairs for myself, plus two more for my athlete-model niece, too.

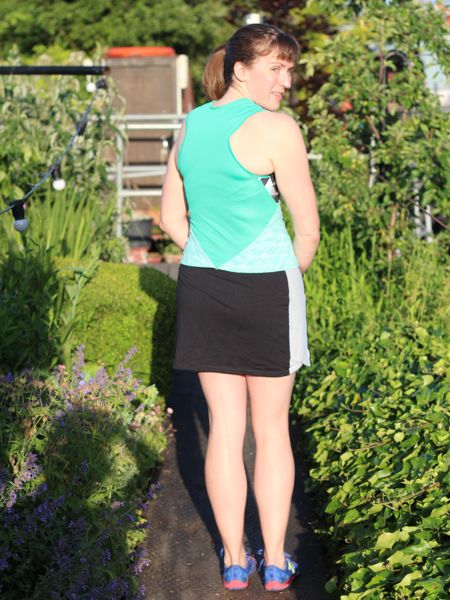
Rather than overwhelm you with all the versions at once, I thought I’d start with the two pairs of full-length leggings I made in solid colours, as you can see the seamlines a bit more easily in these.

This first pair may be my favourite pair ever – made up in citron ex-New Balance supplex from FabricMart (now sold out) with a rainbow spaced-dyed supplex yoke. I’ve got enough of the citron left for another garment, but I’ve made so much with the rainbow before that I mostly just fit the yoke out of the scraps.


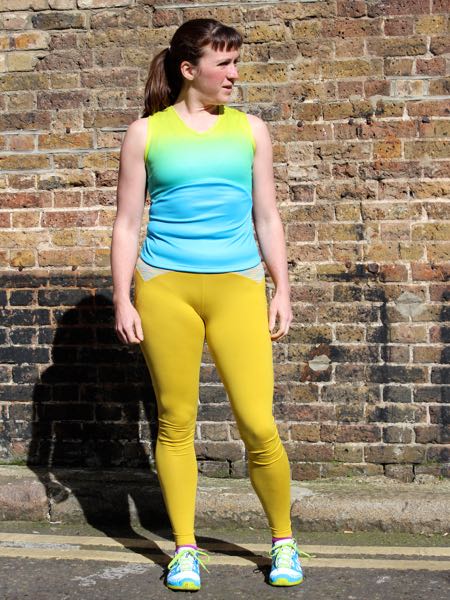
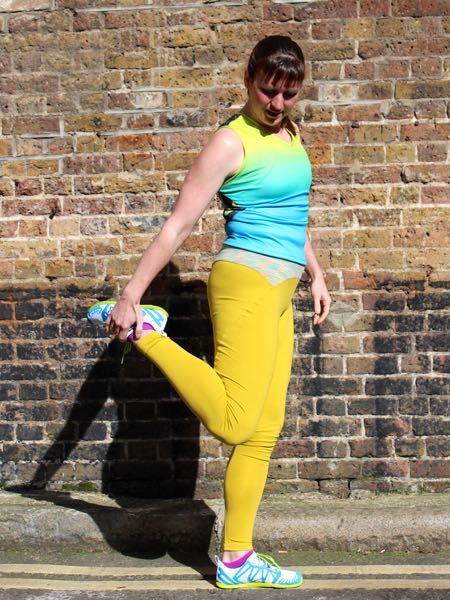
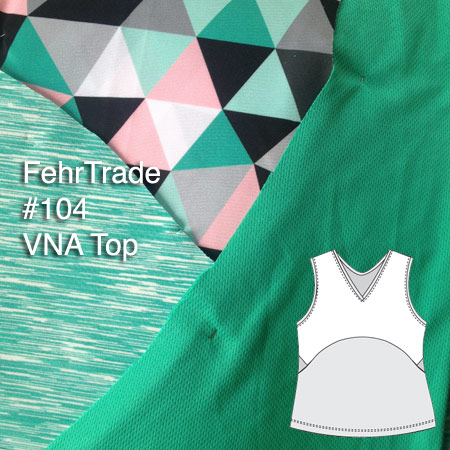
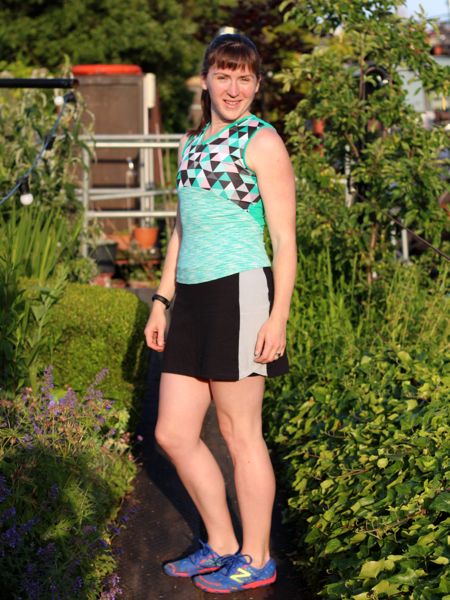
(it pairs so nicely with my ombre-print Fehrtrade x Laurie King VNA Top!)

These are just so comfortable, and you know how I love bright colours! I’ve done quite a few test runs in these, and they really help to liven up the cold, dark wintry nights.

Lavender Threshold Shorts in Berlin marathon

Thank you all so much for first your good luck messages, and then your congratulations after this weekend’s Berlin marathon! We had an absolutely wonderful (and gluttonous!) week in Budapest, Vienna, and Prague leading up to the race, and we thoroughly enjoyed Berlin, too!

I promised you all before I left that I believed enough in my Threshold Shorts design that I’d run an entire marathon in them – and I did! They performed great during the race – they didn’t ride up in the thighs at all and the little back pocket kept my final two gels safe and secure right up until 40k when I gobbled down the last salted caramel Gu.

You can read my full race report over on my River Runner site, but the short version is that I loved this race and truly smiled the entire way through, ending on a total high as we ran through Brandenburg Gate. This was my fourth marathon and my most enjoyable to date (as well as my fourth marathon run in me-sewn gear!).

You can also see that I modified my RDC vest a little bit, too – during races I like to only use one headphone, and normally tuck the other earbud under my sportsbra. But for longer races, this has a tendency to both irritate and get salt and sweat in the earbud, so this time I thought ahead and stitched a little piece of elastic onto my vest at the shoulder to wrap the headphone around! It worked a treat and is something I’ll definitely do for future marathon and half-marathon tops.

My teal mixed-print VNA Top and bonus booty shorts

I showed you a casual version of my new VNA Top pattern a few weeks ago, modeled by my athlete friend Anne, but one of the great things about this pattern is that it works equally well for both exercising and lounging about. Just change the fabrics and go up a size and it’s ready to throw on with jeans!

Since you’ve already seen one casual version, I wanted to show you my favourite workout version – actually, this might be my favourite workout top ever – I just love how the fabrics coordinate together!

If you’ve used any of my patterns before, you know how great they are for using up small pieces of fabric – because sportswear fabric can be expensive and I hate wasting anything, but also because it means you can coordinate tops and bottoms really easily! I made this VNA Top using a Spoonflower print I fell in love with, printed onto their Performance Knit base (though now that they’ve released their Performance Pique, I actually prefer that to the “knit”!), and when it finally arrived, I saw that the teal colour in it coordinated perfectly with the mint space dyed supplex I had leftover from my minty XYT Workout Top, but also with a bunch of mis-printed “Run to the Beat” technical tees I got given for refashioning. I couldn’t believe my luck!!

I cut the Upper Front in the Spoonflower print, the Lower Front & Back from the “hint of mint” supplex, and the Back and Bindings from the refashioned race tee. Three different fabrics in one top, but the shared teal colour mean they look great together!

A green cropped blazer

I’ve got a wedding rapidly approaching, and for once in my life, I actually bought a dress instead of sewing it (ok, technically James bought it for me when we were in France!). But I couldn’t let this occasion go by without sewing something so I decided I wanted a little cropped jacket to go along with it. Luckily there are a lot of colours in the dress to pick out, and a good friend gifted me this green, ex-Karen Millen piqué specifically for this purpose!

I sifted through my pattern magazine archive (made easier since I’ve got each issue overview online) and decided on a sharp little cropped blazer pattern from the September 2013 Manequim magazine (curiously I’d overlooked it when I reviewed the issue!).

I love that this jacket is short in the body so it won’t interrupt the full skirt on my dress, has got 3/4 length sleeves which are so nice for summer evenings, and best of all – a shawl collar with little tuxedo styling at the bottom. There’s no front closure, either, so it’s a nice one to just slip on over the dress and not have it look like it should be buttoned or something.

Many of you ask how I deal with Manequim patterns that aren’t in my size – the short answer is, I don’t. I’ve got so freaking many issues and patterns to choose from that most of the ones I want to sew either either in a 44 or 42 (this one’s a 44), or if they are significantly smaller, I just graft the interesting features onto an existing base pattern that fits me.

The Sherlock coat

Sewing a coat is always a big accomplishment, but this coat in particular has been a long time in the making. I first told James I’d finally make him a coat like Benedict Cumberbatch wears in BBC’s “Sherlock” for his birthday back in early December. I drafted up a pattern using the details provided in this livejournal post, then made a muslin for him later that month. With only a few tweaks needed for fit and style (I made the lapels too big, for starters!), I then moved on to purchasing the wool coating, cotton flannel underlining, and black acetate lining.

But this is also where the first delay came in, as he wanted a black wool coating with faint blue and brown checks from Crescent Trading, who turned out to be closed over the full Christmas period, when I was hoping to get a lot of the work done. All of the above are detailed more
in this “progress report” post from January.

I then had more hurdles involving the hem bubbling (which meant I had to baste it in place, flip it back wrong-side out, handstitch, re-press, etc), waiting for some woman on Etsy to make more replica buttons (which we finally gave up on and just made our own with gold enamel paint), and getting the right upholstery thread to do all the buttonholes.

But it’s finished, it looks fantastic on James, and the proportions are really flattering on him, too! So the lengthy making process shall soon fade away in the light of the finished coat. He definitely prefers it open (as dos Sherlock himself), but it can be buttoned up in the coldest of days, too:

It’s a very warm coat, having underlined the body and sleeves in flannel, a trick I picked up in previous coats to stop the wind.

I can’t take the credit for these, as James was having fun with photoshoot ideas!

My galaxy-print birthday sheath dress

Happy birthday to meeeeee! I hinted about it last week, but I decided to celebrate the occasion this year by sewing up something special to wear, using a fabric that I’ve lusted over for months even before I broke down and ordered it. My feeling is that if you adore the fabric or pattern (or both!) then the resulting garment is pretty much guaranteed to be a hit.

For this dress I used the Derek Lam-inspired knit sheath from the January 2014 Manequim magazine combined with the most amazing galaxy print ponte jersey which is even nicer in real life, I swear! It’s a digital print on a smooth, white ponte jersey base, and it’s both stable and stretchy, making it the bestest fabric ever (and I have just over a metre leftover! woo!).

It’s been a while since I sewed a Manequim pattern and I’ve dropped in size over the past few months of marathon training to a 42 (Burda 40), so I decided to sew up a muslin of this first to test the fit. The resulting turquoise ponte muslin was very close fitting, and I wasn’t entirely certain at first whether it was too tight, or utterly perfect. So I lounged around in it for a day, decided it was comfortable enough, then cracked on with the final version without any pattern changes.

The final version is definitely tighter than the muslin, though, and I’m fairly certain it’s down to adding the lining layer, even though it’s stretchy! You can definitely see some horizontal pulls in the dress showing it’s a tad too tight, and it’s a struggle to get that waist seam on and off over my boobs, but one it’s on, it’s not uncomfortable, thankfully!

The pattern is really simple – a front bodice with both vertical and horizontal bust darts, back bodice with long vertical darts, raglan cap sleeves, and a skirt pattern with vertical waist darts (the same skirt pattern is used for both front and back). The pattern calls for a long invisible zipper, but as I could easily get the muslin dress on and off without it, I was going to leave it off the finished version, too…

…until I discovered the most perfect purple, metal teeth zipper in my stash! So then I decided I had to use it and make it an exposed zipper feature instead. It was a bit shorter than I’d have liked, but it reached exactly to the waist seam, which worked out nicely visually (though for ease of getting in and out of it, a longer zipper would’ve been much better!).

The Swirl Sheath Dress

This dress has been an awfully long time in the making. The idea started back when I took the Pattern Magic 2 class at Morley College last winter, where we learned a technique called “Fundamentals: Create three-dimensional forms with design lines only” (it just rolls off the tongue, eh?).

Essentially what this means is you sew up a muslin, draw design lines all over it, cut along these lines, then introduce snips of ease until the pieces lie flat, and there’s your new pattern! I did all this (based on a sheath dress from the June 2012 Burda magazine, which doesn’t appear to be on the US BurdaStyle, sorry) last summer, but then the project stalled when I couldn’t find any heavyweight stretch satin anywhere in Europe, and had to import this gorgeous salmon stretch duchesse from Gorgeous Fabrics.

Then there were further delays as I didn’t have a wide enough cutting table to lay out the asymmetric and strangely-shaped pieces, until a few weeks ago when the Thrifty Stitcher invited me to pow-wow at her studio and suddenly my swirl sheath dress was back on track!

Because all the darts from the original pattern (bar one) are now incorporated into a bunch of curved seams, this means there’s a lot of easing going on, so if you don’t like easing princess seams, for example, you really won’t like sewing this. My easing motto is “pin the crap out of it”, and I’m proud to say that I didn’t have any tucks or unpicking in any of these seams. Though I did use 58 pins on just the lower semi-circular seam!

My Olympic leggings

On Saturday I showed you a sneak peek of my new running leggings and my thoughts on the Opening Ceremony, but here’s your chance to get a better look at them, and those Olympic rings on Tower Bridge!

I’m finally feeling a little better so we took these photos after I ran my usual 10km loop in my official Stella McCartney for Adidas replica Team GB vest (now sold out everywhere now, sorry!) and my leggings.

This is the 4th(!!) time now I’ve sewn the Papercut “Ooh La Leggings” pattern (UK stockist here), though I’ve actually got a 5th pair on the way, if you can believe it! They’re so well drafted, so stylish, and so comfortable to run in that I just can’t resist making more. That they’re also really quick to sew on my overlocker is just a bonus. Here I made them in the pale grey Suziplex fabric I bought from Suzi Spandex when I was in Montreal in March, and it’s just truly, truly wonderful stuff.

I also used my my elastic waistband tutorial technique for a nice, comfortable finish inside, which, judging by your comments, a lot of you are also using now, hooray! This waistband plus the soft and loopy reverse side of the Suziplex really does make for the most comfortable running gear ever, aeons better than anything I’ve ever bought.