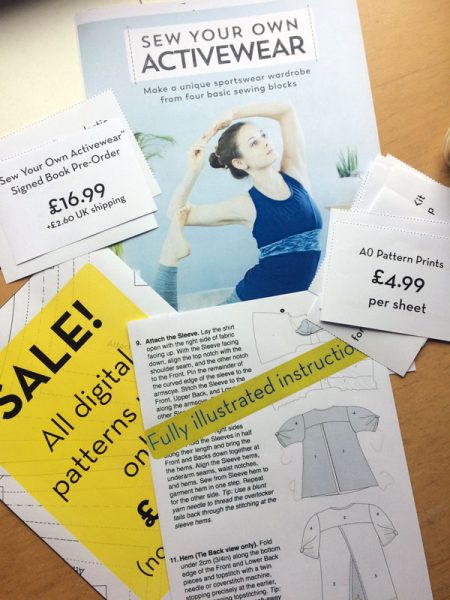
Apologies for the radio silence recently, but I promise it’s for a very good reason! Actually, two reasons, because I have been spending every single second of FehrTrade time for the past few months working to release a new, beginner-focused activewear pattern AND a full beginner activewear-focused eBook to accompany it. Wooooo! And even though the pattern is aimed at beginners, there are plenty of opportunities for upskilling that have won it rave reviews from my more experienced, testers, too.
Coming Soon…
The GBSB Live and storewide sale
If you had told me from the start that buying my first ever stall at an expo would require so much time, effort, stress and money, I’m not sure I would’ve ever said yes in the first place. But back when the Great British Sewing Bee Live event was announced, I was tempted, talked it over with J, and decided to go for it and stretch myself as a small business owner.
It’s been a huge learning process, even just moving from a purely digital business into one that not only has to fill a space (which the organisers kept making bigger!) but also taking in-person card transactions, and ordering supplies to try and really show off what Fehr Trade Patterns really is to someone just walking past who may have never heard of us. If you’re coming along, we’re on stall H1 (turn left once you enter, and I’m in the corner with the workshop rooms).
The show is finally upon us, and hopefully now the panic attacks and stress and dwindling bank balance can give way to the enjoyment of meeting new people and putting faces to long-time customers’ names, too. But if I don’t manage to get a pattern released this calendar year, we can definitely point a blame finger in the show’s general direction as much as the book’s!
Like summer in April…
Happy Monday everyone! I hope you had a brilliant weekend – London has been blessed with three straight […]
I’m ridiculously pleased to announce…
Those of you who’ve picked up the current Threads magazine may have noticed a little something in the byline of my article, and it’s something I’m so! excited! about! but haven’t been able to mention online at all before now…
A quick tip for topstitching activewear seams
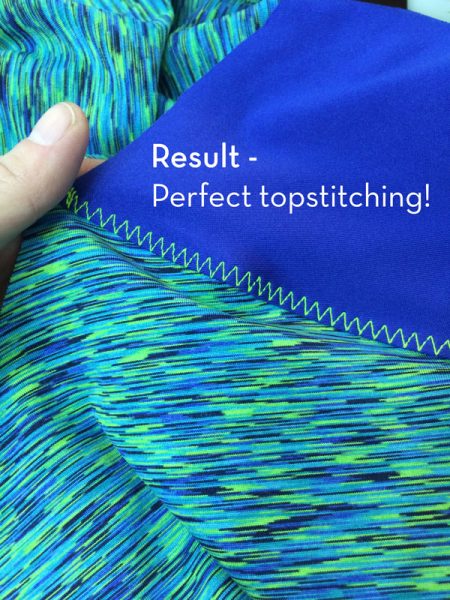
I’m sure some of you may know this tip already, but if you’re someone who prefers to topstitch down all your seams for your activewear makes, get yourself a roll of Prym Wonder Tape, stat. I’ve known about this stuff before, as I’ve seen other people use it for basting zippers in place, but I hadn’t realised exactly how great it could be for topstitching until I decided to give it a try on a pair of Steeplechase Leggings I’m sewing for Cambridge Half next weekend.
Wonder Tape is essential double-sided, sticky, washaway stabiliser, and it comes in a narrow 6mm (1/4in) tape roll. You stick one side, peel off the backing, stick something to the other, and that’s it. No need to heat up the iron or anything and it comes out in the wash, leaving you with perfect topstitching. When I’d topstitched my seams before, I’d usually use pins (and always my trusty walking foot!), but pins can make things lumpy and you’ve still got to constantly feel for the seam allowance underneath if you’re stitching around curves (like on the Steeplechase’s curved yoke yokes). This stuff just made it easy.
A cape in progress
I don’t tend to post about in-progress garment much anymore. I think part of the reason is that I tend to make projects quickly, so there’s not much to document and I roll any construction notes into the finished garment post, but also because I’m not not exactly light on garments to post about and it takes enough time putting together the ones I do share without adding any more to the To Blog pile!
But I’d been making a lot of quick garments in the past few months and decided I wanted something a bit more involved to sink my teeth into, so I started making a cape, using this Burda magazine pattern from 2011 (still available to buy as a pdf). I had some gorgeous teal wool coating a friend had bought for me in Tokyo in January, and I thought it paired really beautifully with some black and pink abstract tartan fabric I chose from Sew Essential as my #sewphotohop prize draw. It’s a lightweight John Kaldor satin with a lovely hand that you really could believe was silk, but alas, it doesn’t appear to be on the site any longer!
Long weekend progress update
For all of you in the US and UK who enjoyed a lovely long weekend, I salute you! I made the decision to devote the bulk of my four days to upgrading/migrating this site over to a new backend, and it was exactly as painful as I was expecting (and it’s not done yet). I’ve been wanting to for quite a few months now, but I just kept putting it off for all sorts of tech headache reasons, and I was right to! It took no less than 3 server moves with my web host to find a server that could support both the old and new platforms simultaneously during the transition period, then a bunch of setting conflicts, frantic forum searching, and then finally data munging all 1,036 posts, over 10,000 images, and a ridiculous amount of tags over in a way that broke the least amount of stuff. Which meant that I didn’t get to the actual appearance of it until late on Sunday, and it still needs a few more days work before I can start the fun 403 redirect process, yay! So until then you’ll still see the old site, and I’m going to do my best to redirect all the RSS for those of you who subscribe in your favourite reader, too!
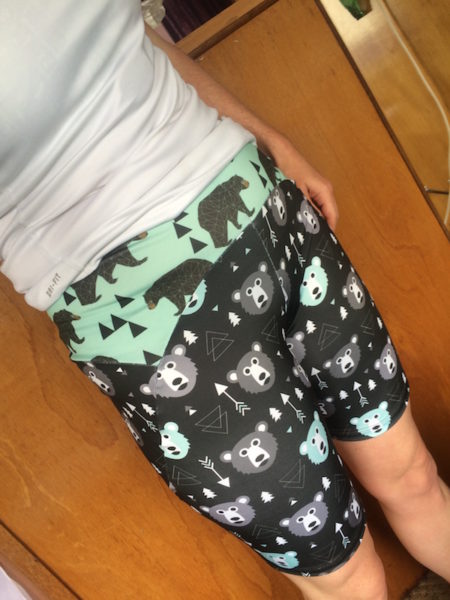
This meant that I was mostly behind the computer (or a barbecue!) this weekend without much happening in my sewing room. But I’d been awaiting the arrival of a re-up on bear fabric (which I honestly didn’t think would arrive in time, but it did!!), so I whipped up a pair of bear shorts for the Transylvanian Bear Race on Friday while a large ftp process occupied my computer. I used my Steeplechase Leggings pattern (Biker short length), using two different Spoonflower bear prints for the body and yoke. I’ll do a full post on these after the race, but here’s a sneak peek from my test run in them on Sunday (because Nothing New On Race Day, folks!)
Re-emerging
Thank you all so much for your understanding, sympathy, kindness, and support while I’ve been ill. I know some of you expressed disbelief that I could still possibly be ill after all this time (10 weeks!) but welcome to post-transplant life! I’ve been thoroughly checked over by the hospital and several doctors and the working theory is that I really ran myself ragged getting the boat ready to move to our new moorings in late January, allowing a nasty bout of sinusitis to take over. Then I had EBV reactivation for a few weeks (effectively fighting off mono/glandular fever), then at least two more viruses, culminating with a delightful flu that’s going round my office which involves constant headaches concentrated near the ear/jaw. It’s been so much fun, let me tell you.
For a lot of that time, I couldn’t do much more than watch Netflix (9 days straight in bed meant I watched the entirety of Orange is the New Black), but then I had to go into work, and the new mooring meant that I either had a 1hr+ public transport commute at rush hour with no means to sit down (costing me £8/day too I might add), or a 40min cycle ride. I’ll let you in on a little secret – cycle commute is made out to be some super healthy, exercise choice, but seriously, a 15min walk took way more out of me than the 40min cycling on flat London roads with red lights every few minutes. It’s unbelievably stressful, but not strenuous in the slightest (even on the days where I was falling asleep at my desk I could get myself home). But I’ve got an entire post brewing on this subject for my Riverrunner site. I’ve had a lot of time to think, and plan, but not so much desire to write.
In Waiting…
It’s never particularly convenient to be ill, but honestly, this couldn’t have been a more inconvenient time. Without going into details, I’ve been ill for over a month now, and it’s been really frustrating to watch the publication month of the Tessellate Tee pattern slip by without being able to show you all the finished garments I’ve been literally waiting months to show off (no really – I made most of these in October and November!), let alone share some fabric choices, great design features, and finished garments that are popping up around the web already.
This is my pile of Tessellate Tee samples waiting for me to be well enough to photoshoot:
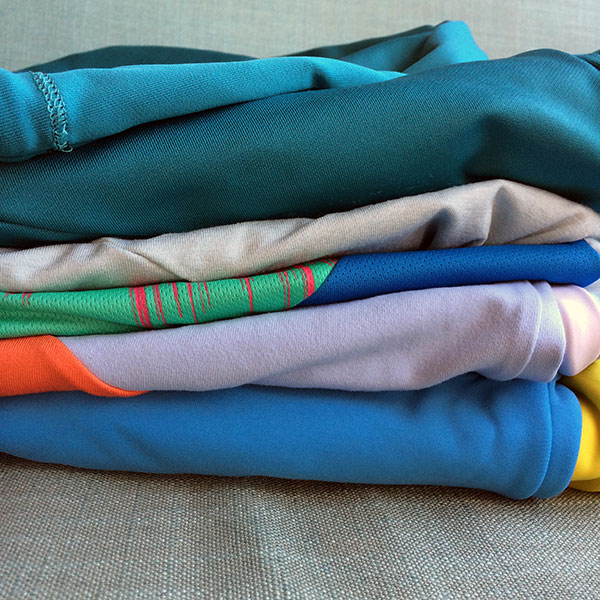
And this pile isn’t even including the two I sewed for Love Sewing magazine’s feature, or the one I made my niece for Christmas! To some people, a month spent mostly lying in bed would be bliss, but to someone like me who already doesn’t have enough hours in the day and is very high activity, this is utter, utter torture. You can make up for a lot of things in life, but missed time is just gone forever…
I honestly have no idea when I’ll be able to pick up with normal activities again. But I can say that I’ve had plenty of time to think and devise new patterns and features and really cool things I want to do with Fehr Trade Patterns, so now it’s just a matter of when I’ll actually have the time, energy, and health to put them into reality.
Bits & pieces
I haven’t got any finished projects or magazines to show you this week, so I thought it’d be a good opportunity to catch you up on all the smaller things I’ve been up to that maybe wouldn’t be enough for their own post…
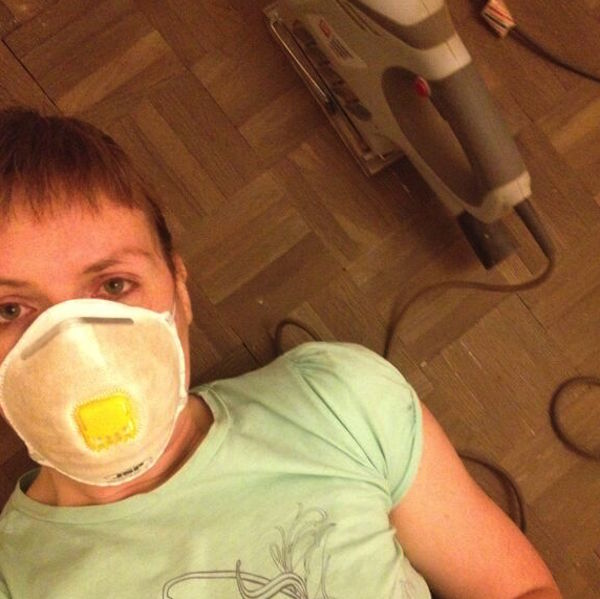
The New Sewing Room
I know it feels like it’s taking forever (and believe me, it does to me, too!) but my new sewing room in the front of the boat is nearly done, so I’ve been spending a lot of time getting that ready to move into.
Most recently, I’ve been cutting, piecing, gluing and now sanding the beeeeeeeeautiful smoked oak mosaic panel flooring into place, which, while both expensive and time consuming, is something that makes me happy every time I see it.
The final remaining step is to put a few coats of oil on the flooring and tack the edge trim down and I’m ready to move in! And yes, at roughly 2m x 2m, it’s still smaller than most American closets! Our boat is heowge, but this particular room will be small, and hidden away, but it will be mine.
Seamwork articles
I’ve been a big fan of Seamwork magazine and a subscriber since Day One, and loads of you have written to tell me how much you enjoyed my first article, A Guide to Activewear Fabrics.
This month’s current issue is all about sewing knits (I know, right) and I’ve actually got TWO articles in it!