James's fantasy jacket

I’ve been calling this James’s “fantasy jacket” because he’s asked me to recreate a beloved unlined, simple, waterproof jacket that was stolen from a pub on the night he met me all those years ago.

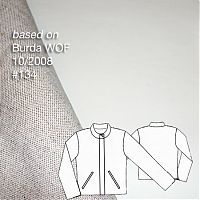
He recalled it from memory while I attempted to create an accurate tech drawing, and then once that was agreed, I compared this against my vast pattern magazine archive (made much easier since I started tagging my At a Glance scans online, so I just had to shuffle through those issues tagged “menswear”!).

I decided that BWOF 10/08 #134 was a pretty good starting point for what James wanted, and I went from there. The muslin went well, so around Thanksgiving I started on the final jacket, made from a very cool laminated linen from Mood in NYC, with bias binding made from some dark red and black tie silk bought in Dublin three years ago.

The reversible disco jacket

I don’t often sew for James (preferring to fill my own wardrobe instead!), but every now and then he either sees something online that he’ll take inspiration from, or have a fully formed idea in mind that he’d like me to bring into reality. So this one is another fantasy jacket, this time modeled heavily on Betabrand’s reversible smoking jacket.

When we were in Paris in March, he bought a wonderful wonderful wool/poly blend corduroy at the Tissues Dreyfuss Coupons shop for €10 total (a complete bargain!) as well as some red chinese brocade to use for the other side.

I started sewing this when we were in drydock in April/May, then I stalled at the bound buttonhole stage since my little red machine isn’t great for precision jobs (no speed control!). Then the pressure was off during summer, but the cooler weather meant I really did want to finish it for him!

Even better – James surprised me buy buying Betabrand’s “open source” disco fabric, so now the jacket changed slightly in that the reverse will be PURE DISCONIUM!

What I’ve made here is the ultimate day-to-night jacket!


(Thank you to Kerry for the photo on the right!)

I started with his last fantasy jacket as the pattern base (which, in turn, started life as Burda 10/2008 #134) since it fit him really well, then James had a bunch of style changes to make to this one:

Brighton & Bank holiday sewing

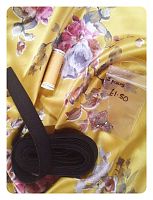
We had a long weekend here in the UK this weekend, and I’m pleased to report that I made the most of it! On Saturday, James and I made an impromptu trip down to Brighton, and we stopped off at Lewes on the way down. Our main objective in Lewes is always the Harveys Brewery shop, but I also discovered The Stitchery just across the road upstairs in the Riverside Centre, which stocks a wide variety of fabrics, embroidery floss, yarn, and haberdashery. I checked my handy “sewing shopping list” on my phone, and bought black waistband elastic and trouser hooks, both of which I needed. Very sensible of me, I know.

But the real temptation was walking right past Ditto in the North Laines in Brighton, and I told myself I was only allowed to buy ONE fabric there, so it’d better be a good one! In the end, this gorgeous butter yellow floral silk charmeuse won out over a similar yellow coloured, textured, ex-Blumarine crepe.

Florals really aren’t my usual fabric choice (and I would’ve never bought it from the terrible photo on Ditto’s site), but in real life, I was just captivated by it, and I’m thinking I’ll need to pair it with some edgier like jeans or my leather skirt to diffuse the twee-ness.

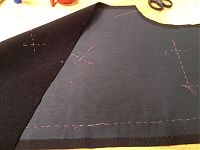
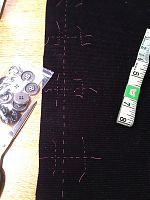
After our big day on Saturday, on Sunday we didn’t leave the boat at all! I spent most of the day doing sewing stuff, starting off with fusing all the interfacing onto James’s reversible smoking jacket pieces. I find fusing interfacing to be really boring at the best of times, but it’s beyond teeeeedious with a mini ironing board and mini iron! Once that was all fused, I then moved on to hand basting all the pocket placements (it’s a fantasy jacket, so there are five pockets!) and then basted the bound buttonhole placements, too.

A new sofa slipcover (and bonus cat photos!)

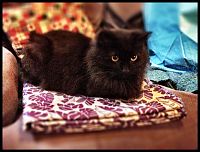
Home dec sewing is boring – there’s no two ways about it. To keep you from falling asleep while reading this, Bosco has helpfully decided to sprawl himself all over said slipcover to act as a diversion from the tedium!

James bought this purple and grey leafy brocade/damask fabric in Paris at Coupon St Pierre last weekend. The coupon fabric shops are a bit different from the usual “there’s a bolt I want you to cut this much of it” fabric stores – here instead, you rummage through piles and piles of pre-cut fabric at set prices, then take what you want to the till. You’re forced to get the full length, but at greatly reduced prices. Anyway, James was after some loud brocade for the interior of a fantasy jacket he’s got brewing for me (which I’ll be telling you more about soon) and bought this only to come across even better fabric later on.

So this lovely, shimmery brocade was left without a use.

Meanwhile, our faux-leather sofa was entirely covered in blankets to try and stop the cat from scratching off what little life was remaining in it (Bosco has the world’s shortest cat memory, and the Liquid Justice squirt bottle hasn’t stopped the problem). So James had the brilliant idea that I should turn it into a slipcover for the sofa!

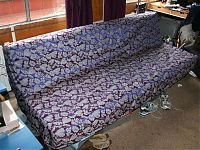
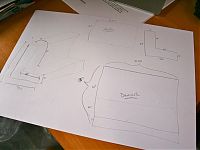
Lucky for me, there was just enough fabric in the 3m to cover our 2m sofa, and the sofa’s an easy enough shape so working out a pattern wasn’t too bad:

(Belated) Christmas gift – red leather handbag

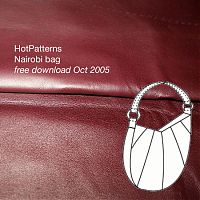
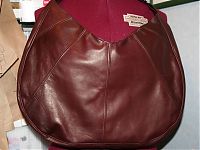
We were supposed to meet up with my friend (and former bridesmaid!) Pip and her boyfriend back in mid-December to celebrate Christmas, but we had to reschedule due to my swine flu, so I’m only just now able to show you her present – a Nairobi bag made up in gorgeously soft red wine leather, bought in NYC from Global Leathers (I find it interesting that Americans would call this colour “burgundy”, whereas in the UK it’d be “claret”).

I sewed this up before Christmas (so you saw a sneak peek in my 2010 roundup), but she asked me to hold off posting about it until she received it. I actually made this same bag for her a few years ago in black corduroy, and she famously texted me later that night exclaiming “I can fit a whole bottle of vodka in here!”

When I made the Nairobi bag for myself, I usually leave out the strip that joins the two halves together as I find the bag is just too big for my liking with it in, but Pip asked me for the bigger size, and bigger she got!

How to sew welt pockets

It may be FREEZING in London, but the heat is on for me to sew James’s fantasy jacket in time for his birthday on Saturday!

I’m calling it his “fantasy jacket” because he’s asked me to recreated a beloved unlined, simple, waterproof jacket that was stolen from a pub on the night he met me. So he recalled it from memory while I attempted to create an accurate tech drawing. Then I compared this against my vast pattern magazine archive and decided that BWOF 10/08 #134 minus all the bells and whistles plus a few different whistles and bells was the best starting point. The muslin went well, so this weekend I started on the final jacket, made from a very cool laminated linen from Mood in NYC, with bias binding made from some dark red and black tie silk bought in Dublin three years ago.

The rubberised coating on the fabric means any and all pin holes show, so I needed to treat it like leather – pattern weights and rotary cutter for the pieces, and since it’s unlined, I also needed to create metres upon metres of bias binding for the exposed edges. I used a continuous bias binding method for the first time ever and it was very quick, though not very intuitive.
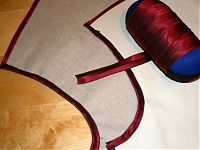
(I wrapped the binding around a sunglasses case to avoid creases. And because it was handy. Let’s face it – I’m not going to be needing the sunglasses any time soon!)

After binding most of the edges, I then set to work on the front welt pockets, which were rather tricky on a fabric that requires a press cloth (I’m paranoid that the laminating will melt!) and can only be basted where it will never be seen. So I thought I’d document the process and give you all a little welt pocket tutorial.

This is also exactly how I do bound buttonholes, but because the scale is much larger here, it’s easier to try welt pockets first to get the technique down and then just do the same thing on a smaller scale for buttons once you get the hang of it.

How to sew a double welt pocket

My pockets here are 7 inches long (6” is standard but I wanted to make sure his big man paws would fit in), and the opening is a total of 2cm wide (1cm on either side of the centre opening line). So the welts I cut out were 4cm wide (folded in half, they’re 2cm wide so straddle the stitching line nicely), and 8 inches long (so I get some overlap at the ends). You’ll need two welts per pocket. I folded each of these lengthwise and machine basted close to the cut edges to keep them together. If your fabric frays or shifts in anyway, you may want to interface the welt pieces in addition to the area around the pocket opening.

Step 1
Hand baste the pocket edges and central line. When you’re basting (in general), never turn a corner with your hand stitches, but leave the tails free at the corners. Also, you should extend the short edges here two centimeters or so beyond the long lines. I haven’t here because the needle holes would show!

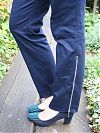
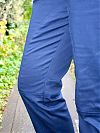
Navy blue riding trousers

Jacquie made these trousers as part of her recent wardrobe collection (she’s “dingyadi” on PR) and I instantly knew I had to make them, too. Like her, I was put off by how skin-tight these looked on the Burda model in the magazine, but in real life, they fit really nicely! Unlike her, I left off the front patch pockets, though, as I figured there was enough going on everywhere else!

They’re from Burda magazine 08/2008 #120A:

They’re great trousers, but there’s just so many freaking pieces, omg! And the topstitching!!

Take the front leg, for instance. On a normal pair of trousers, it’s one piece (maybe three if you have a pocket). On these, the front leg is comprised of three pieces before you even get into the pockets (so 6 in total for mine, or 9 if you chose View B with the added pouch pockets with the flap!). There’s a scooped pattern piece at the inner thigh in the front and back, and lots of horizontal topstitching across the knees in addition to topstitching pretty much every seam of the trousers, too.