Our DIY wedding – printed materials
One cost that can add up really quickly for a wedding are all the printed materials you need for the day. I’m not just talking about the invites (which can get ridiculously expensive if you go the letterpress, inner envelope, return card, RSVP envelope, etc route!), but also all the other bits of papery stuff that is forgotten until a few days before when you realise you actually do need them!
The illustration
The first step in our wedding design process was to commission a cartoon drawing of us from the illustrator John Allison (of Scary Go Round fame). James has been a big fan of his comic for ages now, and we both really liked his design style. So we sent him a photo of us, a brief description of James’s suit and my dress (at that point I was still thinking of that Vogue cowl-neck number) and to imagine 6 months’ more hair on my head. Which somehow he got eerily spot-on.
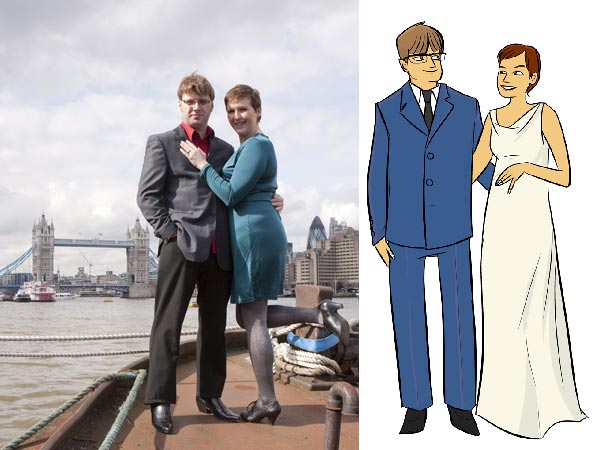
(Apologies for the awful jpg artifacting – I’ve not got the big version of the illustration in front of me to work from)
The wedding website
With the illustration in a nice, big file, we could then set about making our wedding website, which was to be the crux of our invitations. We both work in web developments, and absolutely everyone we know, right up to my grandparents, has an email address, so this way we could put the bulk of the information for both receptions on our site and be able to update it later, too. The RSVPs were all online, using a Google Spreadsheets form (easy to set up, easier for people to reply to than a trip to the post office, and we could both get access to the running tally), and all the usual venue info and registry links could be added without having to worry about word counts and layout.
I can now post a link to it for you to have a look at James’s standards-compliant coding prowess, because I don’t have to worry about you all messing up the RSVPs or gatecrashing or anything! The worst that can happen is that you decide to buy us some more insulation off our registry…
Invites
So with the website in place, all the invites really had to do was give folks the date, and point them towards the website. We ran up two sets of postcards from Moo.com (one set for the UK wedding and reception, and one for the Pennsylvania reception). And to set the tone, the wording was “James and Melissa are finally getting married!” ha!