Go to content Go to navigation Go to highlighted projects Go to contact


Articles by Tags:
bag, bamboo, boning, book, burda, burda-style, butterick, bwof, city-guides, coat, colette-patterns, corduroy, costume, cotton, drafting, dress, embroidery, fimi, fleece, folkwear, fur, fw07, go-patterns, hat, home-dec, hospital, hot-patterns, ikea, jacket, jalie, jeans, kids, knipmode, knippie, knit, knockoff, kwik-sew, la-mia-boutique, leather, linen, lingerie, machine, magazine, manequim, marfy, menswear, muslin, patrones, plus, press, prima, recycled, s08, satin, shopping, silk, simplicity, skirt, style, top, trousers, tutorial, tutoroal, velvet, vest, vintage, vogue, wedding, wool, xmas

Lingerie Contest Medium

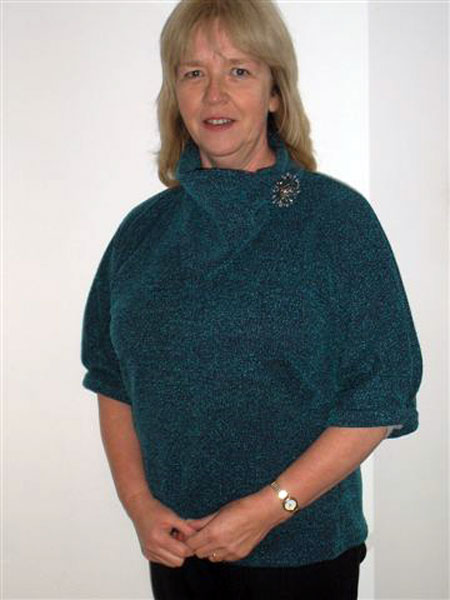
Prada meets Patrones

18 November 2009, 12:13

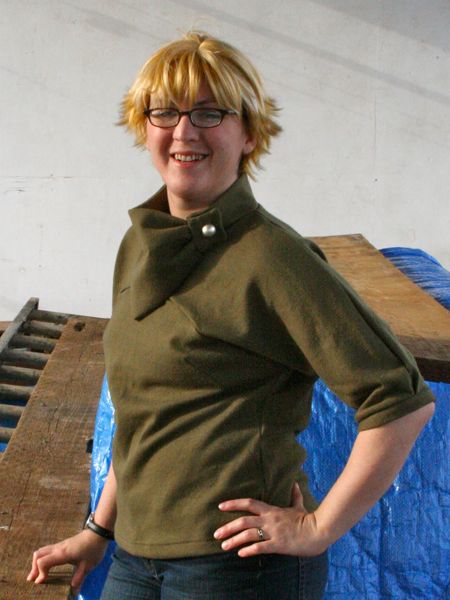
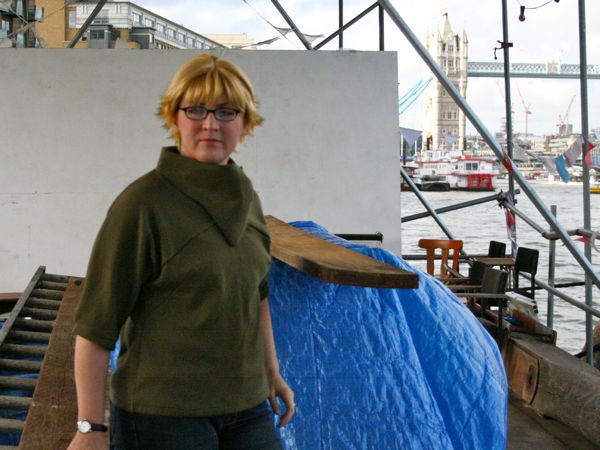
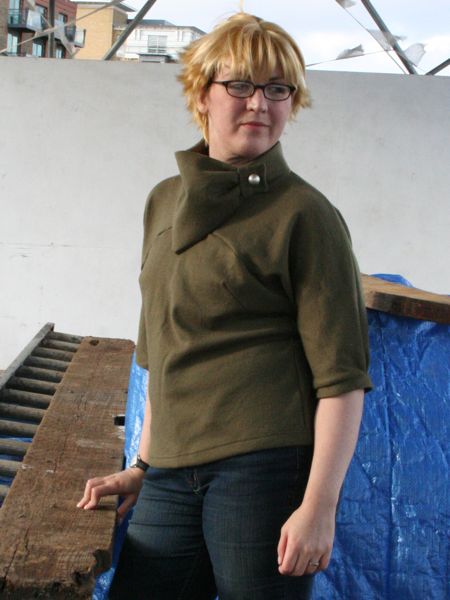
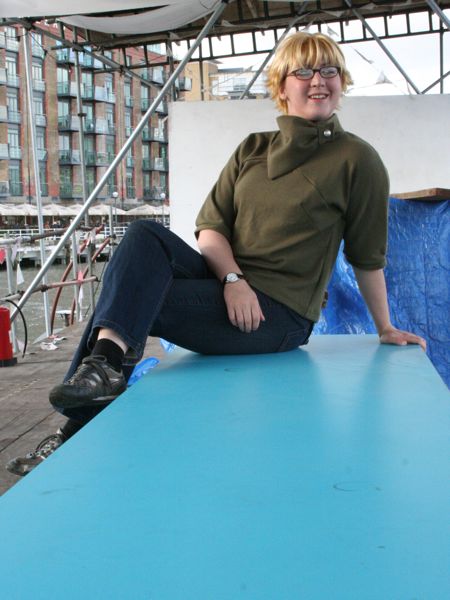
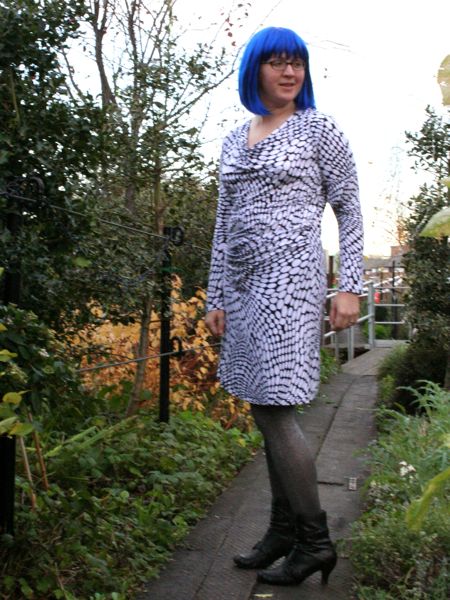
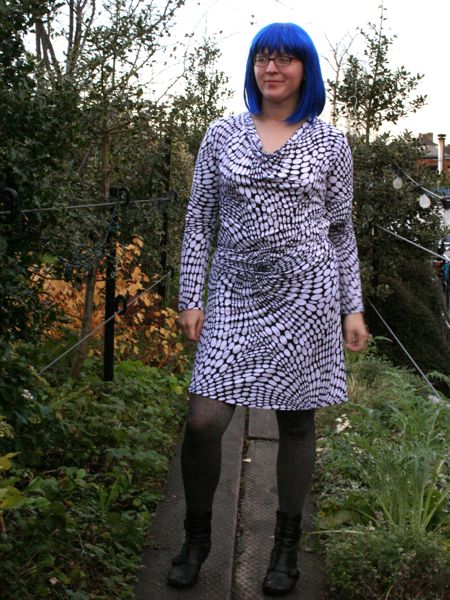
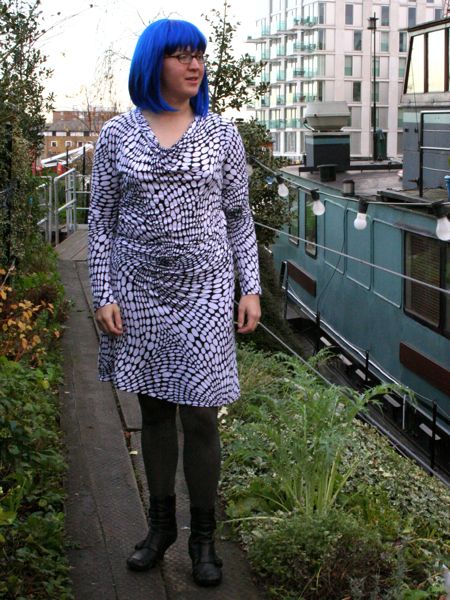
Ahhh I finally get my designer fix! Patrones may have stopped attributing designer names to their patterns, but it hasn’t stopped me from adding my own glamour to the mix… This short sleeved top with an interesting gathered and buttoned triangular collar is no1 from the latest issue of Patrones magazine, #285:

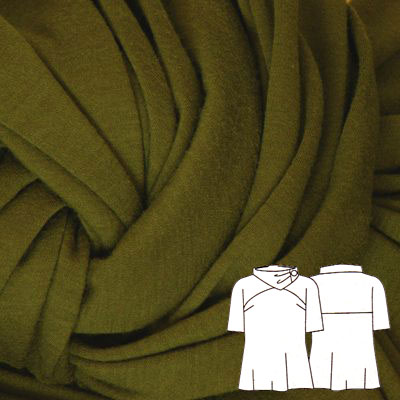
So where does the Prada come in? Well, the fabric is a gorgeous ex-Prada olive wool interlock from Ditto Fabrics in Brighton. I’ve only ever sewn wool jersey once before, and after the struggle I had to keep that from rolling onto itself in both directions, plus having to use double layers to keep it from being see-though, I wasn’t overly keen to sew with it again.

But oh my god, the difference between these two fabrics is like night and day! This wool interlock is just beautiful – it washed up a dream, behaves beautifully in the overlocker and sewing machine, presses and molds the way you want it to, and is just SO soft you’d never guess it was wool at all. Honestly, this stuff is just amazing to touch.

If you remember, I had some difficulty visualising how the pattern pieces fit together in this top, partially down to my not speaking Spanish, but also due to the 2D nature of the technical drawings and the one limited magazine photo. So I made a paper model to help figure out that the collar actually is detached from the neckline in front (the neckline being bound by a bias strip) and the sleeves have pleats on the upper arm where they meet the sleeve band. If you’re interested in the construction of this pattern, I recommend you open the earlier post in another tab now to refer back to while you look at the perty photos!

Here you can see that sleeve pleat:

And the back view, with the horizontal seam:

Here’s some closeups of how the collar looks when it’s open:

You can see that where the collar detaches from the neckline, there’s still a smooth finish to the neck edge even though it’s always concealed under the collar during normal wear. To achieve this, I overlocked one long edge of the bias strip (which I made to be 4×15cm, but Patrones don’t give dimensions for, btw), then stitched down the other edge alone the neck edge, making sure to overlap the bias strip onto each end of the collar to get a seamless look:

I then pressed this to the inside, understitched the bias strip to the seam allowance, and hand tacked the bias strip to the seam allowances of the upper front piece (Though it’s supposed to be cut with that tiny centre front isthmus on the fold! The seam allowances really came in handy here and the seam is always concealed by the collar so I’d actually recommend doing it my way if you’re playing along at home).

At this point I should also stress how important preserving the shape of the neck edge is to this pattern. There’s a lot of notches and pieces that absolutely must line up, and if anything stretches out, it’s not going to work. So I used Burda’s favourite notion, Vilene bias tape, along the entire neck edge (front and back) but you could also cut your own bias strips of lightweight, woven fusible interfacing or even just staystitch to keep the neck edge true. Also, I used some medium weight woven interfacing on both the back and triangular collar pieces so that they can stand up nicely on their own like in the magazine photo. Think bank robber, not cowl neck!

Another aspect of this pattern that’s not immediately apparent from the tech drawing is that the button on the collar is purely decorative, concealing a snap on the underside that actually does the work. Patrones used a large covered button, but I only had small ones on hand and with the post strike and my not being allowed to use public transport for germy reasons still, getting one in a hurry wasn’t likely to happen. I thought about making my own with a regular button and a bit of fiberfil, but in the end I really liked the look of this silver dome button that’s been in my stash since my velvet jacket so I went with that instead.

If you zoom in on the photo on the right above, you can see two rows of tiny stitches on the inside of the square button piece. I ended up doing these to attach the back of the square to the pleats contained inside to further stabilise the collar piece. Squinting at the magazine photo, it looks like this square piece might’ve been topstitched in their version, but in reality there is just way too much fabric there to get nice stitches (I just got thread snarls underneath that required unpicking, argh!). So in the end I had to do some invisible hand stitching around the edge of the square to attach it to the pleats of the triangular piece, and I wasn’t sure if this would have enough strength if it got pulled in any way.

Reading through these last two posts, this top may look a bit intimidating, but this wasn’t my intention at all! On the contrary, I know quite a few people were planning on sewing this top, too, so I wanted to share all the things I learned during my journey with it so that the rest of you end up with a top you love as much as I do mine!

PS: This is my blonde wig, the one James doesn’t recognise me in sometimes! Only one left to go, which I’ll be wearing with my next project, these KnipMode jeans:

Tags: knit, patrones, wool

Comments:

  1. That blonde wig is sooo cute!

    I need to pounce on that Patrones Joven as soon as it shows up on Ebay.


    Christina    Nov 18, 02:27 AM    #
  2. The description of your Prada fabric got me all drooling!

    Your top is truly fabulous. I love all the details.

    That blonde wig looks so fantastic on you!


    Isabelle    Nov 18, 03:22 PM    #
  3. Hope mine looks half as good.


    — Kim Hood    Nov 18, 04:04 PM    #
  4. Fabulous! I really want to make this an I have a gorgeous piece of wool jersey. By the way, wool jersey is really not uniform. I have a piece of pale yellow that is a bit too sheer and I just finished a top with a gorgeous fine wool jersey from Emmaonesock that is soft and not thick, but sewed beautifully. I wish I had saved it for this top! I still have too many things to sew to get to this one soon, but you can bet I’ll be back to make use of your help.


    Nancy K    Nov 18, 11:52 PM    #
  5. This top looks fantastic on you, and I love the style! Although I can’t physically touch the material, it just looks soft and warm. The longer sleeves will give it more versatility as well. I still love the cut of this hair style on you.


    — Mom    Nov 19, 01:18 PM    #
  6. I love the end result! Much more than the original, and I loved the original! But this one has a more interesting colour (the original is a bit lost in the background, isn’t it?) and looks so great on you!


    Hana - Marmota    Nov 19, 07:50 PM    #
  7. You are an inspiration, although you are facing physical challenges you find the time to sew…well done! Have you named your wigs. I call mine Whitney! You have to name each one as they have an identity of their own hehehehehe!


    — Karen    Nov 19, 10:16 PM    #
  8. Love the top. It’s different and it looks great on you. Your blond hair is totally cute too! It’s a great style.


    gwen    Nov 19, 11:47 PM    #
  9. Love this top. Seeing your pictures made it clear: I have to make this top too!
    The blond hair and the top look great on you!


    — Teddie    Nov 21, 09:12 AM    #
  10. Oh, this is one of my favorite design in this my new favorite Patrones issue. Thanks for all the photos, the blouse is even more detail rich than one could tell from the Patrones pic. Awesome job!


    Johanna Lu    Dec 3, 09:01 AM    #

Add a comment:

  Textile Help