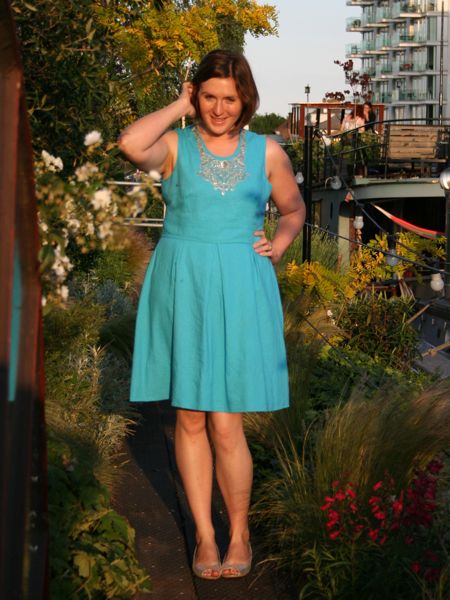
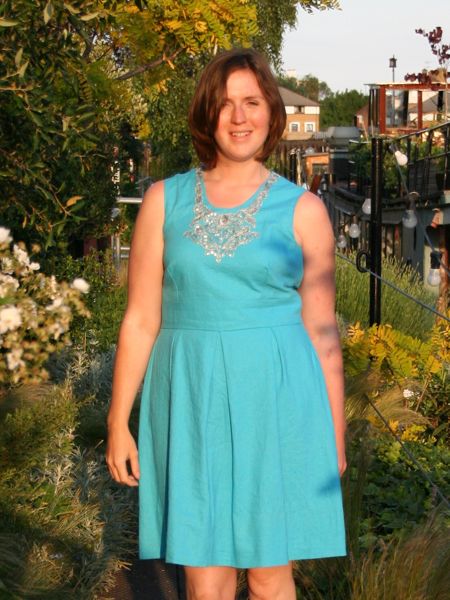
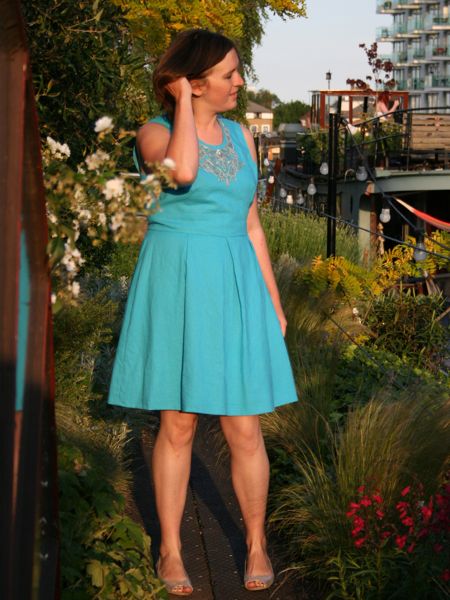
Lace dress for a wedding

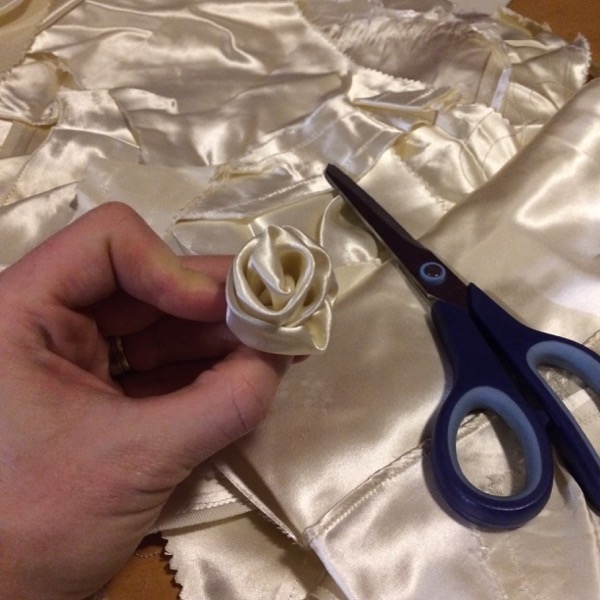
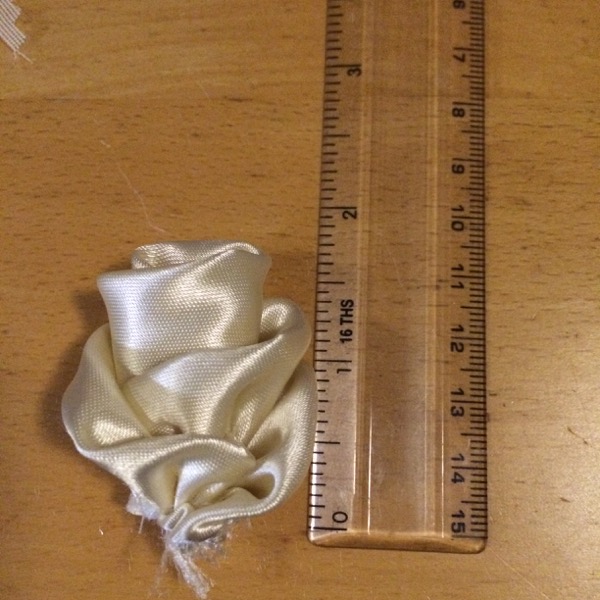
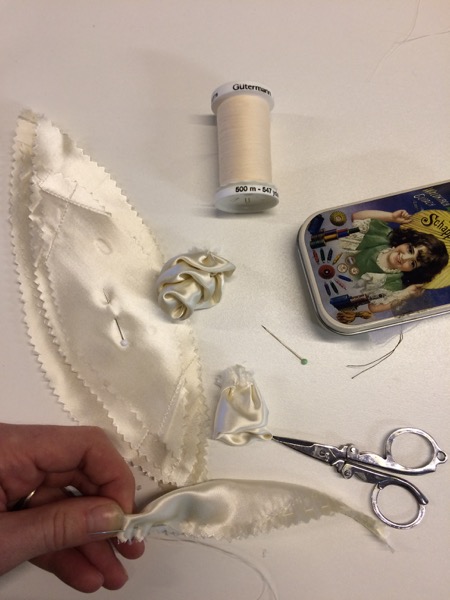
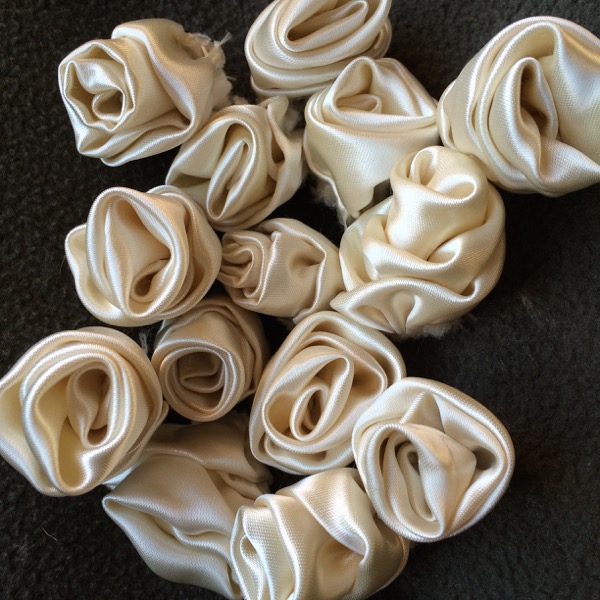
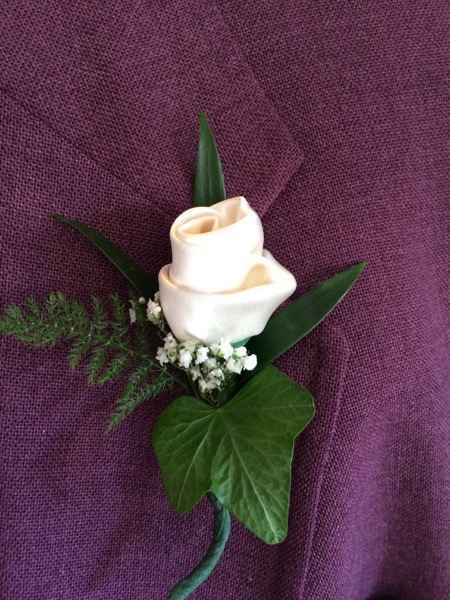
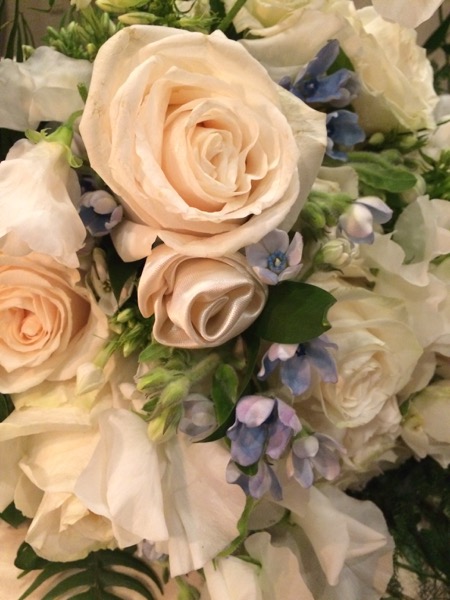
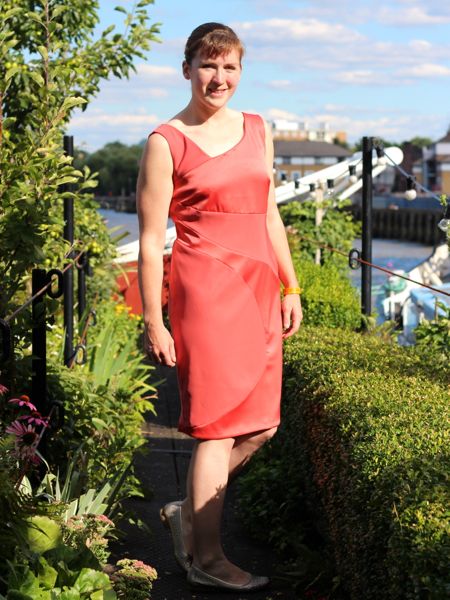
Last week I showed you the roses I made for my aunt’s wedding in DC, but I also managed to sew myself a new dress to wear for the occasion, too!

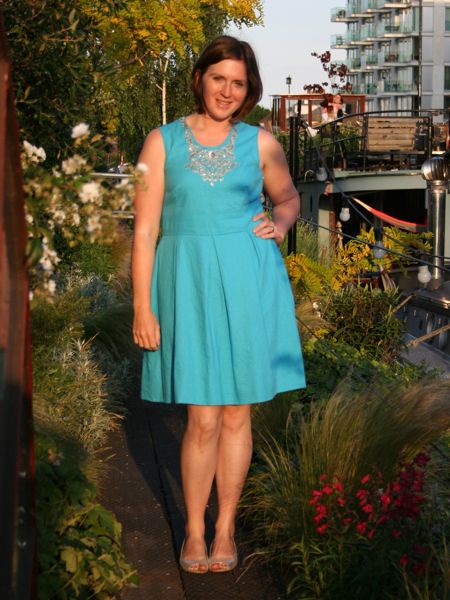
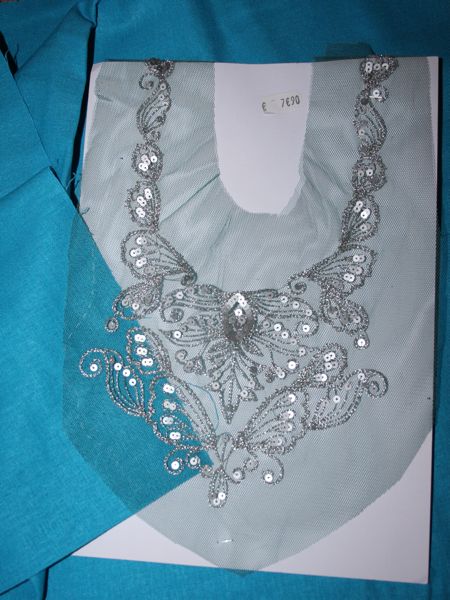
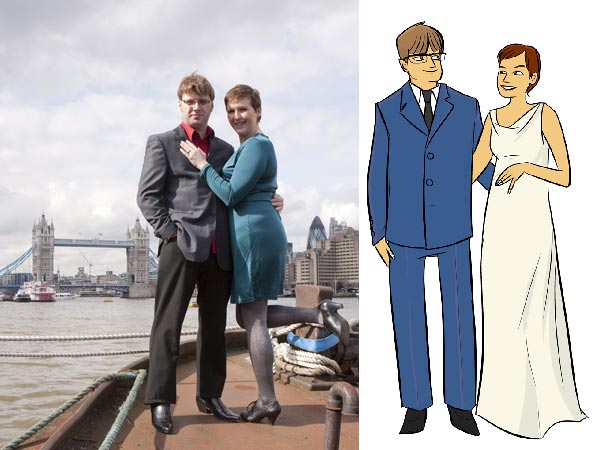
When I was at Ditto’s Brighton shop in December, I fell in love with a wonderful muted turquoise lace and bought a beigey lavender jersey to layer underneath it. I didn’t really have an occasion or pattern in mind when I bought it, but with the wedding trip approaching, I pulled these out of the stash and knew they’d be the perfect starting point.

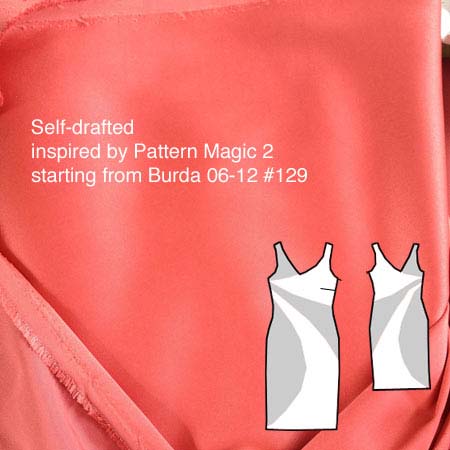
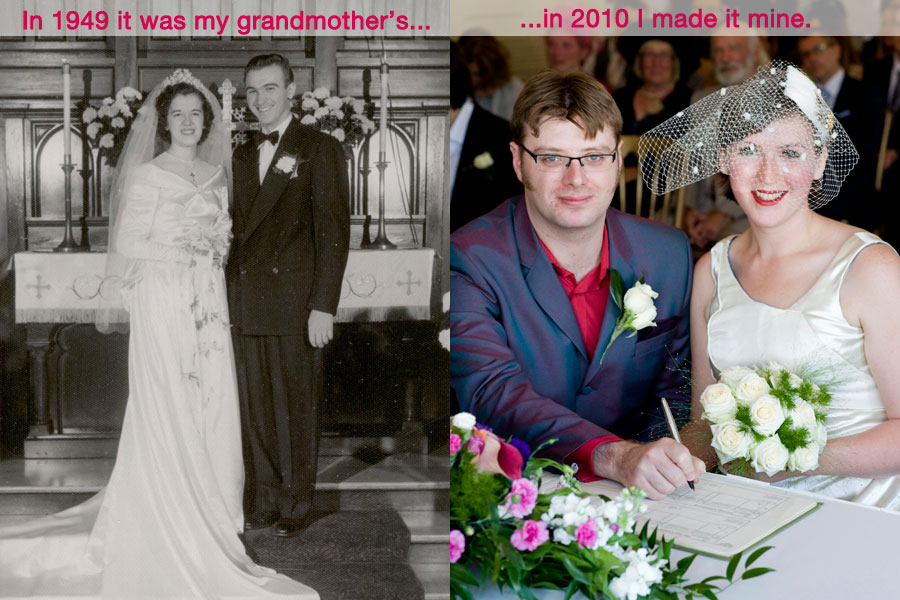
When making lace dresses, I always look for patterns with a lot of little pieces as I’ve found that the shared seams help keep the layers from separating when worn, such as with the Burda dress I made in pink and grey lace (and still wear a lot, 5 years later!). If you try to make a lace dress from big pieces, you have the opportunity for one to grow or move independently if there’s nothing holding them together in the middle of the garment. I wanted something that I’d sewn before, too, as I didn’t have much time to make it before the wedding and wanted to skip the muslin stage. I ultimately decided on a pattern I’d traced from an ASOS dress and previously made twice – once in a mustard ponte and then again in mustard, teal, and white as a designer inspired colourblock dress.

A watercolour silk noile dress

At my last shopping trip down to Ditto Fabrics in Brighton last December, I bought a great mix of spring and summer fabrics with a few cold weather ones thrown in for good measure. So far I’ve already sewn up a Fair Isle sweater (which I was too sick to blog about properly), that muted turquoise lace dress, a pair of cycling jeans (with another coming later this week).

But I’d bought a length of silk noile with a watercolour-esque muted floral print that the owner, Gill, was raving over, saying it made the most comfortable summer dress. It’s long sold out now, but Ditto have a few other silk noiles in stock. I knew I wanted to make a dress from it – preferably unlined to take advantage of the silk noile’s comfort and coolness, but I needed an occasion to actually sew it up. Luckily, two friends I’d know for years from Run dem Crew got married this weekend, so I had the perfect excuse!

Vintage silk roses for a wedding bouquet

The main reason for our recent trip to the States was to celebrate my Aunt’s wedding, and since I still had some scraps of my grandmother’s (her mother’s) gown leftover from when I refashioned it into my wedding gown back in 2010, earlier this year I offered to make her something from the silk so that her mother could be a part of the day, too.

I thought perhaps she’d want a clutch bag, or cropped jacket or something, but she requested fabric roses instead. And a lot of them!

I made my own “pattern” so all of the roses would be the same size, but the pattern was really just two different sizes of pointed ovals. To make each rose, I just folded the oval in half lengthwise and gathered together the cut edge by hand with some running stitches. I rolled up the larger one, tacked it together at the base, then wrapped the smaller around the outside of it, and tacked that together by hand, too.

It took a few minutes to make each rose, so I made myself a little kit and tried to do one or two each lunchtime at the office (after I’d finished any messy eating!!).

And before too long, I had a whole herd of roses to post off to DC!

Then her florist used floral tape and wire to create “stems” on each and worked them into the bridal bouquet, the flower girls’ crowns, and the buttonholes for all of the men on our side of the family, including my granddad. Apparently as my Aunt pinned his buttonhole onto his label, she told him that the roses were made from Granny’s gown, and he was so touched he started crying!

The Swirl Sheath Dress

This dress has been an awfully long time in the making. The idea started back when I took the Pattern Magic 2 class at Morley College last winter, where we learned a technique called “Fundamentals: Create three-dimensional forms with design lines only” (it just rolls off the tongue, eh?).

Essentially what this means is you sew up a muslin, draw design lines all over it, cut along these lines, then introduce snips of ease until the pieces lie flat, and there’s your new pattern! I did all this (based on a sheath dress from the June 2012 Burda magazine, which doesn’t appear to be on the US BurdaStyle, sorry) last summer, but then the project stalled when I couldn’t find any heavyweight stretch satin anywhere in Europe, and had to import this gorgeous salmon stretch duchesse from Gorgeous Fabrics.

Then there were further delays as I didn’t have a wide enough cutting table to lay out the asymmetric and strangely-shaped pieces, until a few weeks ago when the Thrifty Stitcher invited me to pow-wow at her studio and suddenly my swirl sheath dress was back on track!

Because all the darts from the original pattern (bar one) are now incorporated into a bunch of curved seams, this means there’s a lot of easing going on, so if you don’t like easing princess seams, for example, you really won’t like sewing this. My easing motto is “pin the crap out of it”, and I’m proud to say that I didn’t have any tucks or unpicking in any of these seams. Though I did use 58 pins on just the lower semi-circular seam!

The Donna Karan red vixen dress (Vogue 1280)

I don’t often sew Vogue patterns, but I am a massive fan of the Donna Karan patterns’ design and execution, so it’s no surprise that I added Vogue 1280 to my Wish List the second it was announced recently!

Happily, my mom saw there was a pattern sale where she lives in the USA and offered to buy a few patterns for me at US sale prices – she paid less than half the price for the pattern + shipping to the UK than I’m charged just in postage to the UK for the same pattern! I wasn’t planning on sewing a dress right now, but I got so excited when I saw Vogue’s numbered pattern marks for the first time (possibly in response to my complaints regarding Vogue 1259’s instructions), that this dress moved quickly up my Must Sew list.

Like all DKNY & Donna Karan Vogue patterns, this one’s a great mind puzzle to put together! It also has the joy and wonder of looking like a total mess until the very end, when it all comes together into a dress shape. I found it to be true to size, so go with your measurements, not some vague idea that all Big Four patterns have tons of ease. Most of the pieces are cut on the bias (not that it means much in a jersey!), and it hugs the body very closely. If you’ve got any lumps and bumps, though, this is not the pattern to hide them, and so you’ll probably be wearing Spanx underneath in addition to the strapless bra the bodice requires (Full disclosure: I’m not wearing Spanx in these photos!).

The turquoise and silver motif dress

I am very pleased to finally be able to show you this dress, which has been quite a while in the making!

I first bought the motif at Mode et Travaux in Paris when we visiting there last summer, but then a few months ago I decided that I really wanted to do something with it, so I started laying out my first pattern ideas. Then I finally decided on a a pattern and started basting the motif onto my linen in preparation for our French road trip, where I painstakingly sewed the motif onto the dress using silver thread and an embroidery hoop.

The finished dress is a variation on dress #102 from the March 2010 KnipMode supplement, but I modified the neckline heavily so that it’d match the motif’s curves. In actuality, I cut the curve of the neckline after I’d completely sewed the motif into place!

Since I changed the front neckline, I also had the widen the back at the neck edge to match the front, too. It means my big head can only just fit through, as it’s much narrower than the original pattern.

A linen & silver dress – ideas

London has gone super sunny and warm over the past few weeks, so my thoughts have turned to spring sewing and using up some treasures from my stash. Remember the silver chain and sequin motif I bought in Paris last summer? Well I still adore it, and I thought it’d be a great showpiece for a spring dress.

Since the motif is mounted on blue netting, I thought it’d be best to pick a similar coloured fabric for the dress, so that the little spots inside the design which can’t be trimmed away wouldn’t look too out of place. Luckily I’ve had this turquoise linen/rayon mix in my stash for a few years, so its day has come!

I thought it looked good next to the motif, but wow! it looks amazing when I actually pull some through underneath it!

Has anyone worked with motifs like this before? I’m guessing I just get silver lurex thread to match and take tiny stitches the whole way around and trim off the excess netting? Is an embroidery hoop useful (or necessary)? I’m hoping to get the piece cut out and ready to work on during our French road trip over Easter, with any luck.

The next step is figuring out which pattern I’m going to use. I used my usual method for sifting through my pattern magazines (like I did for my wedding gown and my latest winter coat) – since I’ve got all my At-a-glance pages scanned in an online gallery, I flip through them all looking for a suitable pattern, and when I find one, take a quick screenshot of that pattern (Shift-Apple-4 on Mac makes it really easy!), and rename the file to be the issue number so I can find where it came from.

Our DIY wedding – printed materials

One cost that can add up really quickly for a wedding are all the printed materials you need for the day. I’m not just talking about the invites (which can get ridiculously expensive if you go the letterpress, inner envelope, return card, RSVP envelope, etc route!), but also all the other bits of papery stuff that is forgotten until a few days before when you realise you actually do need them!

The illustration

The first step in our wedding design process was to commission a cartoon drawing of us from the illustrator John Allison (of Scary Go Round fame). James has been a big fan of his comic for ages now, and we both really liked his design style. So we sent him a photo of us, a brief description of James’s suit and my dress (at that point I was still thinking of that Vogue cowl-neck number) and to imagine 6 months’ more hair on my head. Which somehow he got eerily spot-on.

(Apologies for the awful jpg artifacting – I’ve not got the big version of the illustration in front of me to work from)

The wedding website

With the illustration in a nice, big file, we could then set about making our wedding website, which was to be the crux of our invitations. We both work in web developments, and absolutely everyone we know, right up to my grandparents, has an email address, so this way we could put the bulk of the information for both receptions on our site and be able to update it later, too. The RSVPs were all online, using a Google Spreadsheets form (easy to set up, easier for people to reply to than a trip to the post office, and we could both get access to the running tally), and all the usual venue info and registry links could be added without having to worry about word counts and layout.

I can now post a link to it for you to have a look at James’s standards-compliant coding prowess, because I don’t have to worry about you all messing up the RSVPs or gatecrashing or anything! The worst that can happen is that you decide to buy us some more insulation off our registry…

Invites

So with the website in place, all the invites really had to do was give folks the date, and point them towards the website. We ran up two sets of postcards from Moo.com (one set for the UK wedding and reception, and one for the Pennsylvania reception). And to set the tone, the wording was “James and Melissa are finally getting married!” ha!

Our DIY wedding – refashioning my grandmother's gown

I’ve got many, many more wedding photos to come, but as I was slowly going through all the photos from friends and our professional photographer, I realised that there were a lot of parallel poses between my grandparents’ photos and ours.

Big thanks to my Dad for taking the time to scan in my grandparents’ wedding album in hi-res format, and also to our truly INCREDIBLE and AMAZING wedding photographer, Paul Tanner. I’m pretty sure he was the best money we’ve ever spent.

Confetti toss:

Post ceremony posing:

Walking back down the aisle:

Cutting the cake:

Pre-wedding girly preparations:

If you’re new to this site, let me back up a minute and explain what went on here. First of all, yes, I sewed my own wedding gown. But that would be too easy (ha!), so I decided to sew it from my grandmother’s gown.

Final wedding "in progress" update

This will be the last update you’ll get before the wedding on Saturday, so after this it’ll all be finished photos, which is rather exciting!

I almost winced trying on my gown for the final time on Monday night – I thought for certain there’d be some niggling problem I’d have to fix, but no, phew! Everything’s still good. My sister-in-law marked out a nice curve in the train, trimmed it to within an inch or so of the pins, and then I did the hem last night. As it turns out, I’ve still got a good two feet of train left, and the thumb loop is intact, so I’ll be able to easily lift it up for the dancefloor.

The original hem was just a narrow turned hem that’s stitched by machine, so I did the same thing on the new area to keep it consistent. First I folded the allowance over so the fold was at the marked hem line, and I machine stitched as close to the edge as I could get. I pressed this (with the indispensable silk organza press cloth!), then carefully trimmed away the allowance as close to the stitching as possible. I then folded over the hem again and stitched about 1/8” away from the edge, then gave it another good pressing.

But this wasn’t the only hem I sewed last night, no no! I also hemmed both bridesmaids dresses! My sister-in-law was a huge help here, too, by hand basting the hem of each dress very close to the cut edge of the fabric. So when it came time for me to send them through the coverstitch machine, not only did I have a nice line to follow, but the basting kept the silk jersey from twisting underneath like it loves to do.