Creating the disco running top

How much do I love the disco fabric?? It really is the fabric that keeps on giving. This time, I paired the Beta Brand disconium fabric with some black Supplex from Tissu (which is BACK IN STOCK right now! This stuff sells out in days, people!) to make a sweet disco running top to match the disco running leggings I made in December

For this top I did something different and started with the teeshirt sloper from the Patternmaking for Underwear Design book, which I love (thanks for the surprise gift, Mom!!). It’s drafted with 10% negative ease and fits exactly the way I want my running gear to fit. And because knit slopers have no darts, they’re surprisingly quick to whip up, too.

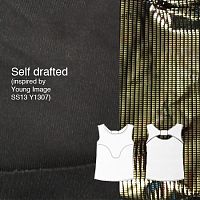
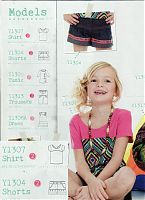
I was super inspired by this kid’s top in the most recent Young Image magazine, so after making one for my niece, I altered my sloper to have a similar back, which was surprisingly easy to do.

Essentially, I just drew two curves so there was a hole in the centre back, traced along one set of curves for the upper back piece (red in the diagram below), and traced along the other for the lower back (blue). At the shoulders, I didn’t want the lower back to peek through, so I made its strap 1cm narrower at the neckline. The back pieces are connected at the shoulders, armscye, and (just barely!) at the side seams, but the rest is free-hanging.

Surf to Summit Top – Three Cycling versions

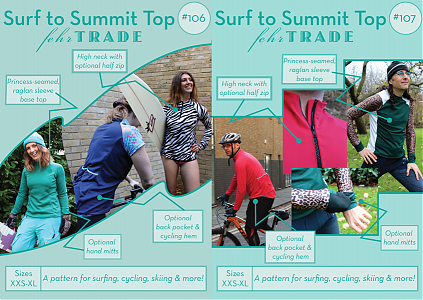
I’ve got quite a few different versions of my latest Surf to Summit Top pattern to show to you! It’s such a versatile pattern with so many different options, which meant that I had to sew samples of all the different features over the past few months. Today I want to focus on the cycling features of this pattern, for both the men and ladies.

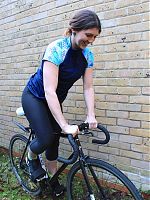
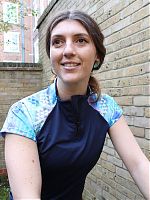
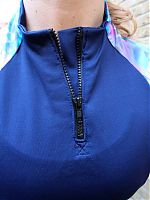
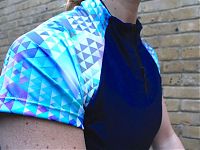
Let’s look at the ladies’ version first, which is again modeled by my friend and multi-talented athlete, Emily, whom you met earlier this week. I made this version using some navy wicking nylon from UK Fabrics in the body, and some “triathlon” printed lycra from FunkiFabrics in the sleeves. The 1.25m I bought of the latter was enough to make leggings for myself and have enough over for the short sleeves here, and probably a sports bra, too! I finished off this top with some turquoise FOE bought on eBay around the hem and back pocket.

This top was one of the very last samples I made of the pattern, a few days before its release, and it uses the exact same version that you buy – it was sewn up to test that the final changes to the pattern were good. I’m pleased to say that the improvements I made to the half zip, facing, and zip underlay in particular are ones I’m particularly proud of – this came together really smoothly!

IWTV tribute crew shirt

It should come as no surprise to anyone who’s been following me on social media for the past few months that one of my first makes of the new year should somehow involve the “Interview with the Vampire” tv show (aka “the show so good I think it altered my brain chemistry”). I also spoke more about it in my end of year roundup if you want more explanation of just how good this show is, and how to watch it (short version: AMC or Amazon in most territories).

Anyway, in the official Behind the Scenes documentary, Sam Reid (the actor who plays Lestat) wears a slate blue teeshirt with a coffin drawing on the front, which I really liked, so I did a bit of investigating. Sam’s a massive Anne Rice nerd (to an encyclopedic degree!) but it turned out that this was the “crew shirt” for the show – a promo item made and distributed to cast and crew only. Usually these are pretty tacky affairs with just the show logo on a tee or trucker cap, but I really liked the subtlety of this one – it looks like it does have the show name on the sleeve and a bit of text on the back that can’t be read (my guess is maybe “Memory is a Monster”?), but mostly, I was into the coffin drawing. I did some cursory searches on eBay but with NDAs these days, I didn’t really expect to find anyone selling theirs. So if I wanted one, I’d have to make one myself!

Developing the Tenacity Leggings

Thank you all so much for your enthusiasm for our Tenacity Leggings and eBook launch last week! I’ve got so much more to say about both because omg, they were both so much work! but today I wanted to talk a little bit about the development of the Tenacity Leggings pattern.

Throughout 2020 and my 14 months of shielding, I had zero creativity. But then I suddenly got hit with an explosion of it in spring and threw myself into a crazy complicated, advanced pattern. I went through about 4 test muslins but it still wasn’t quite right, and I felt like it wasn’t the right time to focus on it when so many people felt like they couldn’t even get started sewing activewear. So I parked that pattern (hopefully I’ll release it next year!) and started work on a leggings pattern that would be beginner-friendly, but with enough options to keep myself and other intermediate- or advanced-activewear sewists interested, too.

My Cold Gear PB Jam Leggings

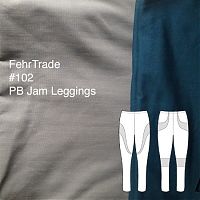
Thanks so much to everyone for your support with my new patterns! I have actually been doing a bit of non-exercise sewing over New Year’s (which I’ll show you later this week), but first I wanted to show off one of the pairs of PB Jam Leggings I made during the development of the pattern.

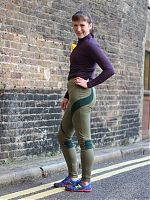
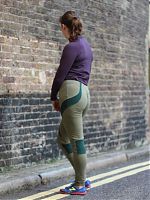
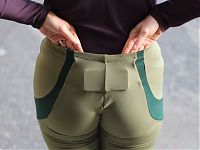
This pair was made from two different green colours of Under Armor Cold Gear fabric that were gifted to me by Cidell a while back. Last winter I made a pair of Ooh La Leggings in the forest green Cold Gear and they were seriously the warmest leggings I’ve ever worn, even keeping me warmer than heavy coats on my upper body! I knew I’d need at least one more pair to get me through this winter, so I alternated leftovers of the forest green for the swirl and back knee pieces with the sage green Cold Gear for the main body pieces.

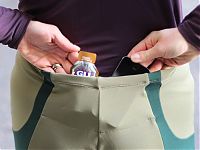
Here you can see that hidden back pocket in action – it can easily store an iPhone 5 or bigger, plus a gel (shown here with Gu Peanut Butter, but their Salted Caramel is also splendid!) or keys, The waistband keeps it all contained and from bouncing around while you move, too. For this pair, since the Cold Gear is quite thick, I actually used a thinner lycra for the pocket piece, and this worked really well!

A taste for gold

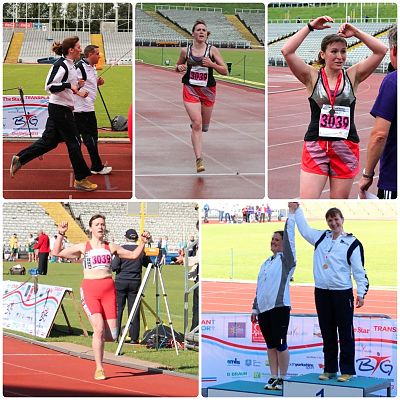
As I mentioned last week, I was up in Sheffield this weekend for my first British Transplant Games competition*, and despite having done specific track training for the past few months, I was absolutely bricking it in the leadup to the first race.

I’ll keep it brief since this isn’t a running site, but the first event was the 3km “Mini Marathon”, which is the longest race run in the games, and my Main Event. It’s good to keep an open mind for this sort of thing, because in the last few moments before the race I discovered that a) my main competitor was out with a stress fracture, b) the race was actually on the roads/trails around the stadium instead of a straightforward track race, and c) there was a fun run occurring at the same time and no separate start area for those of us who were competing in the Games.

Despite all this, I ran really strong (even up the two surprise hills!) and ended up the first female finisher, coming second overall and only about 30 second behind the lead male! I did an unintentional Mo Bot when the commentator told me I came in under 12 minutes!! So this earned me a gold medal for my age group, but also apparently a trophy for the first female for any age (which I’ve not received yet and may just be a rumor?).

Then the next morning was my second race, the women’s 1500m (3.75 laps around the track). This indeed was a true track race, with a gun start and a bell for the final lap! I came out in front in the first 200m and grew the lead over the race, ending up finishing over a full minute ahead of the next finisher! I had to lap a few of the other ladies, which I felt bad about, so I tried to offer encouragement as I went past.

Orange and Pink tie-back teeshirt

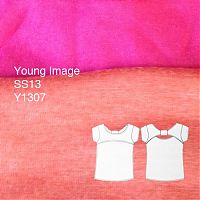
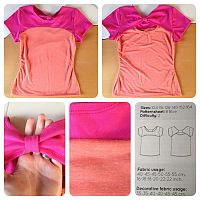
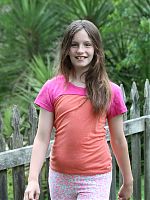
I’ve got so many finished garments to show you this week, and I thought I’d start with one that I actually made back in February (while I was in a drug-addled shingles haze of pain). This top was a gift for my niece, from the Young Image SS2013 magazine.

I loved it as soon as I got this issue, and I went and traced and sewed it right away! The front has got a subtly curved yoke seam, but the back is where all the action is – a double layer with a tied yoke! It’s kinda hard to tell in the magazine photos though, because they don’t show the back at all, even though it’s the standout feature of this pattern!

I made size 164 and lengthened it as everyone says she’s so tall and thin, but those were the only changes. The only thing I’d change in future is to remove a ton of ease from the sleeve cap – there’s way too much in there, arrgh! Jersey tops really don’t need any ease at all, let alone several inches!

So even though I made this back in February, I had to hold onto it until I visited her in Baltimore in April. The shirt was a big hit, but I didn’t want to impose a photoshoot on the kids there and then, so my dad took these back in Virginia, and they only just came through a week or two ago. Thanks Dad!

Baltimore & DC

Last week we flew over to the States for a week – not in Pennsylvania where I grew up (no offence, but I’m kinda sick of visiting there!), but to Baltimore, with a day in DC at the end. We got a lot of strange looks from British friends when we said where we were going – “Baltimore? Really? Why??”, and we’ve been mounting our own Baltimore Tourism crusade since we got back, because it was fantastic!

The reason we were over was because James was speaking at a prestigious tech conference, but I took the opportunity to meet up with loads of friends and family, including the chance to finally meet some fellow sewing bloggers!

I’ve been speaking to Cidell & Trena for at least five years now I reckon, and even weirder is that I already knew their voices from their earlier sewing podcasts (please bring them back!), and there was zero awkwardness when we met up for dinner! It really was like we’d known each other for years, which I suppose we have!


(Note: Jack’s Bistro did not pay us for their product placement!)

Cidell puts me to shame – she posted about our meeting like the same day!! I was also very excited to get more of the Under Armour Cold Gear fabric she’d previously sent, because during the last few months I’d been doing laundry twice a week in order to wear my Cold Gear leggings on both my Tuesday night runs and my Saturday long runs because they’re seriously the warmest leggings I own. Next winter I’ll be much better prepared now!

But they weren’t the only sewists I met – I’d also planned a run with Kathy in Patterson Park near my cousin’s house in Baltimore, which she’s already posted about here!

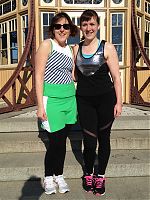
We both wore running gear we made ourselves – she’s wearing McCalls 6435 adapted for running as her top and the Jalie sports skirt lengthened into leggings, and I’m wearing my disco top and my new self-drafted leggings with that fishnet insertion from Tissu in the front thighs and back calves, which you can see a bit better here:

Book Review: Patternmaking for Underwear Design, by Kristina Shin PhD

You’ve heard me mention this book a few times as I’ve been experimenting with various drafts, but I felt it deserved a full review because, frankly, I’m a little obsessed with it right now. My mom surprised me with this when I was ill with shingles and the subsequent nerve damage pain, and it gave me something to focus on right as I was in the midst of my last bout of lingerie sewing.

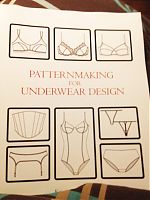
It’s “Patternmaking for Underwear Design”, by Kristina Shin, PhD, and here’s a (pretty bad) shot I took of it’s cover:

It’s primarily a book for drafting your own bras and lingerie (but much more, too), and the biggest difference I’ve seen here in that these bra drafts all start with the underwire shape, and build from there. Every other bra draft I’ve seen starts with a bodice sloper, which is then adapted into a bra shape. The approach taken here makes a lot more sense to me for getting an accurate fit, since there’s so much variation in breast shape and distribution for women who even wear the same size bodice. As anyone knows who’s ever sewn a bra, finding the right size underwire is absolutely key, so it really seems right here to use that as a starting point. And it helps that most women can make a small incision in a well-fitting bra and just trace off one they know fits them!

There’s not really any construction or sewing instructions included in this book, but there are a few pages at the beginning with stuff like tips on cutting lace…

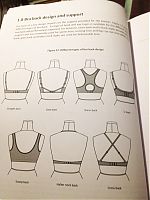
…and the wide variety of bra backs you can use once you’ve got your basic draft sorted out…

…plus several pages of various tables of measurements for different sizes, and exactly what to measure, both for the breasts and the rest of the body.

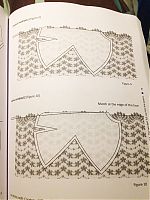
Here’s an example page from the leggings draft so you can see the style of instructions and diagrams. I personally found these easier to follow than Metric Pattern Cutting and WAY easier than any of the Pattern Magic books!

My refashioned Paris race tee

As I mentioned earlier this week, one of the projects I wanted to work on was refashioning the free (but too large) shirt given out at the Paris half marathon a few weekends ago. Pretty much every race these days gives out a shirt, and usually they’re in nice wicking fabrics, but very rarely are they nicely designed, or vests. I prefer to run in vests instead of teeshirts (even if I’m wearing a jacket over top), so after I finished sewing my mom’s latest chic sweatshirt, I set to work on the race tee.

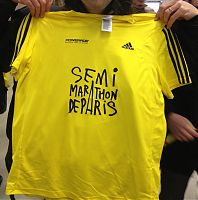
Here’s a “Before” shot, with my friend Daniel holding up his at the race expo (this is the “Medium”, but it’s massive, like a men’s large!)

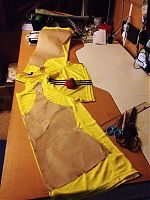
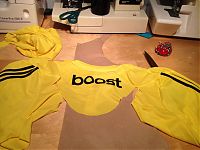
I really like the Paris logo, so I wanted to keep that on the front, but I didn’t care about the adidas stripes on the sleeves or “boost” on the upper back (the new shoe they’re promoting). So the first step was to carefully cut along the sides of the shirt and sleeves, so I could lay the shirt out, folded along the centre front and centre back and pin my (self drafted but based on the Kristina Shin sloper) vest pattern pieces down:

I then cut the pieces out, with seam allowances at the sides and shoulders, but none at the neck and arm edges, since I planned to bind those with some of the black technical strips I used with the disco running top.

These were the only bits of the shirt I didn’t use!

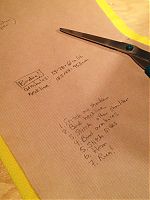
First step is to use my little pizza wheel measuring device along the bound edges to work out what length strips I need…


I caught my mistake before binding – the neckline length needs doubling, as I measured both on the fold!