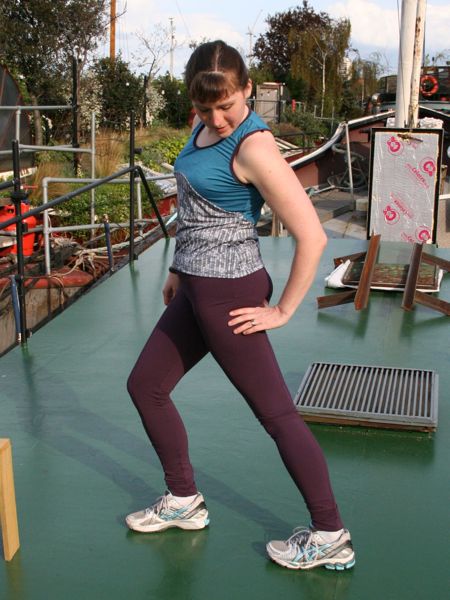
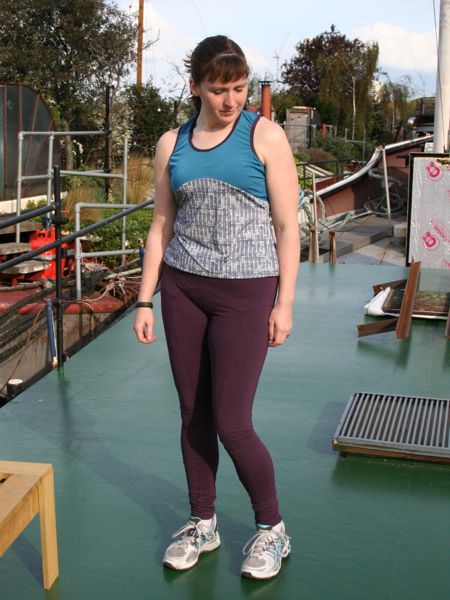
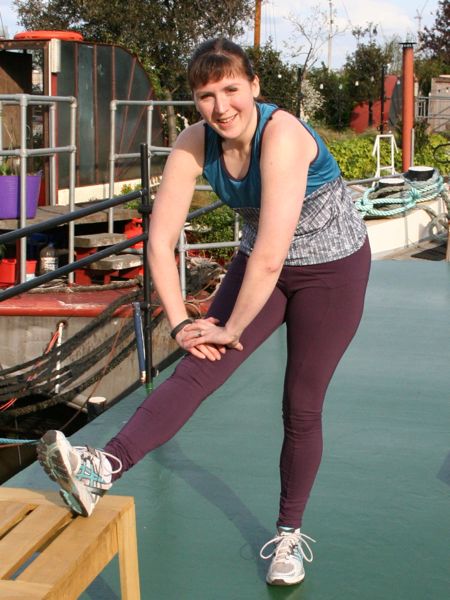
First running gear muslins

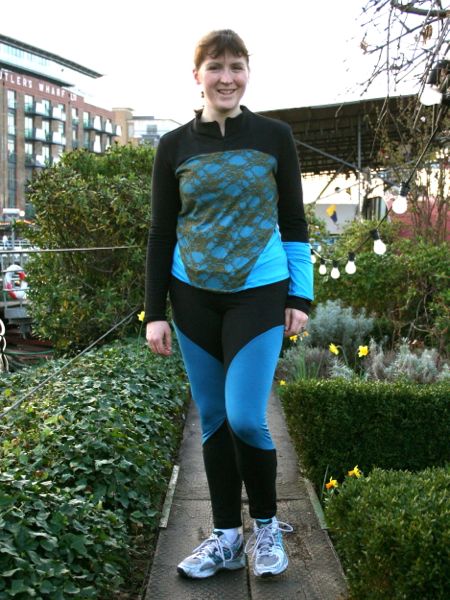
I love it when different areas of my life start overlapping! I’ve been a runner for about 7-8 years but I’ve only really sewn running gear a few times (mostly because my mom knows what I like and gets good stuff on sale for me!). But I’ve got the itch to sew the lycra again, and so I made the first steps towards making my own running gear designs a reality.

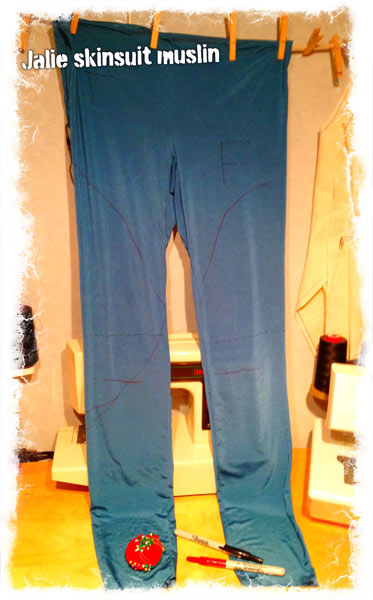
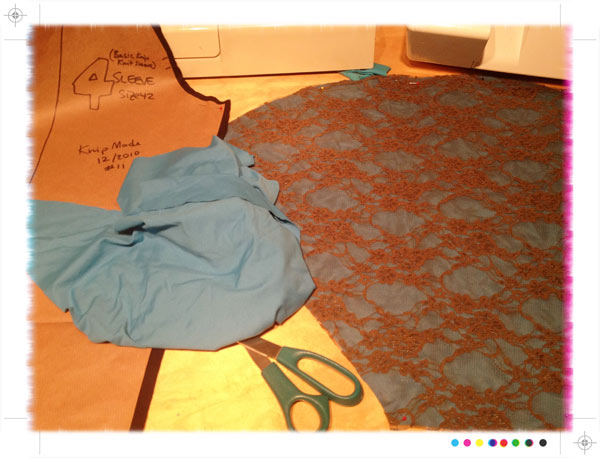
First step was to make quick and dirty muslins to check the fit and mark style lines. The Jalie 3135 skinsuit pattern was my basis for my running leggings (minus the top half and the front zipper opening!). I used the “silk touch” lycra jersey from Tia Knight as my muslin fabric here since it was the cheapest 4-way stretch she had, but it’s surprisingly really nice! It’s got a hand like a silk jersey, but seems a bit too drapey to be ideal in exercise gear, though it should be fine for the occasional accents or panels if I want to.

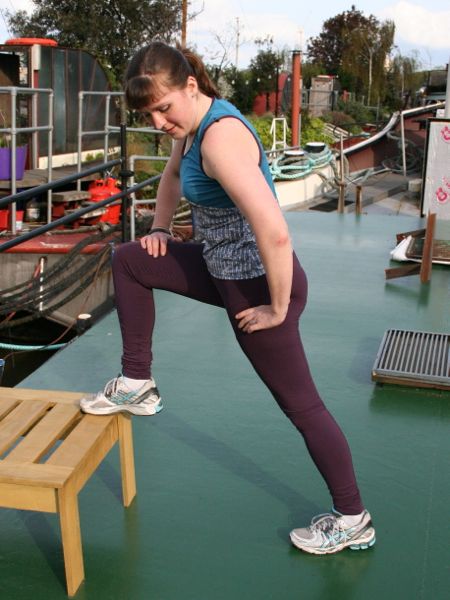
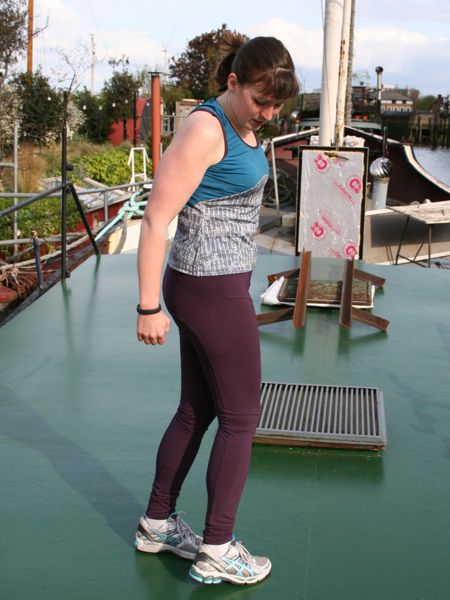
So I made my muslin, tried it on, and while I was wearing it, drew lot of placement and design lines straight on the fabric with a Sharpie:

  • I drew in my waistline just under the pattern’s torso double line
  • I marked the knees on front & back, and also where the curve of my bum lies (helpful for placing design lines later!)
  • I took out some excess in the ankle (no cankles here!) and about 4 inches off the length (the legs are reeeeeeeeally long – maybe to cover skates?)
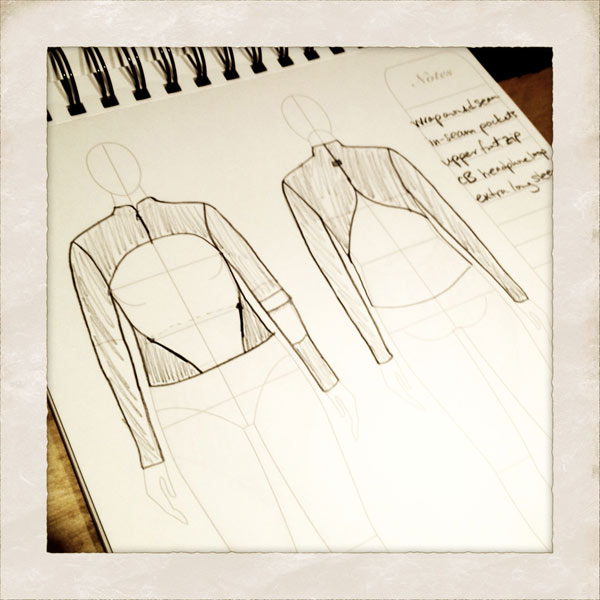
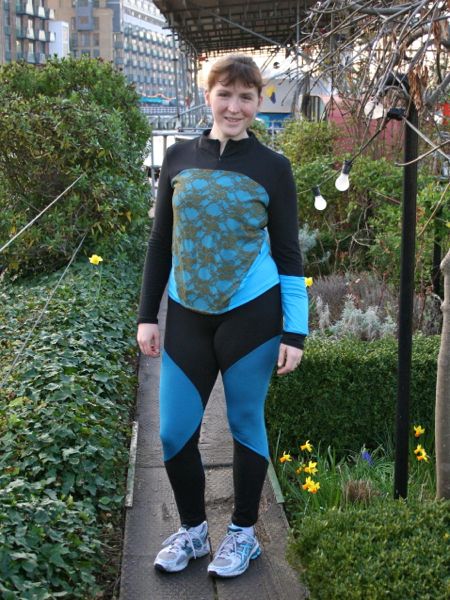
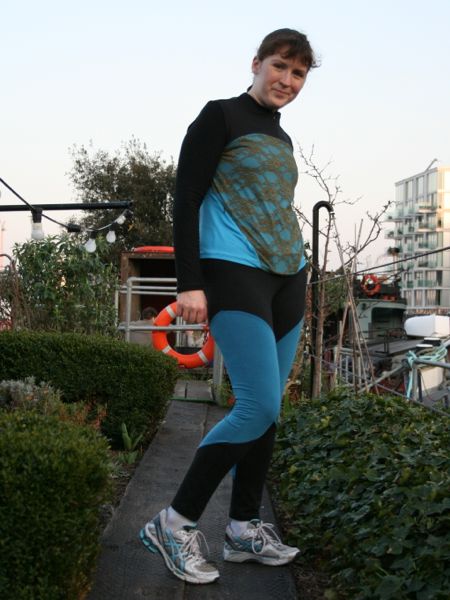
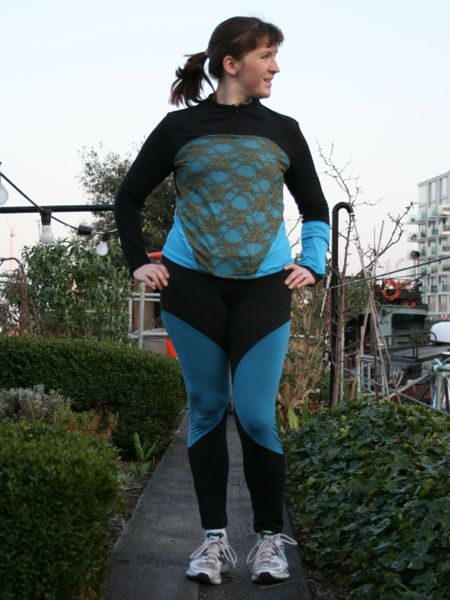
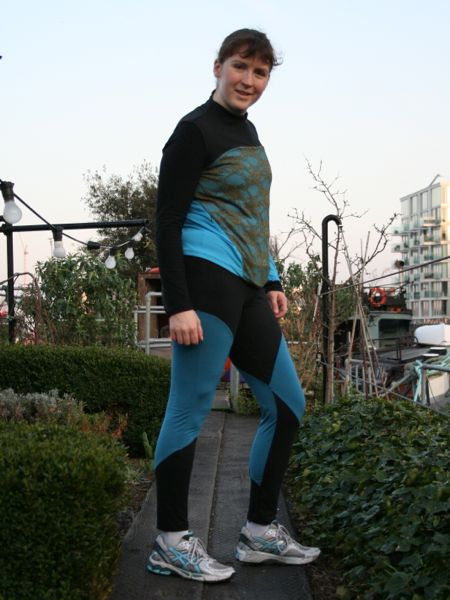
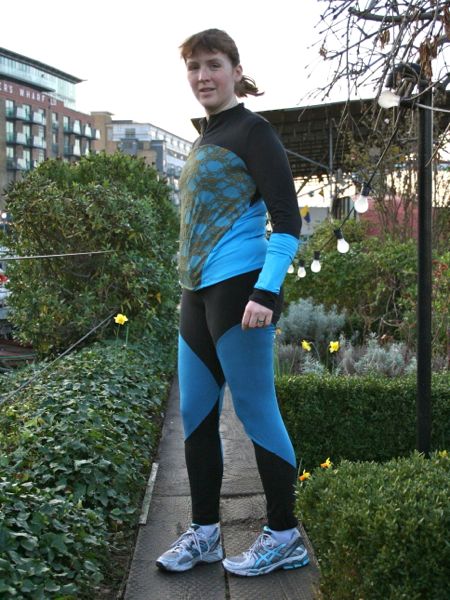
  • And then, finally, I drew in some curved design lines where I thought they might look nice around my thighs and calves

The end result looks a bit like a liposuction patient (which is why I’m not modelling it!!), but it definitely served its purpose!

Sequin running vest and purple leggings

I’m going to break from tradition here and actually post my next two outfits out of sequence from when I made them, mostly because I just shared my elastic waistband tutorial with you, but also because I’m really freaking excited about sewing exercise gear right now. Honestly, it’s starting to become nearly lingerie-levels of hysteria with me – super quick to make, easy to fit, and lots of wild colours and patterns in small doses! But you’ll get to see my “civilian” top and trousers later this week, so no worries if you’re starting to glaze over at all the lycra…

For this set of running gear, I’ve paired up the Papercut “Ooh La Leggings” pattern (UK stockist here) with my self drafted knit block (from Metric Pattern Cutting). And in the case of the top, I altered the seam lines and armhole shape to suit!

You may remember the ex-Prada sequin trompe l’oeil fabric from a few years ago when I used it to make a cowl top. I wear that all the time, but I only had a small piece leftover in my stash, and it was far too lovely to throw away. But with a bit of creative thinking, it was enough for this! Though I think I’ll lower the curve a bit for my next running vest so the peak is just at my underbust…

As you can see with the leggings (or maybe not, the purple fabric is quite dark!), there are no side seams here! The shaped front and back yokes give some really cool, curved seams, and they merge nicely into front- and back-leg seams instead.

Lycra & Lace running top and leggings

It feels like I’ve been talking about sewing my running gear for ages now, but I think that’s just because anything self-drafted and a bit custom tends to take a bit more time and head space than my average project! But I’m happy to report that two out of three of my first pieces are finished now (the sequin vest is awaiting more coverstitch binder practice, but more on that next week).

Both of these pieces are heavily modified (bordering on self drafted) from the originals, but the leggings are based on the Jalie 3135 skinsuit pattern and the top started life as my basic KnipMode long sleeved teeshirt.

You’ve seen a sneak peek of the leggings earlier, but now you can see them paired with my long sleeved top, though the different turquoise shades mean I probably won’t wear them together often in real life.

The long sleeved top needs three different fabrics in order to get a contrast on the upper body and again at the hip pockets. So I’ve used the black supplex for the top and sleeves, leftover turquoise for the lower back (which wraps around to the front hips), and the same turquoise but overlaid with olive green stretch lace for the front body.

The leggings use black supplex and dark turquoise “silk touch” lycra for the contrast panels. You can see my cool seaming on the thighs below, and in getting design lines to match up, I favoured the outer seams matching. It means it’s not quite as cool on the inner thigh seams, but it means I get a nicer overall panelling.

Fall/Winter 2012 Sewing Shortlist

A lot of sewers like to “Sew with a Plan” (SWAP), but I prefer to call this a “Shortlist” rather than a “Plan”, so I’m free to still change my mind and add/remove items as I go along! My main goal here isn’t so much to create a capsule wardrobe that can be worn together, but more to use up fabrics and/or that have been in my stash for a while that I’d really like to just wear.


(Click to enbiggen!)

From the top down, in no particular order:

  • KnipMode 12-2005 #10 – I’ve got some non-stretch denim aging in my stash from a few years ago, and I love KnipMode’s style lines for these. My wardrobe is in desperate need of more jeans, hence why there are two pairs in this Shortlist!
  • Altered Burda 06-2012 #129 – Now that my stretch satin from Gorgeous Fabrics is in hand, I can finally make the final version of this dress after completing the drafting and muslins back in July.

Coverstitch binder attachment tips & tricks

Way back when I was making my first muslins of my new running gear, I realised that the methods I’d previously used to finish knit necklines (elastic, FOE, serged bindings, etc) were just NOT going to cut it on slippery exercise lycra. The results were awful and sloppy, so I allowed myself to be convinced by Pattern Review that a coverstitch binder was the way forward.

At £80 a pop, they’re not a purchase to be taken lightly, and they’re probably about the most expensive thing you can buy for your sewing room, short of a machine or a dressform! But I wanted to ensure the most hassle-free experience, so I went for a brand-name Janome attachment rather than one of the cheaper, much more hacky eBay jobs. I bought mine from Jaycotts and Janome shipped it directly to me:

Unlike a lot of the eBay binders, this comes with everything you need to get started – the big metal plate, the shorter foot, and a big set of instructions on top of the binder attachment itself. So it’s expensive, but you don’t need to then go and buy all the non-optional bits separately – but I can understand the allure of just buying the binder for your second or third if you’ve already got the plate, foot, and instructions!

Yet more lycra…

Are you bored with lycra yet?

If you recall, I’m sewing three different pieces of running gear – leggings, a vest top, and a long sleeved top. The vest top has stalled while I wait for my new coverstitch binder to arrive, but I was able to finish my leggings this weekend and cut out all the pieces for the long sleeved top.

When I went to look through my stash for fabrics, though, I realised that the long sleeved top needs three different fabrics in order to get a contrast on the upper body, and again at the hip pockets. So I’m using the black supplex for the top and sleeves, leftover turquoise for the lower back and front hips, and the same turquoise but overlaid with olive green stretch lace for the front body. I’m thinking a bit of lace in the running community won’t go amiss.

But now this top is stalled while I await more short, black invisible zips (which should arrive with my binder!) for the pockets and the upper front!

It’s realistically looking like I’ll only have my leggings ready for the Paris half marathon on Sunday, so I needed to take them out for a test run last night prior to the big event.

Be prepared for a totally unflattering, post-hour-long RDC session photo…

(I’m wearing the blue Nike pinny over my jacket ‘cos I’m a group leader!) Overall, I’m really happy with the fit. The ankles are still a bit baggy (even after I took them in a bunch!), but the fit everywhere else was perfect. I was a bit concerned about chafing since I don’t have a flatlock machine so my overlocked seams make small ridges inside, but they were absolutely fine, and the waistband was very comfortable and sat exactly where I wanted it to be with no shifting or tugging. Result! I’ll totally be making more of these from my customised base pattern…

MyImage Purple coat – in progress

Yesterday I mentioned that I’ve started sewing the asymmetric, collared coat from the Winter 2011 MyImage magazine, and after a prep period that felt like forever (probably exasperated by the fact that my ironing station is hovering around 0C/30F), I’ve now got some progress to show you!

I’m sewing this up in a wonderful purple basketweave/boucle coating, which was another gift from Claire (she’s so good to me!) at the end of last winter. I always like to underline my coats when I can to just add that little bit of extra warmth, but it made even more sense here as it will help to stabilise the coating fabric and prevent any bagging out that might otherwise occur with looser-weave fabrics. The alternative is to block-fuse the coating with a lightweight interfacing, like I did with my Patrones duffle coat.

For this coat, all the facings were interfaced (the usual front and back facings, plus the front and back hip band facings), and pretty much everything else was underlined in black cotton flannel. This meant there was a lot of prep – everything but like 3 pieces needed underlining or interfacing! I love sewing, but prepping is dull dull dull work!

I machine-basted the flannel underlining to the coat pieces here, because frankly, the prep work was tedious enough as it was. I normally hand baste my underlinings, but in this case, the coating and the flannel “grabbed” each other quite nicely, so this, plus the walking foot, plus a long basting stitch meant it felt okay to do it by machine. I still made sure to never turn any corners though (when basting underlinings, you always stitch to the edge, cut the threads, reposition, and stitch the adjacent side so that you don’t create puckers at the corner)!