Grey leather skirt – muslin

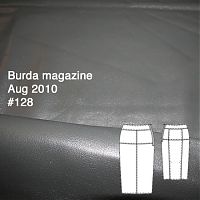
You’ll get to see my Manequim silk blouse tomorrow, but in the meantime I thought I’d give you a progress update on the fourth item in my March Mini Wardrobe, the leather skirt (Burda magazine 08-2010 #128 – though #127 is nearly identical).

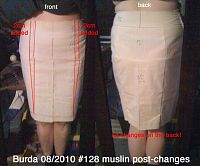
I’m making this skirt in some utterly luscious grey leather I bought while on honeymoon in New York, and despite having sewn with leather loads of times before, this is my first real leather garment. So knowing what I know, I knew I had to make a muslin first because once you sew leather, it’s done – the needles holes are permanent so you can’t rip out stitches!

I made up a quick muslin at the end of February, and, unusually for Burda, the size 42 was too tight over my hips. Rather than trace a bigger size (boring!) I drew two long lines up the front of the skirt on either side of the centre front. On the waistband and yoke pieces, I added 2cm width to each line, and for the lower skirt piece, I made a triangular wedge which tapers to nothing at my marked hem.

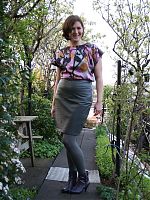
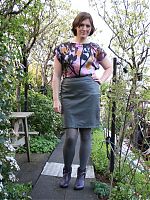
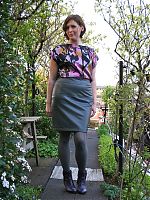
Grey leather pencil skirt

I’ve now finished the fourth garment in my March Mini Wardrobe plans and I think you’re going to love it as much as I do!

I bought some utterly luscious grey leather when I was in New York in September, and I’d thought about a few different patterns (even going so far as muslining one I never showed you), but I finally settled on the long, slim pencil skirt from the August 2010 Burda magazine (#128).

Since we’re talking about leather here and you cannot unpick any stitches once they’re sewn, I made a muslin, which revealed a few minor fitting issues which needed fixing in the final skirt. Other than that, I shortened the length to make it above the knee (which also eliminated the back vent) and removed the centre front seam to improve the look.

(Vote for my) March Mini Wardrobe

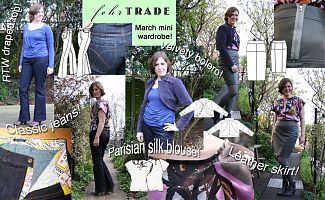
It doesn’t seem that long ago that I was first laying out my initial plans for this mini wardrobe, but now I’ve had some time to step back and have a look over what I managed to accomplish last month. I made this wardrobe mostly for myself, to use some luscious fabrics from my stash in combination with patterns that really appealed to me, but I also kept one eye on the contest requirements running over at PaternReview.com to make sure I remained within their rules, too. Here’s my entry into their contest, or you can just read on below…

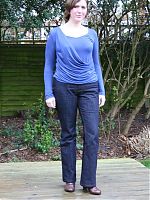
I started with a blue viscose, draped knit top that I’d bought from ASOS and really liked, but I wanted to wear with both casual and dressy bottoms.

To coordinate, I sewed:

1. Jalie jeans – I’d made a muslin but the waistband was horrible so I had my work cut out for me on this pair using great quality stretch denim from Mood in NYC, plus some London streetsign fabric for the waistband facings and pockets. I used my vintage hand crank Singer machine for all the topstitching, plus I got to use my vintage buttonholer attachment and high quality rivets for the first time! I fixed all the waistband issues in this pair and these are now my favourite jeans. Read more…

March Mini Wardrobe

I’ve finished my post-coat winter sewing plans apart from the La Mia Boutique draped skirt which I’m feeling now is better suited for spring or summer, so I thought I’d dip my toes into the Pattern Review Mini Wardrobe contest that’s running throughout the month of March.

This is a pared-down version of their usual, sprawling wardrobe/SWAP contest, so this time around you need to create a five piece wardrobe in four weeks, using one item you already own (sewn or RTW) and be able to create at least six different outfits from this. I’m actually going one better and aiming to sew five pieces rather than four, but that may fall by the wayside depending on how the month goes.

Here’s what I’ve got in mind:

Navy blue riding trousers

Jacquie made these trousers as part of her recent wardrobe collection (she’s “dingyadi” on PR) and I instantly knew I had to make them, too. Like her, I was put off by how skin-tight these looked on the Burda model in the magazine, but in real life, they fit really nicely! Unlike her, I left off the front patch pockets, though, as I figured there was enough going on everywhere else!

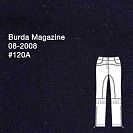
They’re from Burda magazine 08/2008 #120A:

They’re great trousers, but there’s just so many freaking pieces, omg! And the topstitching!!

Take the front leg, for instance. On a normal pair of trousers, it’s one piece (maybe three if you have a pocket). On these, the front leg is comprised of three pieces before you even get into the pockets (so 6 in total for mine, or 9 if you chose View B with the added pouch pockets with the flap!). There’s a scooped pattern piece at the inner thigh in the front and back, and lots of horizontal topstitching across the knees in addition to topstitching pretty much every seam of the trousers, too.

Bridal bodice – buttons, lining and shopping!

Ok after that little lingerie diversion (and a day spent being filmed for BBC1!), we’re back on the wedding gown!

First up was a quick fitting of the shell with all the boning pieces inserted and the waist stay hooked. And I can breathe a sigh of relief, because it’s looking good. A tiny bit of horizontal pulls around the zipper (which can be fixed by laying off the ice cream a bit) and a bit of boning show-through at the centre front (which I’m going to hold off worrying about for now, but I may just shorten that boning piece so it stops below the bust).

So I can push on ahead, safe in the knowledge that there’s no major fitting issues…

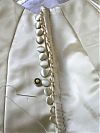
First up – I sewed on all 13 original covered buttons along the right side’s zipper, matching up with the original satin loops I placed along the overlap during the zipper insertion step.

On the surface, these look like ordinary covered buttons, but look at the underside!

I’ve never seen buttons like this before in my life! Instead of a shank with a hole, there’s a mound of stuffed fabric to sew through! What a strange vintage detail! I’ve learned so much from taking the original gown apart…

Silver tweed jacket

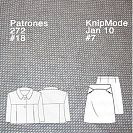
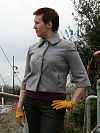
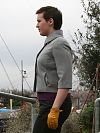
It’s time now to turn our attention to the upper half of this silver tweed Planned Partnership, the little boxy cropped jacket (#18) from Patrones 272:

You saw the jacket as part of a classy suit, but how does it work with jeans?, I hear you ask.

As it turns out, even better!

I actually prefer this jacket hanging open instead of buttoned up (which is why I left off the button loop at the very top of the collar stand and the small button hidden under the collar that the pattern suggested).