Our DIY wedding – the flowers

To carry on with the rest of our DIY wedding (oh no, it didn’t end with the wedding dress!), the flowers were something we’d both thought about, but hadn’t really wanted to go overboard with, preferring instead for subtle and personal accents. My bridal bouquet of white roses, plus two bridesmaids’ bouquets, and a ton of rose buttonholes for the gents, were all made by James’s Auntie Anne, who is a keen amateur florist. She even sent me a self-addressed envelope to get fabric swatches of the bridesmaids dresses so she could best match their bouquets to their dresses!

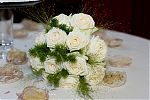
How gorgeous is this centrepiece, too? I told her since we wern’t having “wedding colours” (ugh ugh ugh!) that she should either go for all colours, or just white. So she incorporated the bridesmaids’ dress colours into it and I just love it. I think it’s just stunning, and I’m glad we got to enjoy it during the ceremony and then again during dinner at the top table.

Our DIY wedding – Cupcakes

Mmm, cake, the sweetest decision to make for any wedding, yet one that’s all-too-easy to get horribly wrong (Unfortunately one wedding I attended years ago had a beautiful cake that was mouldy inside when cut into!!)

Luckily, we had Sarah at Maison Cupcake, a friend of a friend and an amaaaazing food blogger and baker, on our side. Honestly, she’s already in my RSS feed reader and I want to eat her whole site on a regular basis!! Like James’s Auntie Anne (who did our flowers), Sarah’s also a “keen amateur” and not usually a baker for hire. With the quality and detail in the cakes she made for us, though I’m sure she could make a living from this if she wanted to!

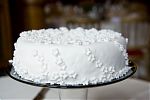
We mostly wanted cupcakes, both for ease of serving and the ability to taste more flavours, but we also opted to have a small cake for us to cut. All we stipulated is that we didn’t want a fruitcake (as is traditional for UK wedding cakes) and that we didn’t want to use a cake topper or have writing on it or anything. Sarah suggested something like this chocolate and booze-soaked cherry cake and we nearly bit her arm off! She topped it all with a delicious fondant icing, and yes, she made all those tiny flowers herself!!

Our DIY wedding – printed materials

One cost that can add up really quickly for a wedding are all the printed materials you need for the day. I’m not just talking about the invites (which can get ridiculously expensive if you go the letterpress, inner envelope, return card, RSVP envelope, etc route!), but also all the other bits of papery stuff that is forgotten until a few days before when you realise you actually do need them!

The illustration

The first step in our wedding design process was to commission a cartoon drawing of us from the illustrator John Allison (of Scary Go Round fame). James has been a big fan of his comic for ages now, and we both really liked his design style. So we sent him a photo of us, a brief description of James’s suit and my dress (at that point I was still thinking of that Vogue cowl-neck number) and to imagine 6 months’ more hair on my head. Which somehow he got eerily spot-on.
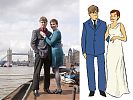
(Apologies for the awful jpg artifacting – I’ve not got the big version of the illustration in front of me to work from)

The wedding website

With the illustration in a nice, big file, we could then set about making our wedding website, which was to be the crux of our invitations. We both work in web developments, and absolutely everyone we know, right up to my grandparents, has an email address, so this way we could put the bulk of the information for both receptions on our site and be able to update it later, too. The RSVPs were all online, using a Google Spreadsheets form (easy to set up, easier for people to reply to than a trip to the post office, and we could both get access to the running tally), and all the usual venue info and registry links could be added without having to worry about word counts and layout.

I can now post a link to it for you to have a look at James’s standards-compliant coding prowess, because I don’t have to worry about you all messing up the RSVPs or gatecrashing or anything! The worst that can happen is that you decide to buy us some more insulation off our registry…

Invites

So with the website in place, all the invites really had to do was give folks the date, and point them towards the website. We ran up two sets of postcards from Moo.com (one set for the UK wedding and reception, and one for the Pennsylvania reception). And to set the tone, the wording was “James and Melissa are finally getting married!” ha!

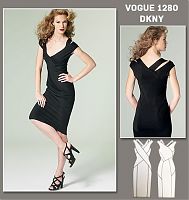
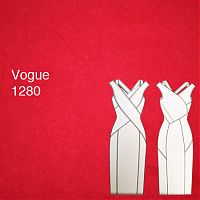
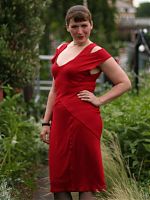
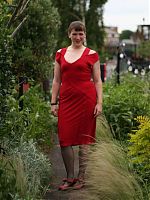
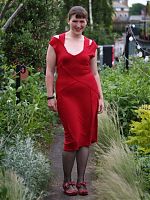
The Donna Karan red vixen dress (Vogue 1280)

I don’t often sew Vogue patterns, but I am a massive fan of the Donna Karan patterns’ design and execution, so it’s no surprise that I added Vogue 1280 to my Wish List the second it was announced recently!

Happily, my mom saw there was a pattern sale where she lives in the USA and offered to buy a few patterns for me at US sale prices – she paid less than half the price for the pattern + shipping to the UK than I’m charged just in postage to the UK for the same pattern! I wasn’t planning on sewing a dress right now, but I got so excited when I saw Vogue’s numbered pattern marks for the first time (possibly in response to my complaints regarding Vogue 1259’s instructions), that this dress moved quickly up my Must Sew list.

Like all DKNY & Donna Karan Vogue patterns, this one’s a great mind puzzle to put together! It also has the joy and wonder of looking like a total mess until the very end, when it all comes together into a dress shape. I found it to be true to size, so go with your measurements, not some vague idea that all Big Four patterns have tons of ease. Most of the pieces are cut on the bias (not that it means much in a jersey!), and it hugs the body very closely. If you’ve got any lumps and bumps, though, this is not the pattern to hide them, and so you’ll probably be wearing Spanx underneath in addition to the strapless bra the bodice requires (Full disclosure: I’m not wearing Spanx in these photos!).