DIY Wedding Fascinator – in progress

The Gown is progressing nicely, the shoes are bought and are being broken in little by little (while doing such glamorous tasks as watering the garden and taking out the rubbish!), so it’s now time to focus on my hair. In the past I’ve made fascinators (First in gold and then in silver) with a comb base that worked well for my long, thick, and straight hair, but post-chemo my hair is only two of those things so I’m using a headband for the base of this fascinator. In some strange twist of Life Imitating Art, my hair looks almost exactly like it does in the wonderful cartoon of us drawn by John Allison way back in March when I had barely any hair at all!

It appears that my “How to Make a Fascinator” tutorial vanished off BurdaStyle during one of their site moves, so I’m really glad I saved it as a Pdf a while ago so you can download it here now!

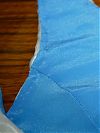
In the past my construction technique mostly centred around the glue gun, but for this one it just felt a bit wrong to do so when the rest of the ensemble is full of couture techniques. So for this base I used two teardrop shaped pieces of blue wool felt (the only colour I had on hand), with one of them stiffened with the ultra-rigid interfacing I used on my sun hat. I then covered this felt with a scrap of the vintage dress satin, stitched on the underside to prevent any puckers at the edges. You could omit this step if your felt matches the colour of whatever you’re covering it with, but the blue kept showing through the first few layers of feathers so I needed the satin layer.

I specifically chose a thin headband that had a fabric covering around it so I’d have something to anchor my stitches to, so keep this in mind while you’re shopping, as it’d be difficult to sew onto an all-plastic band (in which case you’re probably better off using glue). I then sewed the satin-covered base onto the headband, making sure my stitches went around the band each time for strength. Since the top was being covered in feathers, I didn’t bother to hide my stitches on the top side.

Once the decoration attachment is all complete, I’ll stitch the other blue felt piece to the underside of it all to hide the stitches (and band) and create a bit of grip on my hair.

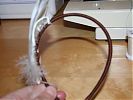
Here’s the fascinator with just the white goose feathers attached:

Sewing these onto the base was way easier than I was expecting. I just took 2 or 3 stitches over the central portion of the feather near the base, and that was enough to keep them secure. I’m leaving them unattached at the tips because as the headband stretches whilst worn, the feathers stay close to my head anyway.

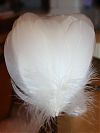
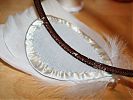
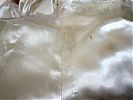
Here’s the underside so you can see my stitches and that super-stiff interfacing:

Our DIY wedding – the dresses, makeup, and final photos

Either groan or rejoice, but this is the last of the wedding posts!

The bridesmaids dresses

If you cast your mind back, you’ll remember the selection process, how I fitted and then hand-pleated, the lined, silk jersey dresses for my two bridesmaids, but even after I finished them, there wasn’t a chance to see either P or G wearing their dresses, let alone together!

It was really nice on the wedding day to be able to see both of my great friends looking so happy and nice, and comfortable, too, in the bridesmaids dresses I made for them.

Their colour choices really suited them both, too, and even though I offered to shorten them after the wedding, I know P (in purple) is definitely keeping hers as a wonderfully posh maxidress. (S was my Man of Honour, but no, I didn’t make his suit!)

My dress

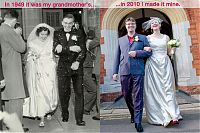
You’ve seen it in pieces and finally, in comparison with my grandmother’s original gown, but here’s some more photos where you can see the seamlines particularly well:

Final wedding "in progress" update

This will be the last update you’ll get before the wedding on Saturday, so after this it’ll all be finished photos, which is rather exciting!

I almost winced trying on my gown for the final time on Monday night – I thought for certain there’d be some niggling problem I’d have to fix, but no, phew! Everything’s still good. My sister-in-law marked out a nice curve in the train, trimmed it to within an inch or so of the pins, and then I did the hem last night. As it turns out, I’ve still got a good two feet of train left, and the thumb loop is intact, so I’ll be able to easily lift it up for the dancefloor.

The original hem was just a narrow turned hem that’s stitched by machine, so I did the same thing on the new area to keep it consistent. First I folded the allowance over so the fold was at the marked hem line, and I machine stitched as close to the edge as I could get. I pressed this (with the indispensable silk organza press cloth!), then carefully trimmed away the allowance as close to the stitching as possible. I then folded over the hem again and stitched about 1/8” away from the edge, then gave it another good pressing.

But this wasn’t the only hem I sewed last night, no no! I also hemmed both bridesmaids dresses! My sister-in-law was a huge help here, too, by hand basting the hem of each dress very close to the cut edge of the fabric. So when it came time for me to send them through the coverstitch machine, not only did I have a nice line to follow, but the basting kept the silk jersey from twisting underneath like it loves to do.

DIY Wedding Gown – attaching the bodice and skirt

Finally I can give you another progress report on the wedding gown! Don’t worry, as you can see below, I’ve been continuing to work on it on my weekends and Wedsnesdays, so I’ve got a lot of progress to cover!

For the first time I got to turn my attentions to the skirt, which is exactly as it was when it was attached to Granny’s dress, albeit separated from the bodice at the (very gathered) waist seam. But there was a prominent blue stain in the centre front (CF) panel at about thigh-height from the blue tissue paper it was wrapped in for 60+ years, so the first step was to unpick and remove that entire panel. I then moved the two triangular sections that had been on either side of it together to form a new CF:

I actually prefer the way these two look together, forming a beautiful triangular, almost art-Deco detail at the CF!

But back to the bodice, where I had completed prickstitching along the entire neck and arm edges. I just free-handed this without my post-it guide and I actually think this looks better than my zipper insertion!