Thank You Part Two

Following on from the post “Thank you!” from a few months ago, I’ve now got three weeks to go before I go into hospital for my bone marrow transplant so I wanted to get my address up for any of you who’d like to send some boredom-relief packages.

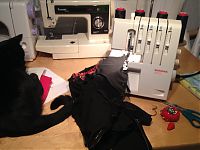
Please read the earlier post for an idea of what I’m talking about here (it’s okay, I’ll wait. . . . . All done? Great!). In addition to all that, I will have my little red sewing machine and my Mac laptop (with low-bandwidth internet) in my little room with me, if that helps with ideas.

Ground rules

  1. Please wrap all boredom-buster(s) individually inside the postal envelope, enclosing your name and email address inside! (as I will gather them all together in one place to open one each day so they’ll get separated from their envelopes and I want to know who to thank!) Newspaper/magazine/recycled flyers are more than fine for wrapping!
  2. It is extremely important that you do not send anything if you or anyone in your home has even the slightest cough or sniffle. Please wash your hands for good measure anyway before wrapping, too (I will have zero immune system and what would cause a slight cold for you will result in a serious illness for me on top of everything else!)
  3. I am not allowed any flowers or fruit you cannot peel (though, admittedly that’s probably more pertinent for in-person guests…) because of the chance of fungal infections.
  4. If you’d like to send a card, please hold off – I’ll post up my hospital address as soon as I’m in so they’ll come straight to me (I don’t want the nurses to have to deal with any early arrivers, and I don’t want my co-workers to have to lug in a ton of post for me, either!)
  5. Please forgive me if I sound like a bossy, ungrateful cow. 🙁

Address for parcels only:

Sewing the Cos “Made By You” Women’s Shirt

Earlier this week I showed you my finished version of the Cos “Made By You” women’s shirt kit with the promise of giving far, far more details on the kit itself and some construction instructions so strap on in! This is a HEFTY brain dump intended to help others who’ve bought this thinking they were getting a full sewing pattern, or who bought it and no longer have Cos’s video online to help. Or frankly, if you’re just intrigued about what a high street shop thinks a home sewing product should be!

How to use your Print Club fabric kit

Big, big thanks for all your wonderful comments and enthusiasm over the new Print Club project and especially, Laurie King’s amazing first “Head for the Hills” print! We’ve both been blown away by the demand for the kits, so don’t wait around if you’re tempted – they really are very limited edition…

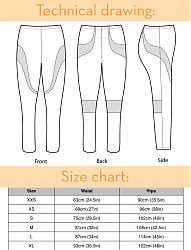
Today I wanted to give some tips for using the kit, especially for all of you who bought the Steeplechase Leggings pattern alongside it!

How to add side pockets to your Steeplechase Leggings

I’ve got a little something different for you all today, compliments of fellow reader and runner Elaine Klein, who emailed me to show off a fantastic modification she did to add side pockets to her Steeplechase shorts.

The Steeplechase Leggings pattern includes a hidden back waistband pockets, but, if like Elaine, you too prefer to keep your keys or lip balm on your leg instead, then read on and see how she added these. Thanks so much, Elaine! -melissa

When my running buddy suggested that we celebrate our favorite trail run by wearing watermelon patterned shorts, your patterns helped us realize that kinda silly dream. Our matching melony shorts were quite a hit! Thank you.

More remarkably, as I dialed in the steeplechase pattern to suit me perfectly (having learned from your blogs and community that this is possible and preferable to wearing ill fitting running shorts) I grew confident enough to tinker a little, so I added pockets to my shorts. I tried the pouch pocket, but I prefer side pockets – I usually tuck an ID or gel or tissue or lip balm in these, but they are large enough to hold my smartphone (though not secure enough to do so comfortably for a long run). They’re also a fun decorative accent.

A Mountain of Your Makes (Part Three)

We’ve made it – thanks for climbing the mountain with me! I hope these last few makes of yours are as inspiring to you as they are to me. I always love seeing my patterns go off and have a life of their own – being interpreted in ways I’d never imagined, changed to suit different bodies, activities, and tastes, and truly become your own.

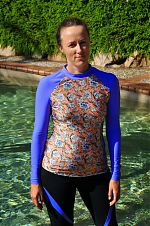
Katherine’s Surf to Summit rashie


Read more…

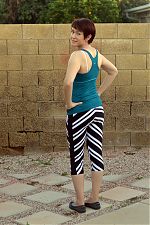
AZGreyGirl’s two different striped Duathlon capris


Read more…

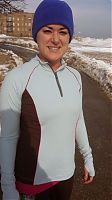
JessieBear’s Surf to Summit with ingenious thumb-hole mitts and piping


Read more…

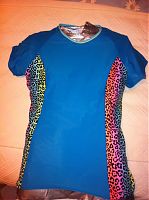
Elizabeth’s rainbow leopard Surf to Summit for her sister


Read more…

Diary of an indie patternmaker, part two

Read Part One here!

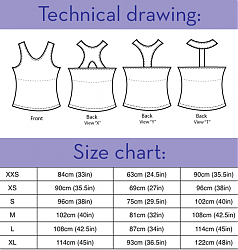
While I was in the States visiting family, I also took the brave step of contacting a few other activewear-sewing ladies and asking them if they’d be interested in pattern testing for me. I knew that I wanted to keep the testing pool small, but also use sewists who I knew had sewn their own exercise gear before, both so that they were comfortable with the basic techniques, knew what they liked, and also could potentially go out an exercise in my patterns for some useful on-the-road feedback. I was utterly delighted when every single one of them said yes, and this really started the timeline towards Launch Day, which I knew I wanted to be before the usual New Years resolutions exercise explosion. Since I started the XYT Workout Top first and it was further ahead in the patternmaking process, I’d give the testers two weeks to test that, a short break, then hopefully I’d be finished with the PB Jam Leggings by that point so they could have two weeks to test that before I’d get their feedback and finish up everything for Launch Day.

The XYT Workout Top pattern pieces were pretty much ready for testing, but I knew I’d have to create the tech drawings as well as all the illustrated instructions at some point, and, while I used to be a semi-decent drawer, I am totally crap at drawing anything digitally. Like, comically crap. So my first attempts at the tech drawing were done by my sketching them out on paper, scanning it in, then tracing over top with (yes, you guessed it) The Pen Tool in Illustrator before cleaning it all up, mirroring to make things symmetrical, etc.

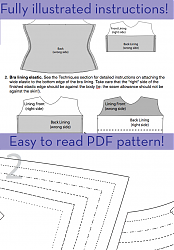
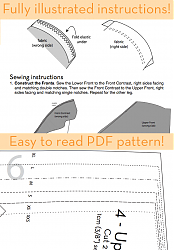
The instruction illustrations were all done by myself, too, but I did all of those without the hand-sketching step, sometimes using the pattern pieces themselves as a starting point (since I already had those digitally, I just had to shrink down the scale!), and sometimes just referring to photos I’d taken during construction. I never quite appreciated exactly how long illustrated instructions take to create, but my god, they took a LONG TIME. The step-by-step illustrations were easily the most time consuming piece of the entire patternmaking process, EASILY. I totally understand now why some indie designers skip the illustrations entirely, because it would be SO tempting to, and it’d make the process to Launch Day so much quicker. But in the end, I’m glad I did do them, as I think they make the instructions a lot clearer, especially for non-native English speakers.

Another thing I wasn’t really expecting was how the pattern testing process would really work. I guess I kinda thought that I’d send them out, some testers would have some fit issues, others might not think the mesh bra worked for them, I’d get some feedback, and maybe catch a typo or two. Ha! I’m so, so glad I have the amazing pattern testers I did, because both of my patterns needed major revisions thanks to my testers. Yes, it hurts at the time, but I’d much, much rather resolve these issues before release than have paying customers go through them later!

Manequim April 2013 (Oscar dress pattern party!)

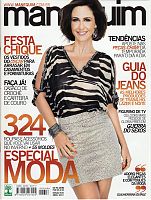
I’ve been subscribed to Manequim (direct with their publishers) for going on three years now, and I’ve only had 3 issues go missing in that time, which isn’t too shabby considering the distance. But I’ve never opened up my envelope before to find, uhh, some other random Brazilian magazine!

As it turns out, loads of other people also got the same “Mundo Estranho” (“Strange World”) magazine instead of Manequim, and the publisher said ours would be sent out, but then May arrived with no hint of April. So I have to thank Isidore for alerting me to this review on a Brazilian site showing that April’s issue was not only the annual Oscar special (which I must own!) but it also contained a ton of fantastic blouses! So I grudgingly went and bought it on eBay just so I wouldn’t miss it (that “luma1985” eBay seller was fantastic, btw, and I’d definitely recommend her if you want any one-off issues)!

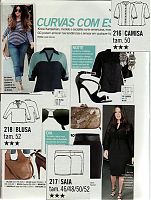
And you know what? I’m totally glad I did, because IMHO it’s one of the best issues for ages, which you can tell just by the number of scans I took from it here!

Nevermind the photos are of a Kardashian – the top and the curved yoke skirt here are fabulous and Plus-sized!

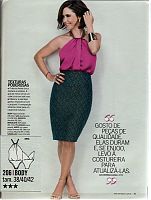
I really like the idea of using a necklace as an integral part of this top design. It’s a backless bodysuit (therefore, not for everyone!) but I really like the ingenuity and glamour of it here.

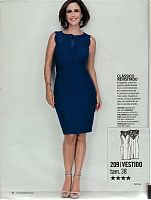
The embroidery around the neckline of this sheath dress is just stunning! It’s almost like a motif, but the pattern has you do the design yourself from some chiffon yardage. It’d be a lot of work, but in my experience, things like this are great for long car journeys!

The Fuchsia party dress

Ooh I am so excited to show off this dress to you, and even moreso because it has a great origin story!

Did you know there’s a new sewing, knitting, and jewellry-making social network in town – Kollabora? It’s from some of the people behind the original BurdaStyle.com and I helped beta-test their new site a few months ago.

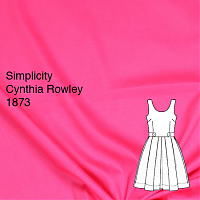
As a big Thank You for sending in tons of detailed bug reports (a nice side-effect of my day job, which involves a lot of online testing, is that I can write a mean Steps to Replication!), they offered to send me any fabric and pattern combo from their shop! They stock loads of great independent patterns like Colette, Wiksten, and Sewaholic, but I thought I should pick something I wouldn’t normally buy myself. So keeping that in mind, I chose this very! bright! fuchsia stretch cotton sateen from Mood + matching thread + Simplicity 1873 (one of the Cynthia Rowley designer patterns).

I made View C – the low neckline & short hem option, but without the button tabs at the waist. I ended up making size 14 instead of my usual Big Four size 16 because 14 was the biggest size in the envelope I was sent, but it turned out just perfect in the end – nicely snug at the waist, but not overly tight. With a skirt this full and pleated, I really think it needs a nipped-in waist, and that’s another reason I didn’t want to add any bulk in the form of the button tabs there, either.

The Motherload of KnipMode – Part Two

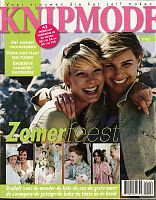
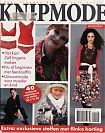
You can read my roundup of Part One of the haul of older KnipModes from Hilde here, but now it’s time for the exciting conclusion to my newly-acquired stash of KnipModes from 2005 through 2007.

KnipMode May 2006

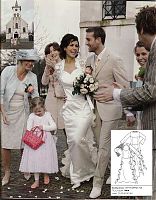
Wow Knip have gone full-on wedding crazy here! The bridal feature takes up a good third of the magazine! Ok so the wedding gown is not really to my taste, but I still think it’s a shame that the pattern is a special-offer to post away for and isn’t included…

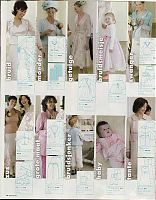
…but the patterns for the rest of the bridal party are!! Everyone from the baby to mother of the bride to wow! those are the first maternity patterns I’ve ever seen in Knip! I wonder why they stopped printing them, especially since Burda and Patrones seem to publish maternity patterns with some regularity.

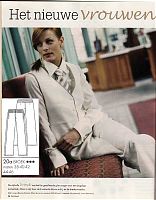
I really liked the khaki and white colour scheme of this feature, especially with this model’s colouring, but my favourite pattern of the lot was these nice pleated trousers:

The Motherload of KnipMode – Part One

About 8 months ago, I got an awesome email from FehrTrade reader Hilde asking if I’d like her mom’s stash of KnipMode magazines from 2005-2007 as she wasn’t really using them much any more and they both thought I’d give them a good home.

Would I??? Omg.

So therein started the logistical planning to transport a rather heavy stack of magazines from The Netherlands over to London… Around this time we thought we’d be driving navigation equipment over to northern Holland in preparation for a neighbour’s North Sea crossing, so we’d make a detour to Hilde’s, but logistics didn’t work out and we weren’t needed for the neighbour’s barge anyway. And then, in a fantastic twist, a few weeks ago Hilde told me her sister lives in London and brought the stash over in her suitcase for me! So I only had to make a 10 minute walk from my office to her sister’s flat (seriously, what luck that she lives so close!) to pick up the magazines and thank her profusely for lugging them in her suitcase.

And for the past fortnight or so I’ve been absolutely pouring over them, picking out my Must Sews, investigating tiny design details, and noticing what changes Knip have made in the past 5 years.

There were too many for me to scan in one session, so here’s my picks from the early half of the stash, with Part Two to follow next week!

KnipMode 11-2005

OMG Lingerie!! I have already got the most perfect fabrics in my stash to make the camisole with the bra cups – the olive green stretch lace I bought in Paris coordinates perfectly with a teeshirt I got free with a magazine but was comically tiny (what percentage of the UK female population has a bust smaller than 27 inches? Seriously.). I think there might be enough to do the cami with a bit of the teeshirt’s sleeves left for a thong gusset. And you know how much I liked the KnipMode lingerie pattern I already had