When bias met straight grain…

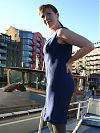
I’m mostly finished with BWOF 09/2008 #114 (which, you’ll remember, is the spitting image of a Versace dress) which I’m making in navy blue silk with a square neckline. The silk is really lovely and drapes beautifully, and I love how it feels, too. I’m super pleased with how the whole dress is turning out, actually, but this morning I noticed the two front seam lines are doing a funny thing towards the hem:

My bias silk 40th birthday gown

Happy 40th birthday to me! Since it’s a big birthday year I kinda felt like I just had to celebrate big, too! So we rented the whole of a private members cocktail bar near Kings Cross, invited a bunch of people, laid on pizzas, and let the rest just happen! Every year I like to make myself something special to celebrate my birthday, and I felt like I should sew a big, glamorous dress for myself to feel like a total star at the party, too.

I happened to have four meters of gorgeous copper-coloured silk satin (charmeuse) in my stash which I’d bought from Truro Fabrics back in 2015 with the intention of sewing a gown for the World Transplant Games gala dinner in Argentina. But I didn’t quite have enough time to sew it before we left, and the silk has been in my stash ever since. I still had the receipt in with the fabric, too, and the price reflects the incredible quality of this silk – I’d paid about £75 for it.

Golden silk asymmetric blouse

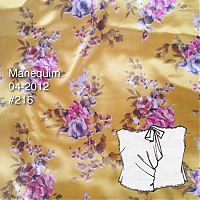
From a total loser of a silk blouse to a triumph of a silk blouse, all in one afternoon! After the Burda FAIL, I turned around, cut into my gorgeous butter yellow floral silk charmeuse I bought at Ditto in Brighton last weekend, and sewed up this blouse in about two hours flat!

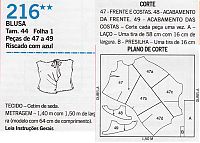
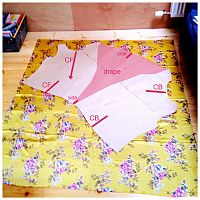
The layout of this blouse is really cool, and the entire blouse is just one piece, with only one side seam (and two shoulder seams). I took a photo of my fabric when it was laid out on the floor, and I added some annotations in pink (below) to help show where the drapey side comes into play. I hadn’t realised it from the diagram, but the CF neckline is on the straight grain, and the CB neckline is on the cross-grain, with the only side seam on the bias. Very cool, and the design feels quite Bunka.

I used the leftover silk in the bottom left corner to make several bias strips about 4cm wide, as I prefer a narrow bias edge on my silk blouses instead of finicky facings. I also left off the shoulder bow, as I felt there’s enough going on in this blouse already!

We were very lucky to catch the “golden hour” on Monday evening, which just makes this silk come alive in these photos! I’ve paired it here with my grey leather skirt to try and give an edgier look to the twee floral of the silk.

Sewing the Cos “Made By You” Men’s Shirt

As I mentioned in my earlier post showing off this shirt as well as the women’s shirt, this post is to outline how to construct the Cos “Made By You” men’s shirt so that others in the future can construct it in spite of the very sparse video instructions provided with the pattern. A lot of this information may be a repeat of the women’s shirt post since the kits are very similar in structure, right down to the fabric and packaging provided.

Sewing the Cos “Made By You” Women’s Shirt

Earlier this week I showed you my finished version of the Cos “Made By You” women’s shirt kit with the promise of giving far, far more details on the kit itself and some construction instructions so strap on in! This is a HEFTY brain dump intended to help others who’ve bought this thinking they were getting a full sewing pattern, or who bought it and no longer have Cos’s video online to help. Or frankly, if you’re just intrigued about what a high street shop thinks a home sewing product should be!

A steel grey Zadie jumpsuit

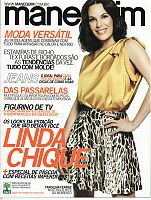
I’ll admit it – I thought jumpsuits were going to be a passing fad when I started seeing them popping up a few years ago (Brazilian pattern magazine Manequim was definitely at the forefront of this!). But it’s been several years and they don’t show any sign of stopping, and I even made myself one a few years back. I didn’t wear it much, though – not for being a jumpsuit, but for having an overly long crotch that irritated my thighs – and it’s since gone into the great charity shop bag in the sky.

I share all this only to illustrate that I’ve got a checkered personal history when it comes to sewing jumpsuits. But when the Paper Theory Zadie Jumpsuit pattern was released, I knew I wasn’t done with jumpsuits just yet. It had all the right details – a flattering wrap-style bodice that made it easy to get in and out of, big pockets, and a casual-yet-dressy vibe that I just couldn’t shake. And that my girl Sanchia was the model for it was just the cherry on top!!

So I bought it, followed quickly by some fabric earmarked for it – this heathered rayon/viscose twill from Mood Fabrics, which I brought back in my suitcase from the States last month. In total this fabric cost me $50 (about £40), which seems reasonable considering the final garment and the wears it’s gotten already.

A very beginning sewing lesson

On Sunday I taught a very beginning sewing lesson to three friends who all wanted to learn how to sew and have been begging me to teach them for months! I decided we would learn to use the machines and make a simple bag, and that would probably be more than enough for a first lesson. So I set up my little red machine, my everyday vintage machine, and made space for Veda to bring her new (purple!!) John Lewis mini machine up in the saloon…

The Sewing Machine Driver’s Test

After showing everyone the various parts of the machines, I put an old or blunt needle in each and I had them “sew” on the lines while the machine was unthreaded. The object is to get every single hole touching the line on the page, and when we did this in my home ec class in middle school, the teacher circled any errant holes (if we had more than three, we’d have to repeat that sheet). You start with straight lines, then corners, then a spiral, and finally wavy lines. My girls did great, but opted to redo the last two sheets to get some practice in!

Download my Sewing Machine Driver’s Test here! (Pdf, 200kb)

They all said that this really helped them to get comfortable with the machine and said the curves of the bag were way easier because of it!

The bag

Then we moved on to BurdaStyle’s (free!) Charlie bag pattern, and I showed them how to trim and tape the pattern pages together, then how to lay out the pieces and obey grainlines and learn how to find the selvedge.

I really didn’t like that BurdaStyle’s instructions have you trim off the seam allowances on the bag handles and then overlock them (wtf? What beginner sewer has access to an overlocker??) so I had my girls make a facing for the top of the bag. It got them to practice sewing curves, the importance of clipping the seam allowances, and flipping inside out! And I personally think it’s less fiddly than bias binding when you’re just learning.

Here’s the one I made earlier, to refresh your memory…

Blue silk cocktail dress

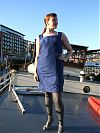
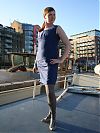
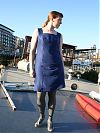
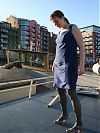
This dress has been in the works for quite a while now, but yet again I find myself with a new cocktail dress just in time for all the Christmas parties! I first noticed BWOF 09/08 #114 when the issue’s preview came up on the website because the seaming was exactly like a Versace dress worn by Kate Moss in the Fall 2007 Versace ad campaign. Besides being a great designer knockoff pattern, I simply just loved the seaming details, though I’m not terribly keen on Burda’s styling of it as a jumper (in the American sense of the word).

Coming up…

Now all my Christmas presents are done, I’m home free to sew more for myself! So coming up in the next few weeks you should find the following…

Completed

  • James’s birthday sweatshirt is finished and seeing as how his birthday is TODAY, he got to unwrap it this morning! Now it’s just waiting for its grand photoshoot…
  • The navy silk dress that gave me all the bias problems is now fixed and finished and awaiting a very chilly photoshoot…

Black yoga tee

I had about a half meter of tubular black cotton interlock leftover in my stash, and
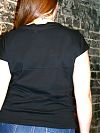
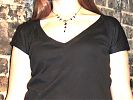
Burda WOF 11/2008 #125 looked to be an excellent use for it! It’s in the workout section of this issue, and #124 is a variation of the same shirt with longer sleeves and a triangular neck insert. I was aiming to make the long sleeves minus the insert, but as it turned out, I was really only able to squeeze in the short sleeves with some creative refolding of the fabric after cutting out half the pieces.